Dividing sections of content using DIVs
A free video tutorial from Kathleen Farley
aka Robobunnyattack! + co-founder of Audiohackr
9 courses
20,017 students
Lecture description
How do you separate different sections of your webpage using HTML and CSS? In this lesson, you'll learn:
- How to divide your webpage layout into different "sections"
- How to format your HTML code with tabs for better legibility
- How to add temporary borders to DIVs to help you understand how your DIVs are positioned on your webpage
By the end of this lesson you'll know how to code:
- The DIV tag (in HTML, to identify sections of content)
- The ID attribute (in HTML, to label content on a webpage)
- The DIV selector (in CSS, to specify styles that apply to DIVs)
- The BORDER-WIDTH, BORDER-STYLE, and BORDER-COLOR attributes (in CSS, to specify how a border looks)
Learn more from the full course
Step-by-step HTML and CSS for Absolute Beginners
Learn how to code HTML5 + CSS3 to create your own website in this beginner-level course. No coding experience required!
03:58:04 of on-demand video • Updated July 2016
In this course, we'll create a simple "Coming Soon" webpage using valid HTML5 and CSS3 code
We'll focus on WHY the code we write looks the way it does –– so you can develop an intuitive understanding of how HTML and CSS work
By the end of this course, you'll be able to use HTML and CSS with confidence, following best practices every step of the way!
English [Auto]
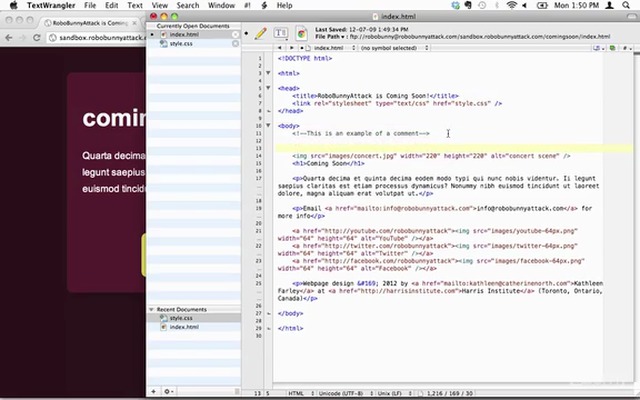
How do I separate different sections of my web page. And why would I want to do that. Well there's a good reason for this. Now we're getting into the good stuff and CSSA We're restarting attack a layout. You know we did a good job here handling the fonts and the colors and stuff like that but we had to move things around. OK here you can see things are laid out very differently than they are right here. So we need to actually start by identifying different sections. OK. On my web page and then we're going to give them you know identifiers of some sort. And then we're going to start applying different styles to those different sections of my site. So let's have a look at our our site are coming soon site here and let's have a let's try to figure out what the main sections are that we want to identify on our page. I see three main sections here and let me show you what I think those are. There's this red box here. OK there's a bunch of content that goes in this main red box right here. And then there's this yellow box here which I kind of consider to be sort of a priority area. OK because we're trying to draw attention to this right here. There's the sort of little inner priority box in the inner Priority boxes inside this main box here and then down here we've got this footer area down here. So right now I know that there's at least three sections that we need to and or code. So let's go do that over to tetch Wrangler and let's have a look at our code here. I want to introduce a new tag to you. Called the DIV tag and the tag. I'm just going to add it in here just looks like this. I want to start by showing it to you. The full opening and closing tag we're not going to leave it here but the DIV tag on it's own doesn't actually do anything and each time it's just sort of a placeholder or an identifier we're going to add some attributes to kind of give it more information and distinguish it. But what you want to do is you want to put the opening and closing div tags around any content that you want to identify as being in a particular section. So we find out what was the first one we identify We identified that this section right here. Everything from including the photo and the coming soon had her and this text here and this link here. Everything inside there is considered. We're going to call this like this is our main section. So let's go ahead and copy this down over. Where am I going to do this. I get it put it right here. OK. Why did I do that why did I put it right there. Well because I want everything between these two these two divs the opening closing device. I want everything inside there to be one div.. OK I want that to be one one section. And now to keep things straight in my head because we're going to start using lots of divs. I want to give it some sort of an identifier. I want to label it somehow. And the way that we do this is we use what's called IDs. OK the id attribute. And so I'm going to and the neat thing about this is that the value that goes into the id attribute can be anything I want. I'm the one who's going to decide what that is and then I'm going to use that and identify I'm going to we're going to put that in my CSSA code and I'm going to style it a certain way and you'll see what I mean. All. Don't worry I'll actually show you how it's done. So I mean what are you going to call this. Going to call it main. Because I've been calling it you know this is the main section so let's just go ahead div equals main and that's closing this this is closed. Right here is closing that div right there that the main div and just so that it makes it a little easier for me to write read my code. I'm actually just going to turn soft wrap text off for a second and look what I'm going to do I'm going to have the stuff over you have to do this but when you start using lots of divs in your code it starts to get confusing and you get a little. It's easy to lose track of where your divs are located. So does that make sense. I put you know the image the coming soon that paragraph text and my email link everything all of that goes inside my div main this this div ID me. So and now what else do we have to do. Let's do the next one. We don't you know we can tackle this in any order we want. Let's let's do this one right here. This this this footer area right here we've got all these icons and all this text and here to be in our footer div. So to do that I'm just going to go ahead and add a div here and I'm going to close that div and I'm going to give it a different idea. I'm going to give it. What's an idea that makes sense for this. Yeah footer footer makes sense for it to remember what that means. And once again I'm just going to Tab this over just to make it nice and neat and just just as a visual reminder that everything between these two tags should be located within the footer my div ID footer. OK. But was the third. The third one. The third section that we want to identify was this main priority section right here this button or this prize this yellow priority area and the only thing that's inside there is just the e-mail thing. This is where we're going to do a nested div we're going to put a div right inside here. OK. I'm going to put opening div there and let's just yeah. Sorry about that. Oh my goodness. Breaking the screencast OK there. And I'm just going to tap that over and I'm going to call this I could call it button. But I prefer to use more semantic names on what to call it something like priority because you know I might decide to change the change to look at that at some of the points I want to call that priority. But if you want it to. So this div is located inside the set the divot perfectly fine you can have divs inside divs as long as you close them in the right order so see him closing this. This one closes that div and then that closes the active right there. So I did a Save that ok and I'm editing the files on the server. Which is why I'm getting this little upload complete things here and let's have a look at it that looks like this is where my my site in progress is located I'm going to hit reload. It doesn't look any different does it. No because we haven't actually applied any styles to this or anything. Let's go and let's actually start to apply some styles to this. Let's go to styled out CSSA and the first thing I'm going to do is now we can use the div the selector and the first thing I'm going to do is I'm going to do a neat little trick to sort of just keep things straight in our heads. I'm going to add a border to all the divs. Now there's not actually a border I mean looks like a border it's actually just there's no border around the footer and there's no borders around here. It's just that. This makes it easy for me to to see like I can see the difference because of the difference in color. But we haven't applied different colors yet so we're designing pages using dids. I'd like to add a border to everything that I'm going to just have on while I'm doing the design. And then when I go live I'll take it off OK and let me show you how that's done. I'm going to add the border width attribute. I'm just going to make that one picks one pixel and then I'm going to do border style. I have to specify what kind of a border I want. I'm just going to do dasht because that'll really stand out. And border color. I'm going to use white in this case only because I know it's going to stand out really well against these dark colors. So I went to hit save. And now let's see what happens we're going to hit reload. Look at that. OK. See what happened there. What's happening is that we've just applied a border around all these all these divs that we just added to each channel code. Let's go take a look at that. See right over here. Each of these have had a border applied to them and it's a little hard to tell because here it looks like this is this. It's a little hard to tell that this Stiv right here. See this is actually located inside this bigger one right here but trust me it is. OK. And there's some ways once we start manipulating this is going to become more obvious. OK. So we've done that. Let's leave it at that for now. OK we can start doing more stuff. I'll show you how we can actually identify the various ideas in the next screen cast. So thanks for watching and I'll see you next time.