Your cart is empty.
Keep shopping
Teach on Udemy
Turn what you know into an opportunity and reach millions around the world.
Learn MorePardot Online Training Course + Certification Exam Prep
Rating: 4.0 out of 54.0(68 ratings)
373 students
Pardot Online Training Course + Certification Exam Prep
Learn Pardot and prepare for Pardot Specialist and Consultant exam
Created byAleksandra Kristine Skorobogatova
Last updated 11/2023
English
What you'll learn
- This course is perfect to lay down the strong foundation in Marketing Cloud Account Engagement
- Some real world MCAE best practices and examples for your projects
- Know how to use MCAE Reports and measure true ROI on all your Campaigns
- Gain knowledge and do test to get certified and build a successful career as a MCAE Admin
- Have access to 195+ quizzes that will help you pass MCAE (ex-Pardot) Specialist and Consultant certifications
Coding Exercises
This course includes our updated coding exercises so you can practice your skills as you learn.
See a demo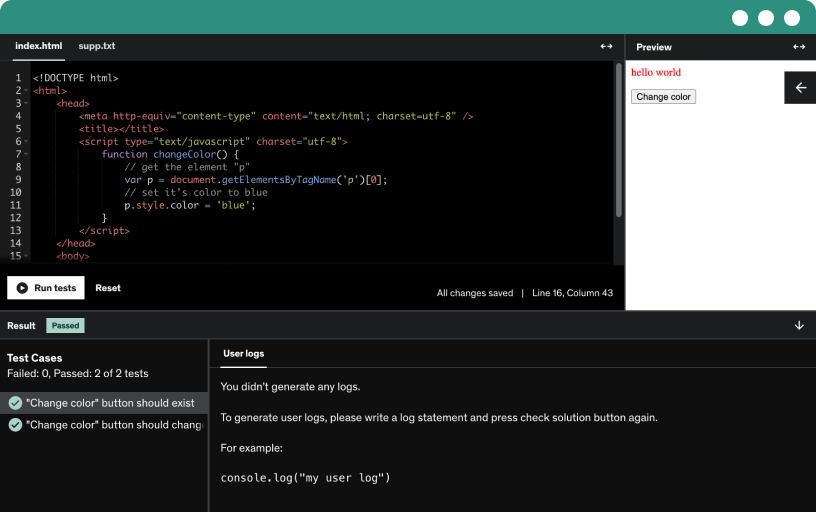
Course content
6 sections • 44 lectures • 6h 18m total length
- What is MCAE?1:34
Pardot has three distinct experiences:
Pardot Classic
Pardot Classic App in Salesforce
Pardot Lightning App
Pardot Classic
All customers have access to Pardot Classic outside of Salesforce via pi.pardot.com by granting them Identity user licenses. Salesforce grants 100 identity user licenses to support SSO authentication which was mandated for all Pardot Users in Salesforce Spring ‘21 release, Feb 2021.
Pardot Users who have Sales, Service, or CRM licenses have the option of logging into all three. However only those with supported Salesforce User licenses (sales, service, and CRM) have the ability to login to Pardot and Salesforce.
Pardot Classic App
Pardot Classic App can be accessed via Salesforce. This is a legacy version of the application UI as it’s simply embedding Pardot pages into Salesforce as an iframe. This causes users frustration when attempting to navigate some of the embedded pages like Engagement Studio programs.
Additionally, Salesforce is no longer actively developing features for this UI. Customers may be able to access newly released features that are compatible with this UI, however, all development efforts are focused on the user experience for Pardot Lightning.
Pardot Lightning App is the recommended experience for users as Salesforce is actively developing features for this user experience. This app allows users to customize their experience by:
Selecting the items they’d like to display in the user navigation. This is great for customers using the new lightning email builder experience because they can add tabs for the Email Template and Content objects directly to the app.
Customizing lightning page layouts to include embedded lightning components to help focus Pardot users around what’s most important to them.
Access platform capabilities for list views including taking action on Prospect records and filtering with Quick Filters
- Brief history of MCAE (ex-Pardot)1:23
- Why businesses choose MCAE?1:04
- Dashboard8:32
Pardot Dashboard
The first screen that you will always see when you login inside your Salesforce and open Pardot app will be your dashboard.
Notifications
Every time Pardot will have an important feature announcement or an upcoming update you will see that displayed at the top above your dashboard when you login.
Typically you'll be able to click on the notification for more details or click “dismiss” to permanently hide them from your dashboard. Dismissing a notification will only hide it from you. Other users on your account will still be able to see it.
Additionally, each user depending on their Role might see fewer announcements. What each user sees is setup on their User Role.
You can review Default and Custom User Roles by going to:
Your Pardot Settings
Expanding User Management tab
Clicking on the Roles tab
And by selecting the Role you wish to review
Further, click on the Admin and Scroll down to Notification Banners to review the enabled notifications for this Role
Moving next. Let's discuss the reporting graphs.
“Prospects created”. This is a number of new prospects created through “form”, “form handler” or a “landing page conversions” or created via imports including via API. This includes both archived and unarchived prospects.
“Conversions”, a number of previously anonymous individuals who submitted a form or a landing page to identify themselves as prospects. Bear in mind that prospects created stat will generally be a higher number as it includes records pushed into Pardot from any source as opposed to those created through a form or a landing page. For example, those other sources can be if you create a record in Salesforce and then from Salesforce CRM this prospect is pushed into Pardot.
“Opportunities created”. This is a number of new opportunities created at the given date. Opportunity date is pulled from your CRM, created manually or created via API.
Furthermore, “all prospects” is the accumulative total of prospects in your database, excluding those in your recycle bin. Each data point represents the total size of your prospects in the database at a given point in time.
Here on the top, we can view all our prospects by different days and times, and we can also create a custom range to see in a dashboard the numbers that we're interested to review.
Marketing Calendar
Now let's talk about a marketing calendar. It will show you all your scheduled AND past emails, social posts, events, and webinars. A slimmed-down version of the calendar appears here for marketing and administrator users in your dashboard
If you want to see more, you can click on “view full calendar” and this will show you the fuller view that is adjustable to show a day, week or month. Here, on the top, you can select these (click on week, day). This allows you to page through dates you want to see.
Clicking View Full Calendar will show a fuller view that is adjustable to show a day, week, or month view and allows you to page through the dates you want to see. Hovering over an event will show you details about the item (event tickets sold, webinar attendance, email click-through rate, etc.) and allow you to click into either a report (for items in the past) or to a detailed screen (for items in the future).
The colors of each event represent a different activity so you can quickly glance at the calendar and have an overall sense of what's coming up.
Green: Emails
Purple: Webinars
Pale Pink: Eventbrite Event
Blue: Social Messages
You can also use a Pardot Calendar to plan your marketing campaigns and activities.
By clicking on the ”Create New Event” button you can create a custom Event. These for example can act as reminders for you or your team to pre-create posts or to post manually on your social media platforms.
Now let's try to create one Event together. Let's click on the ”Create New Event” blue button to start.
Type in a name using internally approved or in your marketing team agreed naming convention
You can tick “All day” to choose only dates and ignore specific times
Next {Start time} will be mandatory if you choose to keep the time
You can choose to add {End time} if you wish, and also “Clear” it if you make any mistake or change your mind
Next, you can add a URL as a hint, source, or location that can act as a helpful description
You can choose an icon to better illustrate your Event for the team
And finally, you can choose a color for each type of Events you create
When ready, just press save
You can then go to the Event in your calendar and see if all is as expected
The calendar is visible to Marketing and Administrator users by default. If your account level includes Custom Roles, you can create additional user roles with calendar access. The minimum requirements to be able to view the calendar obviously depends on the user having the 'Calendar' permission ticked and at least one of the following permissions ticked also -
Both view emails and view email reports
View social posts
View webinars
View events
Because without one of these, the Marketing Calendar would be empty and therefore we would not display it for that user.
Active Prospects for Review
The dashboard will display up to five Active Prospects for Review -- prospects that are neither assigned nor marked as reviewed and have been active. Click More Prospects to see all Active Prospects for Review. Note this shows all prospects that have had at least one prospect activity and are not yet assigned or marked as reviewed, including those prospects that were imported.
Identified Companies
The dashboard also displays up to five of the most recent visitors whose companies could be identified. Click More visitors to see all Identified Companies.
- Settings7:18
Settings
In this lecture, we're gonna talk about Pardot settings.
By pressing on Pardot's Settings tab, you'll be taken to your main account page. Here, you'll be able to see all your account details. Like your company name, your Pardot edition, address, and also the features that are enabled for your account.
An important element on this page that you need to be aware of is your Pardot Account ID. When you submit a support case with the Pardot support team, you will need to share your Account ID so they can locate your account on their end and review it.
Here you will be able to see the edition that your company has.
Currently, Pardot has 4 different editions.
Growth
Plus
Advanced
Premium
On the right-hand side, you'll be able to see and specify who is actually responsible for specific updates in your business and who needs to be first notified whenever any happens.
Settings are also the place where you can:
Edit your Company Information
Edit people who should be notified
Change Default Locale
Change Default Language
Currency Formatting
Choose to Honor Do Not Track (DNT) Header
Two-factor Authentication Require for users who log in with Pardot credentials.
IP Location Activation
Email Plug-in Campaign, this is the Campaign that will be assigned to a Prospect when by default when it is first created in Salesforce and synced through connector to Pardot
Google Ads Campaign
First-Party Tracking. To protect consumers’ privacy, web browsers are moving away from supporting third-party cookies. The marketing industry uses third-party cookies to track prospect engagement across marketing assets and domains. Pardot has first-party cookie tracking to record prospect activity, give you more flexibility with campaign attribution, and block traffic that doesn’t come from your domains.
Max Tracking Cookie Duration (days). It can be setup for up to 10 years. This is for how long Prospect can be tracked if they are in Pardot. Historically Prospects were also tracked while they were in the recycle bin, but since the change in GDPR regulations Prospects that are situated in the recycling bin will not be tracked.
Email sending IP Type. To protect email deliverability, the right type of IP for your business depends on how much email you send through Pardot. If you send more than 100,000 emails per month, we recommend a dedicated IP. If you send less than 100,000 emails per month or your sending volume fluctuates, we recommend a shared IP.
Resubscribe. Here you can also setup resubscribe for your Pardot account. After setting this up, your unsubscribed Prospects will be able to see that they are unsubscribed when they will be completing your Pardot Form. This is a must to set up to ensure Prospects san opt-back in before completing a Contact Us form or wanting to download your gated white-paper.
Operational Emails. Lastly, you can also enable Operation emails for your organization. By default, Pardot does not send emails to prospects who have opted out. However, the operational email feature lets admins send non-marketing communications to prospects, even if they have unsubscribed from your marketing emails. The operational email feature only applies to list emails, not Engagement Studio or other automated emails.
Operational emails would be:
Critical system changes that require users to do something
Shipping information and invoices
Terms of service changes
Order confirmations
System status notices
Legally required notifications
Grant Account Access to Pardot Employees
I would also like to draw your attention to the “Grant Account Access to Pardot Employees” button on the right top corner. By clicking on this, you'll be able to give Pardot employees or Pardot support access to your account to make sure they can actually look into your account if at any point you have any issues with your account. Usually typically should give them access for one week to make sure they have enough time to review your issue and respond.
When the case is Resolved, you can simply go back to this setting and “Revoke” the access.
Usage and limits
In this “usage and limits” tab you will be able to see all the features that are available to your account, and as well if your account is approaching any of the limits. This is an important page to check, for example, every 3 months, depending on your edition and available features, to make sure that you are not reaching any of the limits. If we scroll down below, you will be able to see the unavailable features if you are on the Growth or Plus edition. I am on the Advanced, so I do not have this section at all.
My profile
The third tab - “My profile”. Here can see your personal user information. You can also update it by clicking on the “edit” button.
Here you will be able to add your Signature that can be further used in One-to-One emails with prospects. Please note, with Admin profile you will see all available settings. Users will other roles can not modify their Security permissions or change their Role, for example.
- Filters5:32
Filters
Filtering Visitors
Use filters to exclude some types of visits, clicks, or other actions from your campaign results and email notifications. A common use is to exclude your company’s IP address to avoid skewing your reporting.
When you add a filter, everything associated with the following objects and activities is filtered.
Visitors
Visits
Visitor activities
Visitor page views
Email clicks
Email opens and clicks on the unsubscribe link in the body of emails are never filtered.
Create a Visitor Filter
Admins can create a visitor filter based on an IP address or hostname.
Open the Filters page.
In Pardot, select Admin | Automation Settings | Visitor Filters.
In the Lightning app, select Pardot Settings, and then Automation Settings | Visitor Filters.
Click +Add Filter.
Name the filter.
Choose a filter type.
Enter a value for the filter. You can use wildcards to exclude a range of IP addresses or subdomains.
For example:
Entering 198.168* filters out visits from IP addresses that begin with 192.168
Entering * (dot) pardot (dot) com filters out visits from hostnames that end with (dot) pardot (dot) com
Click Create Filter to save.
Remove a Visitor Filter
Admins can delete visitor filters. Pardot filters activity by cookie, so if you delete a filter, filtered prospects continue to be filtered until their cookies are cleared.
Open the Filters page.
In Pardot, select Admin | Automation Settings | Visitor Filters.
In the Lightning app, select Pardot Settings, and then Automation Settings | Visitor Filters.
Click the name of the filter that you want to remove.
Click Delete.
View Filtered Activities
Admins can view filtered activities in Pardot.
From a Pardot Lightning report, click Tools above a prospect activity table and select Show Filtered Activities.
In Pardot Classic, hover over the gear icon on any page, and select Show Filtered Activity.
Considerations for Visitor Filters
Keep these considerations in mind when using filters.
A filter goes into effect when it’s created. However, the filter works only on new visitors. Pardot doesn’t filter prospects that are associated with an IP address or hostname before the filter was created.
If you create a filter for internal employees, they must clear all Pardot cookies for the filter to take effect.
Filtering by hostname filters only the domain of the visitor hostname, not the prospect’s email domain.
When a filter is created, autoresponders, notifications, email completion actions, and other actions, including scoring actions, associated with filtered activities don’t fire.
By default, your Pardot account contains system-generated filters. These filters are marked with the prefix [PD-SYS] and remove activities associated with email security scanners. If you don’t want to filter scanner activities from reports and triggers, you can remove the filters.
Filters don’t work on unsubscribe link clicks in emails. If a bot or email security scanner clicks the unsubscribe link, it unsubscribes that prospect.
Summary
In the article about Email Stat protection published on 7th December 2020 Pardot shared that they have now built a Metrics Guard for Emails to watch for activity that is not part of your hard-earned metrics. This brand-new service monitors email clicks and opens to identify patterns that are clearly bot-based, and it keeps those activities out of Pardot entirely. In its first week, Metrics Guard for Email kept 2 million scanner clicks from inflating our marketers’ metrics and triggering actions that shouldn’t have happened.
The best part of this service is that it’s totally hands-off for you — no activation is required!
- Score & Scoring Categories6:19
Prospects Score & Scoring Categories
What is Prospects Score?
Prospects Score is a sum of points Prospect gets after he/she has been cookied and interacts with your assets that further result in a single number that is Prospects Score.
You can view your Prospect Score by going to the Pardot Lightning app and click on the Prospects tab.
Here you will see a Score column for all Prospects. And by applying different filters on the top you will be able to see the Score for all filtered Prospects.
Alternatively, you can view Prospects Score by clicking on each individual Prospect record and also on the record page layout in Salesforce if you add your Score field there.
What are Scoring Categories?
Think of Scoring Categories as your customer interests.
A category score is incremented when a prospect performs the following actions on an asset with an assigned scoring category:
submits a form or form handler,
downloads a file,
clicks a custom redirect,
clicks an email,
or opens an email.
Businesses create Scoring Categories for their Products or Service Lines. By doing so they are able to see for each Prospect individually what they are interested in the most based on their Score for each Category.
Therefore, it becomes extremely straightforward to put Prospects in the appropriate Nurture Journeys based on their readiness.
How do Scoring Categories work?
Each Scoring Category must have its own Folder. By placing all related assets in a Folder and applying Scoring Category to it, you will make sure Prospect will be Scored accordingly after interacting with the Asset from a specific Folder.
You can assign the same scoring category to multiple folders, but each folder can have only one scoring category.
An interaction with an asset counts toward the scoring category assigned to the asset’s folder. For example, a form submission on a landing page is attributed to the scoring category assigned to the landing page’s folder.
Category scores are recalculated when you move assets among folders with, without, or with different scoring categories.
Any interactions with assets not stored in the Scoring Category folder will count only towards the Overall Score, but not the specific Scoring Category.
Deleting Assets and Categories
When you delete an asset with an assigned scoring category, the previously added points from that asset are removed from prospects’ scores.
You can’t delete a scoring category that’s actively assigned. Remove the folder assignments, and then delete the scoring category.
After you delete a scoring category, it’s moved to the recycle bin.
To reuse a scoring category name, undelete it—duplicate names aren’t allowed.
Scoring Category Summary
Scoring category updates sync with Salesforce approximately every 15 minutes.
Plus, the Advanced and Enterprise editions account supports up to 50 scoring categories.
You can’t manually edit category scores on prospect records.
Scoring categories aren’t supported with Person accounts.
Category scores are included with full prospect .csv exports.
- Domain Management9:51
Domain Management
In this lecture, we will learn about how to set up your sending domain with Pardot.
What are Tracker Domains?
Tracker domains are known as CNAME (Canonical Name) and, they enable you to mask your Pardot hosted content like landing pages, forms, or files with a branded URL.
So for example, if you don’t setup your own Tracker domain, and create an asset like a custom redirect that you would like to include in your Facebook social post to track, it would begin with go.pardot (dot) com.
Who Are Multiple Tracker Domains For?
In the 2019 August release Pardot made it possible for 1 Pardot org to have more than one Tracker Domain. This is after many customers requested it because their: v
Companies operate and market in different regions
Companies have a separate domain for each of their product lines
Enterprises are comprised of many companies or multiple subsidiaries
Companies need to have multiple tracker domains in each Business Unit
Companies operate more than 1 website
Why does Tracker Domain matter?
Branding is one of the most important aspects of any business – large or small, B2C or B2B.
By setting up your Tracker domains in Pardot you will be able to stay on brand and create a seamless browsing experience for your visitors. They won't even notice and realize that after clicking on the button or a tab on your website they have now been redirected to a Pardot landing page with gated content or a registration page to your upcoming webinar. Because your Pardot Tracker Domain will be almost exactly the same.
And when I say almost, one thing you need to know is that the Tracker domain can not be precisely the same as your corporate domain name. Therefore, I recommend you choose a simple alias that gives your visitors the best possible user experience. For example, if your domain name is paretopi (dot) com, then your domain name can be www2., go., info., events, and so on.
Can I have multiple Tracker domains?
Yes, based on your Pardot edition you can have up to 20 tracker domains.
Growth: 3
Plus: 10
Advanced: 20
Premium: 20
*info displayed is based on the offering available on February 2021
This means if you or your client is a large company that:
Operates in different countries:
www.paretopi (dot) com
www.paretopi (dot) co.uk
www.paretopi (dot) lv
Or manages multiple brands
www.zara (dot) com
www.zarahome (dot) com
and wants to have all of them in one Business Unit, you can create multiple domains that users can select when creating assets like files, forms, and landing pages.
- Connectors15:00
Connectors
In this lecture, we are going to learn more about Pardot connectors.
By setting up Pardot connectors, you can draw information about your prospects gathered using activity on these third-party tools into the profile for that Prospect in Pardot. Information like Google Ads clicks, ticket registration details, webinar attendance, and so on.
Why should you use Pardot connectors?
To save time, because after integrating Pardot with third-party tools, you won't have to spend time switching between all the apps to view data or import it manually.
To make sure your prospect profiles are complete and up to date in ONE SINGLE place.
Where can you set up your Pardot connectors?
You can connect your Pardot with other 3-rd party tools by going to:
Your Pardot App
Clicking on Pardot Settings
And selecting the Connectors option from the menu on the left
Here you will be able to see all the connectors that your company has already set up and enabled if you see this green mark over here.
Salesforce Connector
The Salesforce-Pardot connector syncs prospect, account, opportunity, and all the custom object data between Pardot and Salesforce.
Things to know:
You can have only one Salesforce connector in Pardot. Meaning it is one-to-one relationships and you can't sync your Pardot data to multiple Salesforce orgs and vice versa.
Pardot can integrate with Salesforce Person Account record types.
Importing prospects into Pardot causes them to sync with Salesforce. Unassigned prospects sync to Salesforce, but records aren’t created when there is no matching email address.X So basically, if the record with the same email address is not found in Salesforce Leads, Contacts, and Person Accounts, this Prospect will remain in Pardot until you assign it to a User or Queue.
Pardot checks for changes in Salesforce and Pardot up to every 2 minutes.
As Pardot admin, can “pause sync” between Pardot and Salesforce to make configurations or data changes that could impact the data syncing.
Pausing the connector temporarily is stopping the flow of data between Pardot and Salesforce under which you resume the syncing. It doesn't make any permanent changes and does not archive your Pardot business units.
Sync Queue
Whenever you're going to do any major big updates to Pardot prospects, you'll see here the total number of all prospects that are waiting to be updated with the latest data based on your Sync reason.
For example, you had a field in Salesforce and at the later stage, you decided to create that new field in Pardot. You triggered the Sync all Prospects to make sure all values from records in Salesforce are brought to Pardot.
Sync Errors
Whenever sync errors occur to Your Prospects you will see a number of errors here. By clicking on the number you'll be able to see all Prospects that do not sync back to Salesforce due to the error and all exact errors with descriptions.
The most typical errors you will see are usually due to discrepancies in picklist field values in Salesforce and Pardot.
It could be because your Salesforce admin added new values to picklists in Salesforce and Salespeople started to use them. And Pardot admin did not sync these new values to Pardot. Hence Prospect from Salesforce can not sync to Pardot, because new values do not exist.
Another scenario could be when your Salesforce admin makes fields required in Salesforce on the field or page layout level, and you do not collect these fields for Prospects in your website forms. Due to this even though Prospect is assigned to a user or queue, it won't sync to Salesforce as it is missing the required value.
To sum up, I would highly recommend for Salesforce and Pardot admins to work hand in hand together and sync up on all changes any of you are making in the system to avoid any errors.
Other Pardot Connectors
Now let's click on the “+Add Connector” button and review all available connectors.
The first ones you will see will be:
Webinar Services
You can connect Pardot to your webinar service to register prospects for events using Pardot forms. Then Score prospects based on event attendance, report on registrations and engagement, and create prospects from registrations. X Pardot integrates with WebEx, GoToWebinar, and ReadyTalk. GoToWebinar connector allows you to track recorded webinars.
Google Ads Connector
Pardot connects with your Google Ads account to track prospects that reach you through paid search. X You can tie cost data from Google Ads to opportunity data from Salesforce to determine your true cost per qualified lead and search engine marketing ROI.
Google Analytics Connector
The Google Analytics connector pulls UTM parameters into Pardot, where they can then sync with Salesforce. Pardot collects data from five Google Analytics tags: campaign name, medium, source, content, and term. This connector simplifies the flow of Google Analytics data between Pardot and Salesforce.
Twilio Connector
If you use Twilio, create a connector to instantly follow up with prospects via phone. The selected user gets a call when a prospect submits a connected form so that the user can connect with the prospect by phone. Twilio activities appear on prospect records, where you can view details about calls.
Bitly Connector
Pardot generates Bitly short links for:
landing pages,
multivariate tests, and
files.
Use your own Bitly account with the connector to track link performance from Bitly. If you use a custom domain Bitly account, Pardot uses it to shorten URLs.
Olark
Use the Olark connector to create prospects from your chats and view chat activities on prospect records.
UserVoice Connector
Pardot syncs bidirectionally with UserVoice, a suggestion tracking and support ticketing system. You can pull in suggestions and support tickets as prospect activities, update prospects, and view UserVoice data in Pardot.
AddThis Connector
allows you to add your company’s social media links to your email and landing pages.
Eventbrite
Pardot syncs with Eventbrite to provide reporting and scoring on event registrations and attendance and track prospect events activity.
Wistia
is a video hosting service that measures engagement with your content. Use the Wistia connector to record prospects’ video activity and create prospects from video conversions.
Social media connectors
Use Pardot’s social media connectors to enrich prospect data and post to Twitter, Facebook, and LinkedIn. The key 3 limitations you need to be aware of are:
You can add only 1 image per post
Can not @mention other accounts from within Pardot (you can only do this when posting directly)
Can not upload the video (but you can add the video link)
WordPress.org Sites
Lastly, you can integrate Pardot with WordPress.org Sites. The Pardot WordPress plug-in lets you add Pardot forms and dynamic content to your WordPress pages and posts without using code.
If there’s a platform you use that doesn’t have a pre-made Pardot connector, it may be possible to build one using an expert developer and the Pardot API Documentation.
- Standard & Custom Objects12:24
Standard & Custom Objects
In this lecture, we will learn about Pardot standard and custom objects.
However, first, let's start with Salesforce. When you purchase Salesforce org it comes with a set of standard Salesforce objects. A good analogy would be you buying an iPhone. When you buy the phone it comes with a set of standard apps that are available for you. If you want to have an additional app, you have to go to the Apple Store and install them yourself on your device.
Similarly with Salesforce. After business purchases Salesforce CRM they will work with an implementation partner to further customize it. A part of it will be also developing custom objects and required business logic so they can fully support their business requirements.
Organizations create custom objects in Salesforce to store specific information related to their business or industry. If there is a need in the business to use custom object data for marketing purposes, you can then create custom objects in Pardot to enable your marketing team to use this information when creating dynamic lists, automation rules, and segmentation rules. There is also a workaround that will allow you to use custom object data in Email templates, but we will discuss that a bit later.
In the beginning, you might get confused by the fact that many Salesforce Standard objects will be Pardot Custom objects as they are not part of the 4 default Pardot objects (Leads, Contacts, Account, and Opportunities) that Pardot integrates with.
Therefore Pardot Custom objects are:
any Salesforce Standard object that does not natively connect (for example, Cases, Contracts, or Products) or
any Salesforce custom object (for example, Property, Job Posting, or Donation).
Some things you need to consider:
Custom objects are read-only in Pardot.
By default, Pardot accounts with Advanced and Premium editions can map up to 4 custom objects. For Pardot accounts with Plus edition, the feature is available at additional cost. You will need to contact your Account Executive directly to get a quote.
You can only create a custom object if at least one lookup field is linking the custom object to the lead, contact, or account objects.
Custom object data can be used as criteria when creating dynamic lists, automation rules, and segmentation rules.
By default, custom user roles don’t grant access to custom objects. Manually grant custom object permissions for each custom role.
Pardot Custom objects sync with Salesforce in the background every 10 minutes.
If you want to use a custom object field in an email, you can create a formula field on the lead or contact object that pulls data from the custom object’s desired field. Then map that field back to Pardot as a prospect custom field and insert that field into emails. Just note that changes to formula fields do not trigger sync between Pardot and Salesforce. If you decide to use this method, you must ensure Pardot data is up-to-date before sending an email.
What are some common errors you can get?
The most common error system admins can run into is due to unrefreshed metadata. This will prevent Pardot from accessing the custom object data.
The first thing you can try to fix it is to navigate to your Pardot Settings and click on the gear icon next to the Salesforce connector. This will re-verify your connector. If that doesn't work, you can test if the sync is working in general by manually syncing the data on the individual Prospect record. You can click the “Sync with CRM” button on the Prospect record. If data shows up, then it is just a matter of time now for it to appear. It can take up to 4 hours for all metadata to refresh.
Another issue may be if the custom object you're trying to connect with isn't related to a prospect record. In Pardot you have only Custom Objects that are directly tied to a Lead or a Contact record. But if that Lead or Contact does not have a lookup relationship to that custom object, Pardot won't give you the option to create that custom object in the system.
Lastly, an issue that has been seen very often is that permission has not been granted to the connector user in Pardot. So, as you may or may not know, Pardot has a connector user which provides the lens into what Pardot can see in Salesforce. If a Pardot connector user doesn't have the minimum “read” access with that custom object, it won't be able to see it and you won't be able to sync it with Pardot.
- Standard & Custom Fields13:10
Standard & Custom Fields
What are Pardot Standard fields?
Salesforce’s standard fields are prospect default fields that appear in the system by default when Pardot org is installed. In other words, when Pardot is purchased, all these prospect default fields will be already there - available.
What are Pardot Custom fields?
Whenever someone creates a custom field in Salesforce and wants to have the same custom field in Pardot, they will need to create this custom field in Pardot.
The easy way to determine custom fields in Salesforce and Pardot is actually by the field API names. All the custom fields have “__c” in the end.
Salesforce’s custom fields are Prospect's custom fields that need to be manually re-created in Pardot.
Who are “Prospects” and what are “Prospect” fields?
In Salesforce we have two separate objects:
Leads and
Contacts.
And from the business point of view, it completely makes sense to have these two separate.
I like to think about a Lead as a business card. Imagine you just spoke with someone, got their business card and all you know about them is high-level information, like their name, where they work, and what they do.
Leads represent
Potential sales opportunities or
New customers.
And Contact is someone you are
About to establish a business relationship (Opportunity is in progress) or
With whom you are already doing business (Opportunity Closed Won).
But, in Pardot Leads and Contacts are Stored under one object called “Prospects”. From the Marketing point of view, they all can go through the same or similar marketing journeys. For example, they all can receive the same Newsletter or new Product notifications.
But, of course, if you wish to exclude one or another from your nurturing, you can simply use the following CRM Status filter.
Do I need to create Standard Salesforce fields in Pardot?
For all the Prospects (meaning Leads and Contacts) and Account, Salesforce standard fields will be created for you.
But for the Opportunity object, you will need to create Salesforce Standard and Custom fields yourself.
- Prospect Import14:42
Prospect Import
In this lecture, we will learn about Prospect importing into Pardot.
When Salesforce provisions for you a new Pardot instance it has zero Prospects. Logically, right? After you setup your Salesforce connector and enable two-way sync, you give your Salesforce connector a green light to create a new Prospect in Pardot, that was just created in Salesforce. To reiterate, it will mean that only those Lead and Contact records that were created in Salesforce after the connector was enabled will be transferred to Pardot.
So this will mean, if you want to see in Pardot all your historical Prospects, you will need to import them first after you finish your Pardot Implementation and before you go live. So you have all your historical Prospects available for emailing.
This will be the first time when you will encounter the need to use this feature.
Considerations
Keep these considerations in mind when importing prospects.
The size of the import file can be up 100 MB.
Pardot imports the rows from top to bottom.
If your import file has a new email address or CRM ID, Pardot creates a prospect.
In accounts that don’t allow multiple prospects with the same email address, Pardot handles duplicate email addresses in a special way. When the import file has more than one prospect with the same email address, the field values in the last entry imported are used.
Import files are available for at least 60 days.
The first row in the import file is reserved for headings and is ignored during the import.
If your custom prospect field can record and display multiple responses, the data in the import file adds to the current value for that field. It doesn’t overwrite the value.
Be sure that your import file doesn’t include spaces before or after your values. Spaces cause a value not to update correctly in the prospect’s record.
Only valid email addresses are accepted. Email addresses containing HTML or invalid characters are skipped during imports.
I recommend that you don’t import values in all caps. When you use merge fields to customize Pardot assets, prospect data appears exactly as it is entered in our database.
In your import file, separate multi-select field values with semicolons.
Import dates need to be in the following format: YYYY-MM-DD
If your import includes a CRM user type prospect field, you must include the CRM ID for the Salesforce user.
To assign prospects during import, include a column with the Pardot user’s username, and map it to the Assign to User field.
You can reassign assigned prospects during an import. However, if assigned prospects have a different owner in the CRM, they are reassigned in Pardot during the next sync to maintain consistency. The CRM has priority in terms of the prospect owner.
You can’t assign prospects to a queue during import.
In accounts and business units that use Marketing Data Sharing, imported prospects that don’t match the sharing rules are automatically archived.
These are the 6 common errors why Prospect can fail on the import:
Archived Prospects. Archived prospects are not imported unless Undelete matching prospects found in the recycle bin during this import is selected in the import wizard.
Invalid Email. The email address is invalid.
Field Validation Failure. The imported field value doesn’t match the predefined field values.
Email not Allowed. The email address isn’t allowed. Pardot rejects spammy and role-based email addresses on import because they are likely to cause spam complaints and blacklisting. Role-based email addresses have generic prefixes that don’t identify a specific person. Here are some examples of role-based addresses.
admin@
default@
email@
feedback@
hostmaster@
info@
mail@
marketing@
news@
newsletter@
ops@
orders@
press@
pressrelease@
postmaster@
sales@
security@
support@
Invalid@
According to Policy: Policy Expired. The time on your computer is incorrect. We recommend that you update your computer time using a resource like www.time.gov.
You are not authorized to modify this prospect. The prospect is not assigned to the user performing the import, and the user doesn’t have the View Prospects Not Assigned to Self permission.
- Prospect Export4:15
Asset & Prospect Export
Asset Export
In Pardot we can export list with the following asset:
Automation Rules
Page Actions
Segmentation Lists
Pardot Email
Drafts
Scheduled
Sent
A/B Tests
Email Template Drafts
Published Email Template
Email Rendering Tests
Email Preference Pages
Forms
Form Handlers
Landing Pages
Multivariate Tests
Custom Redirects
Files
Tags
Keywords
Competitors
Paid Search Campaigns
Site Search and
Reports
This will be useful when there is a need in business to review all assets in one view.
Let’s say you want to review all your Email Templates with your marketing team in a meeting to identify which ones have not been updated in the past year.
To get this information, you will navigate to:
Pardot Emails
Templates
And click on the ‘Tools’ button
And select on “CSV Export”
Exports with fewer than 100 rows will be available instantly. Make sure you apply Filters and Tags to export only those Email Templates you want.
If the file contains more the 100 rows you will need to wait a bit for the file to become available to download. You will receive an email from Pardot once the file is ready for your download.
Prospect Export
Otherwise, the most important Export you will ever do in Pardot will be related to Prospects.
You can export prospects in .csv format to perform a bulk update, fix sync errors, or use prospect data for external reporting.
To do so you will need to navigate to:
Prospects tab
Apply all the filters you need
Press on Tools
And select on “CSV Export”
Who can export Assets and Prospects in Pardot?
You can control this on The Role and User level.
If you go to:
Pardot Settings
User Management
Roles
And click on the “Sales Manager” Role for example.
Then if you click on the Prospect tab, you can see that the Prospects, Prospect Accounts, and Opportunities sections have an “Export” option. Next, if you click on the Admin tab, you can see if they have the access to View all the Exports.
- Recycle Bin8:24
Recycle Bin
When you delete an asset, it’s moved to the recycle bin in your Pardot account instead of being permanently deleted. You can restore most assets from the recycle bin. You can’t empty the recycle bin.
Considerations when moving items to the recycle bin
Items in the recycle bin don’t count toward usage limits.
If you delete a campaign, the prospects associated with the campaign remain in the system tagged with the deleted campaign. Before deleting, Pardot warns you if elements associated with the campaign, such as lists, rules, and landing pages, are in use. You can then delete the assets or associate them with another campaign.
Tags, Folders and Content files (like images) are deleted permanently and will not appear in the recycle bin.
GDPR & deleted prospect tracking in the Recycle Bin
When Pardot made enhancements as part of GDPR, one of the things they changed was how prospects are tracked.
Previously, if a prospect was in the recycle bin but still had an active browser cookie, any visit to one of your tracked web pages would remove the prospect from the recycle bin. This fell under the ‘shows intent’ category, along with form fills and clicks on tracked email links.
Recently a change was made to this function.
Now, when a prospect is in the recycle bin, they are no longer tracked.
This means if you send someone to the recycle bin, Pardot stops tracking their activities across your site (the pages they view). Any visits to your tracked pages do not register, and do not pull the prospect record out of the recycle bin.
This allows you to fulfill any GDPR request to stop processing data.
Stop tracking data request → Move to the recycle bin → GDPR compliant
If a prospect contacts your company and asks that you stop processing their data, you can comply with that request (for your Pardot instance) by sending them to the recycle bin.
Cases when Prospect is undeleted
If your account does not allow multiple prospects with the same email address, and you manually add a prospect with the same email address as a deleted prospect.
If your account does not allow multiple prospects with the same email address, and a deleted prospect submits a form with the same email address.
If your account allows multiple prospects with the same email address and a visitor cookied as a deleted prospect submits a form, Pardot undeletes the prospect in the recycle bin.
Which Prospects should I always permanently delete?
You should always delete your own and your company employee test records.
All bot submissions.
Prospects that did not give your consent to have their data in your account
All Duplicate records should be merged in Salesforce and then the connector will automatically update the main one. The remaining duplicates can be deleted in Pardot.
All Prospects that Hard Bounced because their Email address does not exist. For your information, Hard Bounced and Unmailable prospects won't count against your storage limits, but I do not see a point in having a marketing Prospect that was tracked based on his marketing activities for the company he or she does not longer work for.
Considerations when Permanently Deleting Prospects
When a prospect is permanently deleted, the prospect is deleted from the recycle bin, and Pardot doesn’t retain any information about the prospect. There is no way to tell which prospects have been deleted, and data cannot be restored.
Associated leads and contacts must be deleted from Salesforce before deleting the prospect in Pardot.
When you permanently delete prospects, we remove the associated engagement data. Reports that use live data metrics can be impacted when we delete the engagement data. To get the most recent stats in any report, contact Salesforce Customer Support and ask for a recalculation.
If the prospect is associated with a Person account, all personally identifiable information is removed from the Pardot account record.
Are there any ways how I can prevent Users from deleting Assets?
Yes, when you are creating Custom User Roles you can disable “Delete” permissions for all Users with that assigned role. Please note that Custom Roles is an add-on feature for Growth and Plus accounts. And if you have any of these two editions you will need to review the pre-set Permissions for Default user Roles to make a judgment whether Prospect can or cannot delete certain Assets in Pardot.
Or you can work on creating so-called Soft/Visual asset deletion prevention tactics. This can be achieved by implementing internal Naming convention best practices. You can add words like:
Evergreen
Do Not Delete
etc
in your names. And whenever Users will see these names, they should know that they can not delete this Asset. This is where you will need to step in and run a memorable user training and produce a user manual.
- Security5:37
Security
In this lecture, we will learn more about Salesforce security measures. First, we will discuss the massive change that occurred in the beginning of 2021 and further, we will learn about what is IP addresses and how these can be setup to enable or restrict users to access Pardot.
Before February 15, 2021 , users could log into Pardot through one of two methods:
via direct login using Pardot credentials or
via single sign-on using Salesforce credentials.
Depending on how users were configured, they could use one, or both, of these login methods.
On February 15, 2021, Pardot stopped supporting direct login using Pardot credentials and now requires that all users accessing Pardot do so via single sign-on using Salesforce credentials. This means that all Pardot only users will need to be created as Identity users in Salesforce and then through the Pardot Settings connected to a Salesforce user.
Why is Salesforce implementing this Change?
Security: Salesforce’s user security system is robust and extensible, and is kept up to date with the latest security protocols.
web app, press blue button with email & password on the screen
mobile app, show the pop-up notification and be going inside the app and proving it
web app, show the part when it started to activate
Also, Salesforce SSO is more sophisticated, offering more options for authentication and login restrictions (login hours, login IP restrictions). You can setup the Salesforce Authenticator app, so that users go through a multi-approval process before they can access the org.
Product strategy: the majority of new features being released now and into the future have the Pardot Lightning App as a pre-requisite (Business Units, Lightning Email Builder, Engagement History). Users will miss out on these, and Salesforce want to avoid users being stuck with a legacy product.
Commercial objectives: although a Sales/Service Cloud license isn’t required to use Pardot, it’s required to access the Pardot Lightning App.
What is a Salesforce Identity License?
A Salesforce Identity License is designed to create a user record in Salesforce with the sole purpose of enabling single sign-on (SSO). These Salesforce user records won’t have any functionality in Salesforce but will have their original functionality in Pardot.
The Pardot team is determined to keep, and they are now bundling 100 Salesforce Identity Licenses for a typical Pardot account.
What is IP location?
IP location is the mapping of an IP address to the geographic location of the internet from your connected device. Therefore, this means that Pardot is able to see where you are when you access your account.
What is this feature?
Salesforce is looking at your IP address when you login. If your login attempt to Salesforce is from an unrecognized IP location, then your login attempt will be blocked.
When this occurs, an email will be sent to the user with a code.
After you paste this code into the verification screen your new location will be activated.
Note: Each time you clear your cookies or access Salesforce from a new location, you will be prompted to activate it again.
What is all this hustle for?
If someone got their hands on your username and password or if you login from an unrecognized IP location your login attempt will be blocked until the IP address is verified by clicking the link in a Pardot verification email.
What will require IP activation?
If you are accessing Salesforce Pardot app through any internet browser like Chrome or Safari.
Or if you are accessing Salesforce Pardot app via the API.
For all API users, you will additionally add API User Key that you will find on a User record in Pardot. By adding API User Key you will ensure that the user has seamless access to Pardot data without any interruption.
- Users10:32
Users
A little bit of background information
If you started using Pardot before 2019, users were created in Pardot directly and x you had unlimited seats available. This was straightforward to manage. You could create a Pardot user and link it with your existing Salesforce user. And you could also create Pardot only users for your external suppliers or agencies that were helping you with marketing campaigns.
If you started using Pardot after the summer ‘20 release, all accounts had Salesforce User Sync turned on by default. By enabling this feature you could save time and automatically see users appear in Pardot if sync for this Salesforce Profile was setup. And still, you could easily create Pardot only users directly in Pardot.
But if you started using Pardot after the Spring ‘21 release, you are already accustomed that Salesforce is discontinuing Pardot-only users and moved on to single sign-on (SSO). Meaning that all users need to be created in Salesforce first, even though you wish them to have only access to Pardot.
Salesforce is making this change for several reasons, but the main driver is enhanced security. Salesforce has features like
custom password policies,
login hours,
and a multi-factor authentication system
that is far more customizable and robust than what Pardot offers today. Besides, this deeper integration with Salesforce will now allow Pardot to continue to bring new feature enhancements to the Platform.
Will now all Pardot users will need to have a full Salesforce license?
No! To support customers with Pardot-only users who do not need a full Salesforce license, Pardot gives 100 Identity licenses with all Pardot editions. Additional licenses can be purchased for $5/mo/user.
- Queues3:12
Queues
What is a Salesforce queue?
A queue is a location where records can be routed to await processing by a group member.
Queues allow groups of users to manage a shared workload more effectively. The records remain in the queue until a user accepts them for processing or they are transferred to another queue.
What is a Pardot queue?
Pardot Queues is a feature that allows you to integrate prospect assignments with your current salesforce workflow.
Rather than assigning Prospects to a specific user in Pardot, you can choose to assign them to a Salesforce Queue and then use your:
CRM workflow,
The manual method of distributing leads, or
your AppExchange lead assignment app to assign new Leads to sales representatives.
- Groups5:12
Groups
In this lecture, we will learn more about Pardot Groups. Pardot Groups is a great feature that allows you to group your Pardot users based on their:
Region,
business unit,
department, or
Any third-party vendors.
Why you would want to group your Users?
Generally, Pardot Groups are used in the following two scenarios:
Firstly, If your account has a Custom User Roles feature, you can setup Folder permissions, allowing you to customize access to these Folders for your Users and User Groups. Folders combined with the User Groups feature is a great way to manage how users access your organization’s content.
Secondly, you can use groups for round-robin lead assignments. When you assign a Prospect to a Group, Pardot will assign the Prospect to a Group member, equally distributing all new Prospects.
Use User Groups for Round-Robin Prospect Assignments
You can see how to setup a non-tecky round-robin assignment here.
Scenarios when Pardot Round-Robin is a good fit
Logic can be created and maintained by Marketing users X
It can be a great solution if you don’t have many users to assign prospects to
Things to consider
It can get difficult if you have many users to manage and what to have a complex assignment based on the countries, regions, business units, and departments. The more robust and advanced Salesforce logic would be a better fit.
It can get very difficult to remember where the “assign to user” action is being used within your Pardot assets, as there is no centralized overview, so you would need to go in each asset separately to find out.
- Roles9:55
- Folders6:20
- Pardot Administration Quiz
- Naming Conventions5:09
Naming Conventions
In this lecture will learn about Pardot naming convention best practices.
And hopefully, the keywords “best-practices” will make you feel at peace as this is not something you need to strive exactly to replicate. But rather these are our suggestions for your naming convention model.
The reason why I wanted to discuss this topic is to make sure before we move into the Marketing section of Pardot and start creating actual assets, you understand and see the benefit of developing your companies internal naming conventions best practices. X So that long term you and your team can swiftly navigate through the pool of thoughtfully labeled folders and files.
By doing so, we will be able to avoid daily headaches of thinking about:
“Where I can find that file?”
“What shall I call that Salesforce Campaign?”
“Is this the up-to-date version of the email template with the correct footer?”
Hopefully, now you slowly get the feeling for why having an internally agreed-upon naming convention or even better an automated Pardot Naming Convention Generator will help you to make sure that you keep only up-to-date files in your org and you can easily find them and re-use them when necessary.
Asset name elements:
Region/Territory/Country (static and unchangeable values)
File Type (PNG, JPEG, iCal, PDF, eBook, LP, WP, PPT, Video, Article)
Form Type (Contact Us, Questionnaire, Sign Up, Event registration…)
Image Width (px) + Image Height (px)
Description
Source
Audience
Day, Month, Year
… basically, anything that will be helpful so that the title can tell everything to an employee about what it is for without clicking on it to view.
Benefit from using naming conventions
Ability to find the right file that you can re-use,
Easily spot out-of-date assets for deletion,
Avoid any duplicate File creation,
And therefore saving Pardot storage space,
And the ability to update one file, for example, logo, that is used across all Email Templates, so that all places where it is referenced will be automatic. because who wants to spend hours/days to go back and manually and update all Templates with the single link of the File you actually want to keep.
- Automation Rules6:51
Automation rules
Automation rules are definitely the heavy lifters in the automation tools toolbox. They’re both powerful and flexible, which makes them a popular choice when automating. They’re also the most comprehensive automation tool offered by Pardot.
Automation rules allow you to perform certain marketing and sales actions based on criteria that they specify. Automation rules continuously look for prospects who match the rule criteria. They are retroactive, but any changes after the rule become live are not. Meaning, the same rule can be applied to a Prospect multiple times, but whatever rules do can not be reverted back or undone.
Popular use cases and examples
Automation rules can be used for the Prospect MQL process. For example, when Prospects Score reached 75 points and downloaded any of your key assets you can make the MQL and assign it to a Salesforce queue.
Change Prospects Profile. You can change a prospect’s profile to Executive Buyer if the person Title contains Executive, Director, or CEO, company size is bigger than 250 employees and their annual revenue is more than a million.
You can decrease Prospect Score Based on Inactivity. The rule can check for prospects with no activity in the past 365 days and decrease Prospect scores to 3 for example. I do not recommend decreasing it completely to 0, as they were active at some point. Additionally, you can add them to a Re-Nurture List that will automatically add them to an Engagement program.
Assign a Prospect Based on Form Submissions and Their Location. This rule combines criteria and prospect actions. If a prospect expresses interest in a demo by completing a Demo Request and is EMEA region, the prospect is assigned to the EMEA Lead Queue.
Send “Why to choose Us” email. If iProspect has an Open Opportunity that was created more than 30 days ago and the name contains “Pardot Implementation” you can help your sales reps, by automatically trigger the “Why to choose Us” email that will incentivize the Prospect to buy into what you have to offer.
To be honest, I could go on and on with examples, as there are so many. Each business and industry has its own specific use cases. And automation rules can vary from very simple to very complex based on your needs.
Therefore after implementing Pardot, you can review all your day-to-day repeatable activities with your team and explore all the possible actions you can automate for your business.
- Page Actions8:11
Page Actions
Page Actions let you create and apply automated actions that change or add information about Prospects when they visit pages on your website or any webpage where your Pardot tracking code is embedded.
This Pardot feature is designed for you to track the most important pages, ones that indicate that the Prospect is increasingly more interested in what you have to offer.
Marketers call these ‘buying signals’. So, you can probably guess that the most common use case for a Page Action would be your company’s pricing page.
So when an Existing Prospects that are cookied and is using a trackable browser (and not incognito) views a specific page that you have created a Page Action for → you can trigger any of the following actions:
Add tags
Add to CRM Campaign
Add to list
Assign prospect via Salesforce active assignment rule
Assign to queue
Assign to user
Change prospect custom field value
Change prospect default field value
Create Salesforce task
Increment prospect field value
Notify assigned user
Notify user
Remove from list
Remove tags
Set prospect’s source campaign
Prerequisites for Page Actions to work:
For page actions to work, including wildcards, the page must have a Pardot tracking code or tracking code implemented via a tag manager.
Pardot matches the most specific page action first. If a page action for a specific URL doesn’t exist, Pardot matches wildcards. For example, you have a page action set up to execute for www.paretopi (dot) com/products/form and a wildcard page action for www.paretopic (dot) com/products/*. If a prospect visits www.paretopi (dot) com/products/form, the specific page action is triggered, not the wildcard action.
Completion actions are applied only to prospects. Anonymous visitors browsing your site don’t trigger the actions.
Page actions are not applied retroactively. They execute when the page is accessed. If an anonymous visitor who previously accessed the page later converts to a prospect, the visitor session is tied to the prospect record. The prospect appears in the page action report, but the completion actions aren’t applied. In this scenario, the page action also appears in the prospect audits but doesn’t appear in prospect activities.
Page actions can be made from non-visible pages and pages that require the user to log in.
One page action notification is triggered per prospect per page per hour. If one prospect visits a page with a page action, a notification is sent to the designated user. If the prospect returns to the same page within the one-hour time frame, it doesn’t trigger a second notification. However, if the same prospect visits a different page with a page action, that page action notification executes.
Page actions match only exact URLs. If you create a page action for http://paretopi(dot)com, the page action doesn’t execute for http://www.paretopi (dot) com. In this case, you need two separate page actions.
Summary
By setting up Page Actions you can enable your Sales team to quickly respond to Prospect ‘buying signals’. Those that indicate that your Prospect is increasingly interested in what you have to offer.
As you saw, the setup is lightning fast, but make sure to put thought into planning your Page Action strategy.
Which pages indicate that Prospects are moving down the marketing funnel?
What is the value of that page relative to your other pages?
When is it appropriate to notify sales?
And finally, how do you convert visitors before they reach the page?
- Connected Campaigns6:15
Connected Campaigns
Historically Pardot and Salesforce campaigns used to be two separate things.
Pardot Campaign - allowed you to have a one-to-one association between Prospect and Campaign, and it was always the first touchpoint or conversion point of the Visitor to a Prospects
Opposite Salesforce Campaigns, Pardot Prospects, could only exist in one Pardot Campaign. You would call it a ‘source’ or ‘first touch’ campaign. A Pardot Campaign answers the question: ‘What brought the prospect to your Pardot Database?’
And Salesforce Campaign - same as now allows you to associate one Lead or Contact to many, Campaigns in Salesforce.
Salesforce Campaigns are multi-attribution, and Prospects can be in multiple Salesforce Campaigns at the same time. A Salesforce Campaign can help you answer the question: ‘What marketing activities influenced Prospects to convert/buy from us?’
And then In Spring 2018, Salesforce released a feature called Connected Campaigns.
Since then Connected Campaigns is the way Pardot Campaigns and Salesforce Campaigns are combined. After you setup and enable these, there are no more separate Pardot Campaigns. There are only Salesforce Campaigns. X That will make your life a whole lot easier.
So if you are still living in the old world and have not set up Connected Campaigns, these are the steps you will need to do before moving ahead:
You will need to ensure Salesforce Campaigns are assigned to a record type in Salesforce. This record type will need to be selected for enablement during setup.
Be sure to set up Salesforce campaigns that mirror Pardot campaigns so you can then connect them. For example, you will need to setup Website Tracking also in Salesforce so you can connect with the default Pardot campaign that tracks all your website Visitors.
Add engagement history fields on the Salesforce Page Layouts for connected campaign record types to allow engagement data to show.
There are now reportable statistics on the Salesforce Campaign itself. They display the following:
Email Open Rate
Total Emails Delivered
Email Click-Through Rate
Marketing Form Submission Rate
Total Marketing Form Views
Unique Marketing Link Clicks
Total Landing Page Views
Landing Page Form Submission Rate
- Custom Redirects10:29
Custom Redirects
Pardot’s custom redirects allow you to track any link on your website or a third-party site.
For example:
a link you add on your Twitter page,
a banner ad on a third-party site, or a
Referral link in your YouTubes video description.
When to use Custom Redirects?
1. Banner Ads
When you put banner adverts up on third-party sites you lose some visibility into the traffic they are directing to your own website or landing page. By using UTM parameters on links you can get an idea of inbound traffic sources in the Google Analytics account.
But by Creating a Custom Redirect in Pardot with your UTM parameters you will be able to shoot two rabbits with one shot and be able to quickly access this data in you Pardot. And see exactly which Prospects came from that 3rd-party source.
And to add a cherry on the top, when setting up a Custom Redirect you can add a completion action to run for all Prospects who click on them! You can, for example,
notifying their assigned user,
send them a special email specific to the product/service they expressed interest in,
or adding the Prospect to a Segmentation List.
Note: Completion actions for custom redirects will only apply to prospects already in your account. Completion actions will not apply to any visitors who convert to prospects after clicking on a custom redirect. However, the click of the custom redirect click will still appear in their prospect activity.
2. Social Media
If you use other platforms beyond the Pardot social connectors, like
Salesforce Success Community,
Linkedin Groups,
YouTube,
Instagram,
you can gain better insight into the traffic from these platforms by creating a Custom Redirect for each link you share.
3. Emails
If you use the same URL multiple times in an email, the reporting is for how the URL performed as a whole, not on the individual link placements. Your emails should have a clear CTA (call to action) and often that CTA is to get a Prospect to click on one specific link (file, landing page, video, white paper, etc…).
If you design the email with multiple link placements to the one CTA (buttons and hyperlinked text), then a Pardot Custom Redirect can help you report on which was clicked the most.
4. NPS Surveys/In-email Questions
Without requiring any extra survey tools, you can embed a survey question to gather NPS or any other answers to key questions you need to ask your subscribers.
NPS (net promoter score) measures loyalty and brand promotion among your customers by asking: ‘how likely are you to recommend us?’ on a scale of 0 (not at all likely) to 10 (extremely likely). X Three categories come out from the results: Detractors, Passives, and Promoters.
You can run a simple NPS survey in Pardot using custom redirects (Marketing Links). All you need is a custom number field (‘NPS Score’ or similar), and 10 marketing links. Each marketing link has a number assigned plus a ‘change prospect custom field value’ Completion Action,
5. Files
If you want to track a file link that is not hosted by you, you can use Pardot Custom Redirect for it.
This will allow you to accurately report on the traffic to that link, as well as the ability to act on it with completion actions from within Pardot.
6. Offline Marketing
Business cards, direct mail, and flyers can seem far from our minds in the world of digital marketing, but they still can be rarely used by businesses.
And if you or your client still considers giving out something to a person and report on how you do, you can use Pardot Custom Redirect to a Landing Page that receivers will enter to access your page and submit their details.
Considerations:
In order for the ‘Prospects’ section of the custom redirect report to display results, either
a visitor must click and convert to a prospect by filling out a form or
the existing prospect clicking must be cookied.
If you are using a custom redirect for a Pardot form, Kiosk Mode must be disabled to prospect activity to appear on the ‘Prospects’ section of the custom redirect report.
Custom Redirects showing clicks and no prospects
Custom redirects are used with visitors in mind to track banner ad clicks, links to third-party sites, links on social media, and access to files hosted outside of Pardot. When the custom redirect is clicked, the click is recorded in the Custom Redirect Statistics table.
In order for the ‘Prospects’ section of the custom redirect report to display results, either a visitor must click and convert to a prospect by filling out a form or the existing prospect clicking must be cookied.
If using a custom redirect for a Pardot form, Kiosk Mode must be disabled to show as a prospecting activity and appear on the ‘Prospects’ section of the custom redirect report.
If you are unsure whether the Custom Redirect is working or not, the best way to find out is by testing it.
To generally test the custom redirect tracked URL:
1. Note the ‘Total clicks’ on the custom redirect report.
2. Click the custom redirect tracked URL in a new Incognito/ private browsing window.
3. Refresh the custom redirect report and you should see the number increase.
To test anonymous visitors converting to a prospect upon click:
1. Copy a Pardot form url and create a custom redirect with it.
2. Click the custom redirect tracked URL in a new Incognito/ private browsing window.
3. Fill out the Pardot form.
4. Refresh the custom redirect report and you should see a new prospect record appear.
5. Note that custom redirect completion actions do not fire in this scenario.
To test an existing cookied prospect clicking the custom redirect:
▸▸Using your cookied browser, click the tracked URL and you should see your prospect record appear on the report.
If not already cookied:
1. Open a new Incognito/ private browsing window.
2. Paste a Pardot form or landing page URL in the window and submit the form to cookie yourself.
3. In the same window, paste the custom redirect tracked URL and you should see your prospect appear in the custom redirect report. The custom redirect completion actions will fire in this case.
Note: Another reason custom redirect clicks might not be appearing in Prospect activities is because your tracker domains are not using HTTPS for the custom redirect links. This can be resolved by configuring the tracker domain to use HTTPS, and also updating the custom redirect links.
- Dynamic Content11:47
What is Dynamic Content?
Dynamic Content is a method of displaying different content variations to your prospects based on what you know about them.
It’s a feature used by marketeers to personalize communications and show how well you know your customers.
Why should you use Dynamic Content?
I am sure by now you have heard many times that effective use of customer data in highly personalized content can dramatically increase new prospect attraction and conversion, right?
For sure, the personalization of marketing content is not a new thing. It happens to each of us every day.
When we access our social media feeds, search engines, or even shopping networks like Amazon and eBay. The recommendations, text, images, and ads we see are tailored based on our previous behaviors, geographic location, or the personal data we have given these platforms.
And with the dynamic content feature, we can do exactly that! It allows us to deliver different copies or images to prospects based on the criteria we determine.
We can personalize content to align with buyer personas and increase the overall effectiveness of our messaging.
In the latest Salesforce Annual State of Marketing report, we can see that Customers are also more likely to switch brands if their experience is not customized. (Source: Salesforce State of Marketing Report)
Where might you want to use Dynamic Content?
You can utilize the Dynamic content feature in marketing assets such as:
Emails,
landing pages,
forms, and your
website.
Some things you should consider:
Order your variations by the restrictiveness of the criteria. If a prospect matches multiple criteria, the prospect sees the first matched variation. For example, you have two variations listed in this order: score greater than 50, and score greater than 100. Prospects with a score of over 100 see the content for the over-50 score because it is listed first, and they match that criteria.
Only HTML is supported.
CSS on the page where you embed dynamic content affects the content’s appearance.
You can’t use fields with the date field type as criteria.
Create plain-text content for use with text emails.
Now let's talk about some known limitations.
Only One Prospect Field.
No Custom Object Data.
No ‘Is Empty’ Option.
25 variation limit.
Dynamic Content Best Practices
When building any dynamic content always keep best practices in mind.
Have a strategy.
Order your dynamic content.
Keeping variations simple.
Content over styling.
- Files7:09
In Pardot You can upload images and other files to use in your:
emails,
forms, and
landing pages.
Pardot-hosted files have tracked URLs based on your tracker domain, so when prospects access a non-image file, it’s reflected in their activities.
Why you should not bulk-upload files into Pardot?
I personally never advise anyone on uploading multiple files at once, by dragging them all in the upload box.
The key reasons for that are:
Naming Conventions
Vanity URLs
Campaign attribution
Completion actions
Supported File Types
Pardot can store your content files like:
Image files for your Emails and Landing pages (for example, .jpg, jpeg, .png, .gif, .svg)
Calendar invite files that you can attach to your Emails (.ics)
An audio file that can be hidden behind trackable buttons (for example, .mp3, .wav)
Video file that can be your gated content (for example, .mp4, .mov, .avi)
PDF files that can be your white papers(.pdf)
JavaScript and CSS that you can use for your custom Layout Templates, Landing Pages, and Forms (for example, .js, .css)
Font files that you can use in your Landing pages(for example, .woff, .ttf)
ZIP files(.zip)
Microsoft Office file formats (for example, .doc, .docx, .xls, .xlsx, .ppt, .pptx)
Considerations
Keep these considerations in mind when using Pardot to host files.
Files can be up to 50 MB.
If you want to automatically update an existing file in all referenced assets, instead of creating a new file, go to the old file and upload the new version using the same name. A new URL is generated, but the previously used URL will continue to work as expected. Basically, the URL changes, but the old file URL will point to the new content file.
Content files are hidden from search engine indexing.
When you delete a file, it is deleted permanently and can’t be recovered.
- Email Templates (Published and Drafts)21:26
Email Templates
Are a reusable email design that you can base new emails on. After you design and build a template, you can personalize an email for each recipient. You can also modify a template and limit what kind of changes your users can make.
List Emails
Are created for one-time sends from the pre-design reusable emails template. An example of a one-time send would be a newsletter or an operational email–content that will not need to be repurposed in the future. Once a list email has been sent, it can be copied and edited, however, it cannot be reused like a template.
When you’re creating your email, you might also be confused by the difference between an email template draft and a list email draft, since the email wizard looks the same for both. Let’s break it down further.
Email template drafts are templates that haven't been published yet. You can’t use email templates for emails until you publish them.
List email drafts are emails that haven't been sent yet. You create emails once, and you can copy and edit them, but you can’t reuse emails like you can reuse a template.
- Email Template Repeatable and Removable elements code
- List Emails (A/B Testing, Testing, Scheduling)7:20
List Emails
In a report on connected customers, Salesforce found that some
63% of millennials,
58% of Gen Xers, and
46% of baby boomers
are willing to share personal information with companies if they get personalized offers or discounts in return. Collecting data isn’t a one-way street. There’s an element of give-and-take in which marketers have a key role to play.
Customers expect content to be tailored to their exact needs. So what happens when email content, for example, isn’t personalized? X For starters, 52% of customers say they find somewhere else to go. That may seem unfair and disappointing, but the marketing landscape is no longer in the hands of marketers. It’s filled with and influenced by customers who thrive on technology and who use it to find companies that fit their needs.
What’s even more striking is that only 23% of marketers say they feel extremely satisfied with their ability to use their customer data to create more relevant experiences.
What List Email are for?
These are created for one-time sends. We all know that our customers expect relevant, varied, and tailored content in their mailboxes. And our job as a marketer is to deliver that.
An example of a one-time send would be a new product line launch for the UK market or a Partner Newsletter - content that will not need to be repurposed in the future. So for these one-time sends we would craft a List Email that we will be sent to our segmented list. Once a list email has been sent, it can be copied and edited, however, it cannot be reused like a template.
A/B Testing
While building an email we started to think about variations we could apply. And how we can know for sure what our Prospects will engage with the most?
For this, we can use Pardots A/B testing. X This will allow us to send different versions of our emails to a portion of our list and track how engaging each version is. Based on how our recipient interacts with the email, we can use the A/B test’s engagement record data to determine and send the winning email.
With A/B test feature, You can test virtually any aspect of your email, including:
Subject line
Layout
Headline
Copy/tone
Call to action
Button color
Offers and incentives
Send time
As a best practice, change only one element at a time between versions. Making multiple changes makes it harder to pinpoint what made an email the winner.
You toggle on A/B testing when you prepare your email draft for sending.
On the Building tab of an email draft, click Basic Info.
Select Enable A/B Testing.
Use the A/B tab to toggle between the email versions.
Sending List Email
The sender name and subject line are the two most important elements when determining whether your recipient opens the email or not: 33% of people open emails based on the subject line alone. X The most persuasive subject lines are short and to the point. They direct people to click through and continue to read the email, which should also be concise.
If you’re looking to increase your click-through rates (CTR) in your email copy, you can experiment with the wording of your links and their placement. X Try an AB test that adjusts the email length. For example, if you notice recipients clicking the first link only and nothing else, then consider shortening your email copy. You can also test where you place the links - high-value links should be placed near the top of your email template.
- Preference Center Page11:51
Why do businesses need a Preference Center?
To make you 100% committed and convinced on using the Preference center here are the 4 key reasons why you should setup one:
Transparency
Your prospects must be able to see what marketing lists they are a part of, it is a fairly standard GDPR requirement and we need to make sure you are fully compliant.
Showcases your email offerings
Every business usually has multiple marketing communication streams. Adding these all to your preference center will make your prospects aware of what you can offer so they can pick what is relevant to them.
Improving email stats
When your prospects receive what they want and when they expect it, they are far less likely to unsubscribe AND are more likely to engage with your content. Xxx In today's world, marketing is not how it used to be when marketers were prized when they sent their emails to skyrocketing numbers of Prospects. But rather the success is measured by the high open and click-through rates.
Avoid unsubscribe and spam reports
It's always a happy day when we send an email to a high number of prospects, but the mood shifts rapidly to the other spectrum when we notice the high unsubscribe rate.
We should aim to always include a Preference Center link in the email so that your Prospects can decide what they want to hear from you. By giving them full control you will gain their trust and collect a pool of happy subscribers.
Setup a Pardot Email Preference Center
First, I must admit that there are multiple ways we can go about it. We can either use purely Pardot functionality or also build a more advanced preference center management solution using a custom object in Salesforce.
In this course, we will focus on all available features and functionalities that we have in Pardot. So let's get straight into it.
First, let's draft our building plan. For us to have a final preference center management solution we will need to first:
Decide on your marketing preferences
Create Public Opt-in Lists
Organize lists
Create Vanity URL
Add HTML & CSS styling
Test Public Lists and Design
Documentation the solution
Now let's discuss each point from the above list individually:
Decide on your marketing preferences
Usually, preferences are built around:
general mailing categories or
specific product/service lines company has.
These preference lists are usually the following:
Newsletter
Product or feature updates
Training/Workshop announcements
Webinar/Event Invitations
Promotions/Special deals
Service update notifications
Create Public Lists
Pardot Public lists are lists that you can make visible to prospects.
And if you have only one default, out-of-the-box preference page, all Public Lists you create will automatically be added to this page.
Key things to know about the setup is that your list:
The name is for internal use
The label will be publicly visible to your Prospects
And Description will be publicly visible to your Prospects
Organize lists
Lists added are ordered alphabetically, according to the List Name (the internally-facing one). It’s easy enough to change the order, by just renaming your Lists Names for the order you need.
Customize Email Preference Center Look & Feel
As this is fully code-based customization you will find a guided tutorial with code snippets attached as a separate document to this lecture.
Test it
First, create a Test List in Pardot. Then create all your preference center testers as Prospects in Pardot and add them to the Test list as you create them.
Document the solution
Your preference center development project will be finished when you document it! There will be new colleagues joining the team, there will be an IT that will want to optimize or add some styling in the future. Make sure to document the solution throughout so the right people know what and where can be customized.
- Engagement Studio22:18
Engagement Studio
What is Prospect Nurturing?
Prospect Nurturing is a process of maintaining communication with your prospects or existing customers at each step of their sales cycle.
What are the typical use cases?
Businesses choose to build Engagement programs to:
Share the relevant information at the right time;
Build closer relationship and spark the engagement;
Send updates about new features or products;
Keep Prospects educated with industry news;
Encourage sales with exclusive offers and promotions and
Invite their Prospects to events, trade shows, parties, and webinars.
Stage-based marketing approach
Stage-based marketing simply divides all Prospects into three groups based on their stage. When you are designing and building your Engagement program it is important to keep in mind which Prospect this nurture is for:
Cold: Prospects don’t know they have a problem that you can solve. They need to be educated about why they should consider spending money with anyone, let alone you.
Warm: They know they have a problem your service might solve. They need to be nurtured on a frequent cadence to get them to be hot.
Hot: These prospects are ready to buy and should talk to sales.
With Pardot Engagement Studio you can:
Build a nurture journey,
Then Test it before you set it live,
and then instantly report on Prospect engagement with your nurture programs.
First, we must answer the following questions:
What is the goal of this Engagement program?
Who are the Prospects that should enter this nurture program?
When Prospects can receive the email from this program?
In which time zone this Engagement program should run?
Do we need to suppress any segment of Prospects from this program?
What are the exit criteria?
How many emails do we want to send?
How often Prospects should receive emails from this engagement Program?
What is the duration of the program?
And is there an expiry date?
Can a Prospect enter other Engagement Programs in parallel?
Then after the questions are answered, it is always a good idea to bring clarity on the:
paper or
the tool of our choice
and draft a high-level program scheme.
Key steps in Marketing Journey
So here is how Pardot can help you.
Pardot will help you to move your visitors and prospects through a sales funnel. The funnel begins when you create marketing materials to generate interest in your products or services and ends when Prospect is qualified and is assigned to a sales rep.
Every marketing journey will start with...
Demand Generation: The act of creating interest in your products or services through marketing efforts.
Conversion: Once a visitor gives you contact information by submitting a landing page or form in Pardot, they will convert and become a prospect.
Prospect: Prospect in Pardot is an anonymous visitor that has converted and now self-identified. We can also call it a lead in Salesforce.
Lead nurturing: Sending targeted messages at specific intervals based on a prospect’s action and whether or not they have met specific qualifying criteria.
Lead Qualification process in your journey. You probably have thousands of people interacting with your organization. Your Sales team can’t contact each of them, so it is marketers’ responsibility to send them the best prospects. The process of finding the best leads is called lead qualification.
Nurture Campaign Ideas
Onboarding Campaign
Onboarding a new client will always be a high-touch, manual process, and rightly so. However, nurturing campaigns allow you to automate some of the more repetitive tasks involved in onboarding. These can include providing introductory training resources, a list of next steps after close, timelines for product kickoffs, and frequently asked questions. These helpful resources can help your new clients get started on their own, without having to wait on a customer service rep for assistance.
Renewal Campaign
Renewal nurture programs can be a convenient way to remind your existing customers that it is time to renew their contracts. Using Engagement Studio, you can set this program to trigger a month (or more) before the renewal date, send multiple reminder emails over a specified period of time, and notify the assigned account manager if no action takes place. Renewal nurture programs make it far less likely that your clients miss the renewals on their contracts, and take the tedium out of the process for your service reps.
For more examples of lead nurturing campaigns using Engagement Studio, see The Complete Guide to Lead Nurturing.
You’ve just learned how to create engagement programs that do the work of nurturing your leads for you in Pardot. Now you’re ready to start building more complex engagement programs by creating a strategy for your account.
Pausing and Resuming
If you pause an engagement program and change the reentry settings, the program honors the new settings for prospects who are already working through the automation.
When you decrease the waiting period, prospects who are on the End step and meet or exceed the new setting can repeat immediately.
When you increase the waiting period, prospects who are on the End step must wait longer to meet the new criteria.
When you decrease the entry limit, prospects on the End step who meet the lower limit stay on the End step. They are no longer eligible to reenter the program.
When you increase the entry limit, prospects on the End step who reached the previous limit are eligible to reenter the program immediately.
Considerations for Repeating Programs
When you allow prospects to reenter an Engagement Studio program, keep these considerations in mind.
Settings and Reporting
Use whole numbers (1–365) for the number of days before a prospect is eligible to reenter.
Use whole numbers for the total number of entries.
You can have up to 10 scheduled and active repeating programs at a time.
After you set a program to allow reentry and start or resume it, you can’t turn off the setting. Specific reentry settings can be changed.
To see how many prospects have completed a program and are eligible to repeat, review the Start and End steps. When your program is set to unlimited entries, these metrics don’t appear.
Engagement Studio tooltips show the total number of times that prospects have completed a step. For example, if 5 prospects have entered a program twice, the tooltip shows 10.
- Form Handlers7:27
Form handlers
In Pardot you can create two types of Forms.
The Form Handler option is the easier one, so we will learn about it first. Pardot form handlers allow you to use your forms to post your data to Pardot.
A Form handler is a great alternative to use instead of Pardot iFrame forms. They allow you to fully customize the look of your form and submit data to more than one database.
What are the main reasons why you should choose Pardot Form Handler?
You already have a:
- long-form with many questions,
- with custom logic
- and many complex dependencies on your website. And you need only a small portion of that data to go to Pardot.
You have very strict requirements for customization that can not be fulfilled with Pardot Forms.
You have the form and all of the fancy customization; it’s very straightforward, and I just need it to point data in Pardot’s direction.
You have built a form on FormAssembly or WordPress and you just set up the connector with Pardot.
You want data to be pushed from the 3rd party site and they want to be in control of all the look and feel of the form.
How do Form Handlers work?
The first thing to understand is that by creating Form Handlers you are not creating an actual form.
You are creating a post-to URL that will handle the data submission from your webpage and send it to Pardot.
When you select the fields for your Form Handler, you are identifying where the data that will be entered on the webpage will be stored in Pardot.
For example, when you add the First Name field to the Form Handler you will send and populate the value in the First Name field on the Prospect record.
Form Testing and Troubleshooting steps
Submit the form with and without all required fields. And verify that a new Prospect is created.
Verify that your Success Location is working.
Verify if the data forwarding is working as expected.
Verify that all field names are correct. The external field name you set within your form handler needs to be the EXACT SAME as what is in your HTML.
Use the HTTPS endpoint if your website is HTTPS. Otherwise, if you use an HTTP endpoint link for your form handler when your website is HTTPS, it will cause the browser to give security warnings.
- Form Handler sample
- Forms9:42
Forms
With Pardot Forms you collect information about people visiting your site or landing page and help you turn anonymous visitors into identified prospects.
What are the main reasons why you should choose Pardot Forms?
The main reasons why you should choose Pardot Forms instead of Form Handlers is because you want to use Pardot's:
Progressive profiling feature
Use Forms on Pardot landing pages
Use built-in form bot protection feature
Base automation rules on form views
Displays Pardot Thank You content after form submission
Display to Prospect if they are Unsubscribed and offer self Resubscribe
Control Forms styling and behavior fully from within Pardot
How to create a form in Pardot?
Creating a form in Pardot is a 5 step process:
Name your form, place it in the folder and assign it to trackable/reportable Salesforce Connected Campaign
Add form fields, set fields settings (error messages, when they should be displayed), add progressive profiling or dependent fields
Decide on forms look and field, by using standard or custom layout. Add above or below form content and add bot protection or make it repeatable.
Decide on what should automatically happen when the form is completed with completion actions
Review and save (nothing here to do, just smile for the work that's behind)
- Layout Templates7:24
Layout Templates
Layout templates are used to add a custom look and feel to your Pardot forms and landing pages. Applying a Layout Template to a Form or a Landing Pages is like dressing up in the morning. By putting on clothes you apply a style to your amplua, similarly with Pardot Layout Templates you give your marketing assets a defined structure and style.
Layout templates are the way to go if you want to retain your companies brand styling on your Pardot assets like forms and landing pages. Otherwise, you can use Pardot's default styling options.
What are use cases for creating custom branded layout templates?
Typically, businesses create custom layout templates for their Pardots:
Preference Center page
Unsubscribe page
Gated Content or White Paper Landing page
Event or Webinar registration Landing page
Newsletter Opt-in Landing page
Contact Us Form
Content Inquiry Form
And many others
How Layout Templates, Forms, and Landing Pages Work Together?
Let's understand theoretically how all the pieces fit together.
The fundament for everything is the Layout Template itself. It includes the code that gives your forms and landing pages their look and feels. It contains the key %%content%% variable tag, that tells Pardot where to place the form on your landing page.
The next layer is the Landing Page itself. It includes your chosen form, landing page content, and all the text that you add to display on the landing page.
The final layer includes all form fields, above form content, and below form content.
Layout Template Builder
The Layout Tab
The Layout tab controls the look and feel of your forms and landing pages. You will be adding your custom code to this tab to style your assets.
You must include the following variable tags in this code to make sure your layout template works in the Pardot landing page builder.
%%title%%
Adds a title to your landing page.
All Pardot landing page template need to have a title. This will help search engines to understand the contents of your landing page.
The title is visible to prospects in search results and on their browser tab.
%%description%%
Adds a meta description to your landing page.
When you use this template to create a landing page, Pardot will prompt you to add a description. The description gives search engines even more detail about the contents of your landing page.
The description is visible to prospects in search engine results.
%%content%%
Adds a form and/or opening general content to your landing page. Opening general content may be text, images, HTML, or other content that you specify in the landing page builder.
X When you use this template to style a form or a landing page, this tag tells Pardot where the form and/or opening general content should appear on the page.
Next let's talk about the …
Form Tab
The Form tab controls the structure of your forms. It contains variable tags like %%formfield-input%% that tell Pardot how to arrange form elements in the browser.
You should only modify this tab if you need to rearrange or remove certain form elements.
For example, you could move %%form-field-input%% above %%form-if-field-label%% if you want your field labels to appear below your form fields.
Please see attached “Layout Template Form Code” that contains all Pardot Form tags.
- Landing Pages13:54
Landing Pages
What Is a Landing Page?
A landing page is a page that is designed to convert Visitors into Prospects. It is different from other pages on your website because it means the following two criteria:
It has a form that allows you to capture a visitor’s information in exchange for the desired offer.
The sole purpose of the landing page is to convert Visitors into Prospects (a homepage with a form on it does not count as a landing page because it serves other purposes as well).
Simply put, a landing page is any page that has a form on it and doesn’t include other distractions—here’s an example:
Remember that any page on your website with no navigation and a form used to convert Visitors into Prospects is a landing page, and every site should have them.
How Do Landing Pages Work?
A person sees a call to action (CTA) and ends up on a landing page with a form.
The person fills out a form, which converts them from a visitor into a prospect.
The information from the form fields is then stored in your Pardot.
You market to the Prospect based on what you know about them.
Furthermore, in Pardot you’ll be able to see:
what promotion the Prospects converted on,
when they converted, and
what other interactions they’ve had on your site.
This information will allow you to nurture this Prospect in a more targeted way by helping you decide which marketing actions are most appropriate to take.
It will be a great idea to utilize reusable Pardot Forms with Progressive Profiling to collect more valuable information about the Prospect over time.
And you will be also able to display the most relevant content with the help of Pardot's Dynamic content feature in both - Emails and Landing Pages. Yes, did you knew that you can display the content on your Pardot Landing Page dynamically based on the information that you have about the Prospect?
Because when you nurture your Prospects with highly relevant content your Prospects are far more likely to become a marketing qualified lead (MQL) and move through the marketing funnel faster. This will help you generate a fantastic return on investment (ROI) of your marketing efforts and keep your sales team and stakeholders happy.
What You Need Before Creating a Landing Page?
Before you can dive into building the landing page, you need to make sure you have done all of the background research needed to put it together effectively.
To do so, be sure to cover the following before you get to work on the landing page itself.
The Buyer Persona(s)
By researching and understand your buyer persona's motives, you will be crystal clear on your customers’ behaviors and how they think. This will help you to develop the most valuable content to convert.
When you create your landing page, it is important to target it to just one of your personas, if you have more than one. If you try to tailor the content on your landing page to multiple personas, it will not resonate with all of them and will decrease the odds of conversion. When you target one persona, your efforts will be much more focused and will increase your conversion stats. It is better to be niche and focused than to attempt to appeal to the masses.
The Offer
You Landing Page with an offer is something that needs to provide value to a Visitor, aside from the products or services you already sell. The offer could be a free e-book, webinar, cheat-sheet, comparison guide, or anything else that is downloadable and informative about the industry you are in. x It should go hand in hand with a particular pain point your buyer persona is experiencing as well as their stage of the Buyer’s Journey.
The Buyer’s Journey
The Buyer’s Journey is the research process a potential buyer goes through leading up to a purchase. It can be broken into three different stages: the awareness stage, the consideration stage, and the decision stage. Different types of content should be created for each specific stage of the journey to help people move from one stage to another.
Awareness Stage
A visitor in the awareness stage has expressed symptoms of a potential problem or opportunity but can’t quite name what that problem is. A person in this stage is doing a lot of research to understand their symptoms and define what is causing them. Pieces of content to create and target people in this stage include e-books, white papers, and guides.
Consideration Stage
In the consideration stage, a prospect has clearly defined their problem or opportunity, and now they want to understand what they can do to solve it. Types of content you should create for people in this stage of the Buyer’s Journey include comparison white papers, webinars, and videos.
Decision Stage
In this stage of the funnel, the prospect knows their solution strategy and approach. At this point, they are doing vendor comparisons and are trying to narrow down the list of vendors to a select few before making their final choice. Providing them with case studies, demos, and product information at this stage would be a wise decision.
Building a Great Landing Page
Once you have the background research in place, it’s time to put the landing page together. However, there is a special recipe that you should follow to increase your odds of conversion on the landing page.
Landing Page Best Practices
Create a Compelling Headline
You need to develop a headline that will capture the visitor’s attention immediately and make them want to read on. X It is the first thing they’ll see when they get to your landing page, and you don’t want it to be the last.
Efficiently Convey the Value of Your Offer
Conveying the value of an offer concisely and effectively is crucial to the development of your landing page. Ever heard of the blink test? The blink test basically states that you need to convey your message and value before your visitor has time to blink—which means you have about 3-5 seconds. If you don’t do this successfully, you risk losing that conversion; x it typically only takes one “blink” for someone to decide if they want to stay on your landing page or not.
Include Bullet Points
For whatever reason, we humans like to mix things up, and we have short attention spans for things like landing pages. To keep your reader engaged, avoid writing lengthy paragraphs on your landing page. Instead, write a brief summary of the offer, and below the summary, list out bullet points of what the visitor can expect to read by downloading the material. Xxx Presenting this information as bullet points will keep the reader engaged while also giving them a preview of what’s to come, which can entice them to convert.
Build the Form
When you create the form for your landing page, be mindful of the number of form fields you are including. The number of form fields you have should correlate with the stage of the Buyer’s Journey. X Typically, for an awareness piece, you want to keep the forms brief and get basic information such as name and email address. The further down the funnel your content is, the more fields you should consider adding as leads are getting closer to buying. Once they’re at the decision stage, you’ll want to get more information from them to help the salesperson understand the contact better so they are better able to close the sale.
Remove Site Navigation
When building your landing page, you want to remove any opportunity for your visitor to leave the page. By removing site navigation from your landing page, you allow your visitor to solely focus on the content at hand, rather than becoming distracted by other enticing links on your site.
Insert Images
Who doesn’t love a good image? Be sure to include a relevant and engaging image on your landing page to draw the visitor in. x x People are more likely to stay on a page if a captivating image is present.
Add Social Sharing Icons
Although you should remove all navigation from the landing page, it is important to include social sharing icons so that people can share the landing page with others across their social platforms. When you do this, however, be sure that when you click on the icon it opens in a new tab or window. You don’t want to redirect people away from the page, but you want to give them a clear option to promote it.
Provide Testimonials When Relevant
These days, people are always looking at reviews of products and services before making a purchase, and this can apply to landing pages as well. But don’t include a testimonial that only vaguely ties into your offer. Make sure it directly correlates to what you’re promoting. If it doesn’t, it’s best to leave it off.
Make Sure Your Instructions on Next Steps Are Clear
A form on a landing page typically implies that you should fill it out, but be sure to include a copy that suggests this on your landing page as well (typically near the end of your copy). This could be something as simple as, “To access the e-book, please fill out the form to the right.” It’s simple, but it gives your visitor clear instructions on the next steps, which will make them more likely to convert.
- Search Marketing (Keywords, Competitors, Paid Search, Site Search)5:53
Search Marketing
With Pardot you can track how your site ranks against your competitors and search results for the keywords that are important to you using search marketing tools. There are many search marketing tools that you can use for your business so you can track your search keywords and closely follow how your competitors are doing with their SEO (search engine optimization).
Keywords
Search marketing starts with keywords. Being able to identify, manage, and optimize the keywords that will drive your inbound marketing campaigns is a crucial element in search engine marketing success.
Competitors
In the competitor’s tab, you will see the ranking information for your competitors.
You can easily add your competitors by clicking on the “Add New Competitor” button and type in their names and website.
After you add the competitor data to Pardot and it syncs, you will be able to see the number for their inbound links, page, and domain authority, how many other sites are linking back to their website domain.
Paid Search
Paid Search tab will be useful for you if you have set up your Paid Ads connector, which is available in Pardot Editions higher the Pardot Growth. The table presents common keywords, how many people used them, and their potential and actual value.
So if you have your Google Ads connector enabled this is where it will show all of your past and current Campaigns, how many ad groups and ads you have, and also Prospect that have converted from those google ADS.
Site Search
It allows you to connect with your website’s search tool. This means any Prospects that are searching on your site for different keywords would all show up here.
And you will be able to see which keywords are most searched from your Prospects giving you a great insight into which pages are performing great and which pages need some keyword boosting, and also which of your products or services is the most popular.
- Segmentation Lists13:45
Segmentation Lists
“Right message, right person, right time” is the email marketers’ mantra. And by segmenting your audiences, you can ensure you get the right message to the right person and hopefully at the right time.
Because Pardot is connected with your Salesforce CRM, you have access to data. You can have a lot or you can have a little, but no matter how much you have, you can always start segmenting your audiences.
But what exactly is segmentation?
Segmentation is filtering out only distinct subscribers so that you can target individuals with specific, relevant, and timely messages.
Why should you segment your Prospects?
By doing so you will ensure that your emails stand out in inboxes and grab your customers’ attention.
In fact, according to marketing research, not only does email audience segmentation ensure you’re delivering the right message to the right person at the right time, it also leads to:
Higher click-through rates
Higher conversion rates
Better email deliverability
Lower unsubscribe rates
Higher-quality email analytics
What are common ways how you can segment your audience?
You can segment your Prospects by their:
Product or service Interests
Activity or Behavior: When they were last active, what they viewed or were they clicking on?
Purchase or Opportunity history: What did they last buy?
Their subscription preferences: What marketing lists they are opted-in?
X Previous email interactions: Have they opened your emails? Clicked links in the emails? What time of day did they do it?
X Geographic location: In which region or country they are based?
Language: Which language they speak?
The more targeted your lists are, the more you can personalize your content, and the more effective it is.
And what is important to remember is that you can’t do prospect segmentation without data you don’t collect.
So, collect, collect, collect! The more information you gather, the more opportunity you have to tailor your messages so they are just right.
Creating purposeful lists
Here are some good questions to ask yourself as you start planning your Prospect segmentation.
Does each segment have its own unique needs? (Otherwise, it’s not a segment!)
Can you contact the segment through your marketing efforts?
Are the people in the segment likely to respond?
Are these people expecting any email communications from you?
Did these people say what they want to hear from you and how often?
X Is this communication worth your time and the investment?
Does your segmentation align with the values and goals of your company, product or service you offer?
- Tags11:03
Tags
Tags are a lightweight, flexible, user-driven categorization for use in sorting/filtering data and reporting. All assets and prospects in Pardot can be tagged with one or multiple keywords or phrases so-called Tags.
How can I create Tags?
Tags can be created and assigned in a number of ways:
Manually by editing a Prospect.
In mass by using the multi-checkbox on Prospect tables then selecting “Add tags” in the drop-down at the bottom of the table.
In mass by using the multi-checkbox on assets tables then selecting “Add tags” in the drop-down at the bottom of the table.
In mass by using the multi-checkbox on assets inside folders then selecting “Add tags” in the drop-down on the right-hand side.
Via Automation Rules.
Through a Completion Action on a Form, File, etc.
Via an import. This method of applying tags is the only additive and will not remove any tags.
Where Can Tags be Used?
Before we go into the imaginative uses for Pardot Tags, it’s a good idea to set the scene.
Tag Prospects
Tag assets (forms, emails, landing pages, custom redirects/marketing links, Lists, Files)
Filter folders
Filter tables of Prospects or assets
In B2B Marketing Analytics (as filters)
- Social Posting4:56
Social Posting with Pardot
With Pardot Social posting feature You can:
Schedule and post updates to Twitter, Facebook, and LinkedIn accounts and company pages.
Gather insight on link clicks, replies, comments, retweets, and likes.
See prospects
who clicked a link in your post,
which social media channels received the most clicks,
and how engagement has changed over time.
Social post clicks are visible as prospect activities on individual prospect records.
Considerations:
You can have unlimited amounts of social posting connectors.
The social posting character limit for Facebook is 4,000, LinkedIn is 700, and Twitter is 140.
Pardot has two separate LinkedIn connectors, one for prospect/company analysis and the other for social posting.
You will need to disable auto-posting between social media accounts before using Pardot social posting.
If your Facebook account is configured to automatically post to Twitter, disconnect the accounts, and then set up separate connectors for Facebook and Twitter.
Links are uniquely rewritten depending on the social connector that the URL is posted to, such as Facebook or Twitter.
Links are rewritten when the message is posted.
You don’t see the bit.ly link populated before the message is posted.
If you
have the bit.ly connector set up, links are rewritten with your custom account URL. X Otherwise, Pardot creates a standard bit.ly URL
Limitations:
You can add only 1 image per post
Can not @mention other accounts from within Pardot (you can only do this when posting directly)
Can not upload the video (but you can add the video link)
- Visitors and Prospects7:14
Visitors & Prospects
In Pardot everything starts with an unidentified visitor. After the visitor provides an email address by completing the form on your website or a Landing Page, you have a prospect and you can start taking appropriate action.
Based on where they came from:
An add
Organic Search
Email Forward
LinkedIn post
Facebook post
Or any other place where you shared the conversion content
You can put them automatically through the appropriate nurture journey or assign prospects to users, so they can approach the Prospect directly.
How do Prospects land in Pardot?
First-time import before the go-live
When you finish Pardot implementation and enable Connector two-way sync only the Leads and Contacts that were created in Salesforce after the Connector was set live will be created in Pardot. All historical records that were created pre-Pardot Connector were set live you will need to import manually using Pardots import wizard.
Manual Prospect creation in Salesforce + Connector Sync
Whenever you create a new Prospect in Salesforce and you have Connectors two-way sync enabled, then manually created Prospect in Salesforce will be synced to Pardot within 2 minutes.
Manual Prospect creation in Pardot
You can also create a new Prospect directly in Pardot from the Prospects tab by clicking on the “+ Add Prospects” button.
General list Import
Similarly, as you import all required Prospects in Pardot before go-live, you can import Prospects in Pardot at any time from the Prospects tab or Import option in Pardot Settings.
Form or Form Handlers submissions
Every time a Visitor successfully submits Pardots Form or Form Handler, a new Prospect will be created in Pardot.
New Prospect creation via API
Lastly, you can also create new Prospects in Pardot via API. Some large enterprises can have complex infrastructures with multiple CRMs, Finance, Billing platforms and they might want to use Pardot's API to create a new Prospect and trigger an email sent or put them on the journey.
- Marketing & Report quiz 2
- Marketing Quiz
- Reports7:25
Pardot Reports
One of the many marketer’s goals is to be able to
build marketing campaigns →
track performance →
and see generated leads as a direct result of their marketing efforts.
In doing so, they can justify their marketing budget spend and helps the rest of the marketing team to secure more budget for future marketing campaigns.
Pardot's reporting empowers the marketing team by automatically displaying all key performance metrics in out-of-the-box Pardot reports.
By using Pardot reports you can
save a massive amount of time,
see how your Prospects are responding to your marketing efforts in real-time,
and confidently display all the stats in your meetings.
How to ensure Pardot Reports display the right information?
To make sure that you can trust all the numbers you see in Pardot's reports you need to:
Campaign Costs
Add accurate Campaign Costs to all your campaigns you will ensure that the ROI is calculated correctly.
Tracking code
Make sure you add your Pardot Website Campaign tracking code on your website or any other 3rd party site where you store your content. Or add your Custom Redirects to correct Connected Campaign to track the accurate ROI.
Assign assets to the Campaign
Always assign your asset in Pardot to the correct Salesforce campaign, so that ROI is correcty attributed.
Campaign Influence
Make sure to enable and configure the Campaign Influence feature in Salesforce. This way all influential campaigns will be automatically added to your opportunities.
Automatic synchronization with Salesforce Opportunities
The best part about all of this closed-loop Pardot reporting is the integration with Salesforce opportunities. Once an opportunity is created and subsequently Closed Won, this updates the ROI figures and campaign stats in Pardot.
What will the Pardot reports show me?
We can see all reports by going to the “Pardot Reports” tab.
The first report you will see
Campaign reporting
When you review all your Campaigns, it will give you an overview of all of the campaigns you’ve created including the campaign performance graph. X This gives you a visual aid so you can see at a glance what campaigns are most successful, where most of the budget is going and where to focus your attention. X x This graph is interactive to play around with the drop-downs and sliders to familiarise yourself with the tool and to get the exact report that you want.
Underneath the graph you’ll be able to see each campaign and these stats:
Number of visitors
Prospects
Assigned prospects
Cost per prospect
Opportunities
Number of opportunities vs Prospects %
Cost per opportunity
Total value
Revenue
X ROI %
Connected Apps
When you connect your other apps like Google Ads, GoToWebinar, Eventbrite you also automatically enable that data to flow in the Pardot Connected Apps report. You can come and review the summary of all the app stats, by simply clicking on the one you want to see.
Conversions
The Conversions Report allows you to see how many new prospects your site is generating and how many visitors are turning into prospects.
Lifecycle report
The information this report tells you is invaluable and helps you to easily inform senior management on how things are going from a marketing perspective.
It will show you your marketing funnel and gives you a strong idea of your current pipeline.
On the right-hand side, the velocity chart gives an indication as to the time it takes to go from prospect to a won deal which really helps you to plan your future campaigns!
Marketing Assets
The Marketing Assets report allows you to see the exact starts for each asset your created and how it is performing.
For example, if I go to Marketing Assets > Emails > and click on List Emails I can select the individual List Email that I sent and review the exact up-to-date starts on how all went.
Opportunities
The Opportunity report will display to you all synced Opportunities from Salesforce.
To ensure you see them all, you will need to make sure all Opportunity Record types are visible to your Pardot Connector user.
Further, you can select to view:
All Opportunities
Open Opportunities
Won Opportunities
Lost Opportunities
And then you can further filter your Opportunities by individual Campaigns.
- Sandboxes7:53
What is a Pardot Sandbox?
Let’s start with a definition of what a SALESFORCE Sandbox is:
A Sandbox is a replica of your current Salesforce environment, including all of the metadata like custom fields, page layouts, Process Builders, and more that allows you to build and test new changes and then push them back to production.
A Pardot Sandbox is a Pardot Business Unit that can be provisioned from a Salesforce Sandbox. Meaning you get access to a fully functioning Pardot org where you can build new processes/automation in and test with a Salesforce Sandbox that’s a replica of your Salesforce org.
Why Pardot Sandboxes are important?
A Pardot Sandbox allows Pardot admins to install, provision, and configure a Pardot org inside of a Sandbox and let the Salesforce team run regression testing until they’re convinced that the Pardot code won’t interfere with their complex automatons.
This is very important for enterprise orgs that have a lot of customization, automation, and Apex codes.
What can I test in a Pardot Sandbox?
The most important things to actively test in a Pardot Sandbox are the items related to the data flow in between Pardot and Salesforce. This is so that you can ensure that your automation do not change records unnecessarily and you do not erase important data.
Make sure you focus your attention on the following:
The flow of contact/lead/prospect data between Pardot and Salesforce
Field mapping & Field-level sync behavior
Running automation rules that impact a large volume or records or critical data
User sync
On the other hand, there are various things that are better to test in Production, like your:
Email templates & drafts.
Forms.
Form Handlers
Dynamic lists
Custom Redirects
Page Actions
Dynamic content
Email Preference Centers & Unsubscribe Page
Scoring
Grading
The biggest hurdle in Pardot Sandboxes is that you can not send out any emails. This means any Form Handlers, Automation Rules and Engagement Studios that send out emails won't work in Pardot Sandbox.
- Testing in the Sandbox11:36
What is better to test in a Sandbox?
The most important things to actively test in a Pardot Sandbox are the items related to the flow of data between Pardot and Salesforce — the things that could change records or cause data to be lost.
These would be priority things to focus on:
The flow of contact/lead/prospect data between Pardot and Salesforce
Field mapping & Field-level sync behavior
Running automation rules that impact a large volume or records or critical data
User sync
What to test in Production?
On the other hand, there are various things that are better to test in Production, like your:
Email templates & drafts.
Email Preference Centers & Unsubscribe Page.
Scoring (with real data).
Grading (with real data).
Dynamic lists (with real data).
Page Actions (as your tracking code is connected with Pardot Production).
Forms.
Form Handlers.
- Well done!1:16
Requirements
- No previous experience with MCAE is necessary
- No previous experience with Salesforce is necessary
- You will learn everything you need to know to get certified and ready for your projects
Description
Want to increase your ROI & close more deals?
Your transformation into a professional who can do that begins here!
This focused Pardot training is created for Salesforce consultants, digital marketers, or someone who wants to have a head start with the Pardot platform.
As a result of completing this course you will:
- Have a strategic and logical approach to everything that you build in Pardot!
- Know real-world Pardot best practices and examples for your projects!
- Know how to setup a Pardot to after measure true ROI on all your Campaigns!
- Gain all the required knowledge to get certified and build a successful career as a Pardot Admin.
- Forever eliminate any doubts of not knowing how to successfully implement and mainatain Pardot instance.
- Have access to 180+ quizzes that will help you pass Pardot Specialist and Consultant certifications!
What is the expected process:
- You go through the lectures one by one.
- You take quizzes to strengthen your knowledge and prepare yourself for exams
- You will get access to HTML and CSS code examples, and experienced consultant best practices to test in your org
Say hi, to your lecturer Kristina Alexandra!
Kristina Alexandra knows Pardot inside out. As 8x certified Salesforce and Pardot expert and digital marketing consultant, she’s spent the last 8 years helping other businesses to utilize Salesforce, Pardot social media and content marketing effectively.
Lucky for us, she decided to share her knowledge with the world by building an online course!
When Kristina had the idea to build online courses, she was running a consultancy that helped small, medium and large businesses implement Pardot automation platform and develop a marketing strategy. Like many in the Salesforce community, Kristina discovered online courses while looking for better ways to deliver her expertise to the volume of people asking.
Who this course is for:
- Salesforce consultants
- Digital marketers
- Someone who wants to have a head start with the MCAE Pardot platform