
Dein Einkaufswagen ist leer.
Weiter einkaufenLearn SQL: The Hands-on Guide with interactive exercises
6.247 Teilnehmer:innen
Learn SQL: The Hands-on Guide with interactive exercises
Master SQL by solving real-world problems. Learn JOINs, subselects, GROUP BYs and more. From Beginner to Pro in no time!
Erstellt vonJannis Seemann
Zuletzt aktualisiert 4/2026
Englisch
Tschechisch [Automatisch],Englisch [Automatisch],
Das wirst du lernen
- Master SQL Quickly: Grasp SQL efficiently with 80+ real-world exercises
- Learn everything you need, in a single course: From Beginner to Pro
- Apply Skills Practically: Work on real-world projects to solidify your knowledge
- Boost Your Career: Gain in-demand SQL skills to enhance job prospects
- Impress in SQL job interviews: Practical exercises provide valuable hands-on experience
- Prepare for Senior Roles: Master advanced topics like indexing, constraints, and permissions
- Stay motivated: Interactive quizzes, exercises, and practical exams turn this course into something fun
- Prepare for High-Demand Roles: Data Analyst, Database Administrator, Business Intelligence Developer, and Data Engineer
Zugehörige Themengebiete entdecken
Programmierübungen
Dieser Kurs enthält unsere neuen Programmierübungen, damit du deine frisch erworbenen Skills direkt praktisch anwenden kannst.
Demo ansehen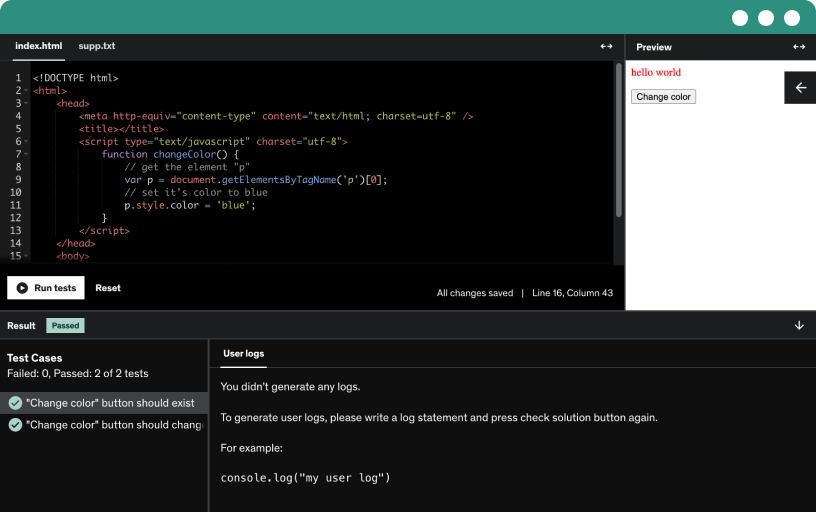
Kursinhalt
32 Abschnitte • 235 Lektionen • 19 Std. 51 Min. Gesamtdauer
Anforderungen
- No previous programming experience required
Beschreibung
Unlock your potential by unlocking the power of SQL.
Imagine accelerating your career growth by mastering SQL swiftly - and enjoying every step of the journey. Welcome to "Learn SQL: The Hands-on Guide", a comprehensive course designed to turn you into a seasoned professional in record time.
Why enroll in this course?
Our immersive, interactive learning approach includes over 80 hands-on exercises that make learning both effective and enjoyable. You'll immediately apply what you learn through more than 100 quiz questions and two full-length practice exams, reinforcing your knowledge and building your confidence.
You'll be guided by an experienced instructor who has successfully taught over 300,000 students on Udemy. With real-world insights and best practices drawn from extensive industry experience, you'll gain practical skills that employers value.
Comprehensive curriculum:
Foundational SQL topics: Start by building your understanding with basic queries and database navigation.
Efficient data manipulation: Learn changing data and advanced filtering techniques for effective data management.
Data modeling: Create your own tables and learn how to properly structure data in an SQL database.
Advanced SQL queries: Mastering complex SQL concepts like subselects, JOINs, and GROUP BY clauses.
Performance optimization: Optimize your SQL database with indexes and enforce data rules using constraints and foreign keys.
SQL Database administration: Advance to features like managing permissions, stored procedures, and triggers to automate tasks.
Full-stack development: Connect databases with programming in Python to PostgreSQL.
Multi-database proficiency: Bonus modules on MySQL, MariaDB, and SQLite make you adaptable to various SQL environments.
Accelerate your career
Equip yourself with in-demand SQL expertise sought after by top employers. Whether you're aiming for roles like Data Analyst, Database Administrator, Business Intelligence Developer, or Data Engineer, this course will prepare you. You'll enhance your problem-solving abilities with complex SQL queries and database management, making you an indispensable asset in the tech industry.
Transform your skills
This course is more than just a series of videos - it's an interactive experience designed to empower you. Engage in hands-on coding exercises that build your confidence in writing SQL queries. Immediate feedback from quizzes and practice exams ensures your learning is both engaging and effective.
By mastering SQL through this course, you'll significantly enhance your employability, opening doors to coveted roles in the tech industry. If you're already in tech, you'll become indispensable and ready for promotion.
What makes this course unique?
It's the transformation you'll undergo. You'll not only learn SQL but master it swiftly by applying your knowledge in an interactive environment. Join over 300,000 students who have advanced their careers with my courses.
Take the next step toward your future
Don't miss this opportunity to accelerate your professional growth. Enroll now and embark on your career-changing journey today.
Für wen eignet sich dieser Kurs:
- Beginners, who want to learn SQL in an interactive way
- People who want to practice SQL, instead of just learning it by videos