
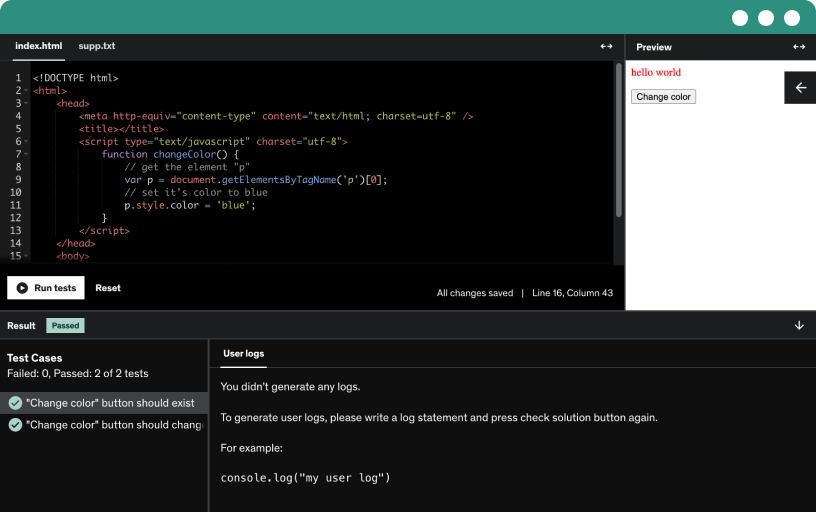
This course includes our updated coding exercises so you can practice your skills as you learn.
See a demo
This course is full packed with useful information, equipping you to become a true WebSocket professional. This lecture is a summary of how this course is structured and it also provides you the ability to skip sections you feel confident in.
This course has been structured in a way that will enable you to learn advanced concepts to do with WebSockets.
The content has been formulated to take your development skills to the NEXT LEVEL, by focusing on all aspects of a WebSocket connection, such as:
the TCP handshake process
the HTTP upgrade process
the actual WebSocket API itself (what interfaces does it rely on, what events does it emit, etc)
how WebSocket messages are formatted into data frames
how to scale WebSockets, what alternative technologies exist, etc
The internet is a global system that connects billions of computers across the world. It has pretty much always used a standard internet protocol suite known as TCP/IP to facilitate communication between devices and networks. This is important because as you'll see later, WebSockets were designed over TCP.
The HTTP protocol was created in 1989 which was pretty much the same time that the World Wide Web was created. HTTP (Hypertext Transfer Protocol) is the set of rules that allows web browsers and web servers to communicate and exchange information over the internet.
In other words, it's the protocol that makes the World Wide Web work.
However, the HTTP protocol was designed as a simple request/response model, which in today's world of financial markets and online gaming, just doesn't cut it.
TCP was created in the 1980's and stands for "Transmission Control Protocol". Today, it is a persistent protocol in that it establishes a reliable connection between the client and server, and it does not terminate the connection even after a request/response cycle has been completed. The initial connection is achieved through a three-way handshake.
There is a lot more to TCP than first meets the eye. TCP also employs mechanisms such as flow control, retransmission of lost packets, and sequencing to guarantee that data is delivered accurately and in the correct order.
TCP (Transmission Control Protocol) is a persistent protocol. This means that it establishes a reliable connection between the client and server, ensuring that data is transmitted in the correct order and without errors. This persistence is achieved through a three-way handshake for connection establishment.
Wireshark is a powerful network protocol analyzer that captures and displays real-time details of network traffic. It is widely used for troubleshooting network issues, analyzing network protocols, and ensuring network security. Wireshark can capture packets from a network connection and display them at a granular level, allowing users to filter and drill down into the data to identify specific issues.
HTTP is the most popular and most use network protocol in the world! It's been around since "pa fell off the bus" but did you know there are some interesting facts about HTTP that you might not have known.
Comet and AJAX are two web development concepts or terms used to describe how HTTP can be used to make the user experience seamless. In other words, they are words to describe ways in which a client can request a web page from a server, dynamically. However, although AJAX and comet have come a long way in helping us, they are not enough for today's high powered online gaming sites and financial markets. In other words, they don't offer true bi-directional communication.
You have a high level understanding of how the internet was created, and that it was built on the HTTP protocol. However, we have more modern protocols today that are better suited for real-time applications. And this brings me onto ... you guessed it ... WEBSOCKETS.
The WebSocket protocol has a rich history that dates back to 2008. Initially, it was referred to as TCPConnection in the HTML5 specification as a placeholder for a TCP-based socket API.
The name "WebSocket" was coined, and the protocol was standardized in 2011 via RFC 6455. Google Chrome was the first browser to ship full support for WebSockets in December 2009, with other browsers following suit over the next few years. Today, almost all modern browsers support WebSockets, which have become a preferred choice for building interactive, real-time digital experiences that provide delightful user experiences.
The RFC process can be confusing at first, so this lecture explains the following:
Not all RFCs are standards. In fact, most RFCs do not get into the Standards Track and hold as much weight as a feather
Only the IETF can approve an RFC to the point of being included in the Standards Track.
If an RFC reaches the Standards Track, it can be in (1) proposed state or (2) Internet Standard.
It is counter-intuitive, because even if an RFC is in proposed state, it is good enough to be authoritative and most RFCs stay in this state forever.
Some fun facts about WebSockets. WebSockets are a great protocol if you want to send updated data from a server to a client constantly.
WebSockets are governed by an RFC and also a living standard.
WebSockets are used by various organizations and applications today. This proves it is a powerful protocol that is worth learning about.
You already know that WebSockets is a protocol, allowing two endpoints to communicate over the internet. But what exactly does this mean?
"Packets" are the basic units of data that are transmitted over the internet. Each packet contains both a header (containing routing information) and a payload (the actual data being transmitted).
Packets are used to break down large messages into smaller, manageable chunks, allowing them to be transmitted efficiently over the internet.
While web browsers like Chrome, Firefox, and Safari are the most common way to interact with the HTTP protocol, they are not the only tools available. cURL, a command-line tool, is another popular way to view and interact with the HTTP protocol.
Using cURL, you can inspect the HTTP protocol in detail, which can be useful for debugging, testing, and understanding how web applications communicate with servers. This is particularly helpful when working with APIs or troubleshooting issues that may be related to the underlying HTTP protocol.
HTTP: HTTP and WebSockets are both communication protocols used in web applications, but they serve different purposes. HTTP operates on a request-response model, where the client sends a request to the server and waits for a response, making it suitable for retrieving static content and non-real-time data exchanges.
WebSockets: In contrast, WebSockets establish a persistent, bidirectional connection that allows for real-time communication, enabling the server to push updates to the client without the need for repeated requests.
Nothing in web development works in isolation. There are many parts (protocols) that have to work together.
WebSockets use TCP to establish a connection between the client and server. This connection is maintained throughout the duration of the WebSocket session, allowing for continuous communication.
The Maximum Transmission Unit (MTU) and Maximum Segment Size (MSS) are two related but distinct concepts. As I mentioned in the previous video, networks will typically not allow a file size of 20,000 bytes to be contained within one packet.
But wait a second, the IP protocol allows packet sizes to be represented by 16 bits, which can represent a maximum value of 65,535 bytes.
This is where MTU comes into the picture.
The Maximum Segment Size is set by the TCP layer, which represents the max size of one segment, including the payload and headers.
WebSockets work by establishing a persistent connection between a client and a server.
You know this.
But WebSockets can't send data over the internet by itself. In order to do so, other protocols need to be used such as the Transmission Control Protocol (TCP) and Internet Protocol (IP).
A brief summary of what we've covered.
IP datagrams contain all the information needed to route the data from the source to the destination on an IP network.
When an IP datagram needs to be transmitted, it is broken down into smaller IP packets that can be sent over the network.
WebSockets were built using TCP.
Later in the course I'll explain how HTTP/3 changes this.
But for now, understand that TCP uses a 3-way handshake to establish a reliable connection between two devices.
The handshake involves three steps:
the client sends a SYN (synchronize) message to the server
the server responds with a SYN-ACK (synchronize-acknowledge) message, and
the client acknowledges the server's response with an ACK (acknowledge) message.
This process ensures that both devices synchronize their sequence numbers and establish the necessary parameters for data transmission. In other words, it helps ensure a reliable connection.
In simple terms, a persistent TCP connection is like keeping a phone line open between two people, even after they've finished their initial conversation, so they can easily talk to each other again without having to dial the number every time. This allows for faster and more efficient communication, as the connection is already established and ready to be used whenever needed, without the overhead of setting up a new connection each time.
A few interesting facts about TCP
I want to show you the practicality of seeing the 3-way TCP handshake in action. I will show you the SYN - SYN/ACK - ACK in action.
The TCP/IP model is a four-layered communication model that breaks down network communication into manageable chunks. This model consists of the Application Layer, Transport Layer, Internet Layer, and Network Access Layer. Each layer performs a specific function to ensure efficient and reliable data transfer over the internet.
The TCP/IP model is a four-layered communication model that breaks down network communication into manageable chunks. This model is widely used in computer networking and is the basis for the internet.
The application layer is the very top layer of the TCP/IP model. It is the closest thing that us developers work with on a daily basis and is where 99% of time is spent by web developers.
This layer is responsible for providing interfaces and protocols needed by users and applications to access the internet. Common application layer protocols include HTTP, WebSockets, SMTP and FTP.
A quick summary of what we've covered so far.
Once a WebSocket connection has been established, the next step is that the message has to be sent across the wire. In order for this to be done, the WebSocket application layer has to hand control of the message to the Transport Layer.
It is inside of the Transport Layer that source and destination port numbers are used to identify which process to send the data to.
The main difference between TCP (Transmission Control Protocol) and UDP (User Datagram Protocol) lies in their approach to data transmission.
Ports help in directing and managing data by assigning unique identifiers to different applications or services running on a device. For example, in web apps, ports like 80 for HTTP and 443 for HTTPS are commonly used to handle incoming and outgoing data requests.
The cURL command provides the --local-port option that allows you to specify a single port number or a range of port numbers to use as the local (source) port for the connection.
This gives you the ability to control the source port used by cURL when making a request.
Before I finish talking about the Transport Layer, you need to know that the 'package' of data it creates is called a segment. I also want to show you the two most important headers that the transport layer creates, and briefly discuss the "window" property.
The Internet Layer is the third layer of the TCP/IP model, responsible for routing and addressing data packets between devices.
It provides logical routing functions, ensuring that data packets are delivered efficiently and reliably across the network.
IP is more generic, and the port identifies where exactly you want the data processed.
Although we are talking about networking, don't lose sight of the fact that data is ultimately always transferred over the wire as electrical inputs.
How is it possible that two tabs open can make a request to the same server at the same time?
The Network Layer in the TCP/IP model is responsible for managing data at the data link level. It is also known as the Data Link Layer. This layer is responsible for framing. The Network Layer is responsible for ensuring that data is transmitted correctly over the physical medium, such as a network cable or wireless link.
A few interesting facts about the MAC address.
In summary, while an IP address identifies a device for routing purposes across networks, the MAC address is essential for local communication within a network segment. Both addresses work together to ensure reliable data transmission, with MAC addresses facilitating local delivery and IP addresses managing broader network routing.
"Tracert" is short for traceroute - it provides a map of how data on the internet travels from its source to its destination. Let' shave some fun and see how data travels in a simple HTTP GET request.
Some key takeaways from this section.
Mostly, developers open a WebSocket connection and send data across the wire. Developers don't typically understand the deeper process involved of that particular data packet from travelling over the wire. As you now know, the data has to be 'packaged' into a certain format, devices have to be recognized, and the data has to be converted to binary before it can reach its destination.
This is a summary lecture of what you've learnt thus far.
enjoy.
Sockets are not the same as WebSockets.
Sockets are a general-purpose network communication endpoint that uses TCP or UDP protocols to establish a "door" or "socket" or "connection" between two processes.
WebSockets, on the other hand, are a specific protocol built on top of TCP.
WebSockets and sockets are not the same.
In the previous section you've learnt how the TCP connection is established. This is important because this first has to be done in order to switch over to WebSockets.
Before we start looking at how to send data across a WebSocket connection, you first need to understand how to open a WebSocket connection between two socket endpoints.
This video explains that when using HTTP/1.1, there is an HTTP handshake that needs to be performed in order for a valid WebSocket connection to be established.
Navigating the complexities of WebSocket support across different protocols and platforms can be daunting. Let me help you clear things up.
I want to show you how to analyze and see the handshake process in action, by making a simple WebSocket request in the browser's console.
WebSockets is an event-driven API that enables real-time, bidirectional communication between a client and a server over a single, persistent connection. Unlike traditional HTTP, which requires the client to initiate a new request for each interaction, WebSockets allows both the client and server to send messages at any time, without the need for polling or long-polling techniques. This event-driven nature of WebSockets makes it ideal for applications that require instant updates, such as chat applications, real-time collaboration tools, and multiplayer games, as it reduces latency and improves overall responsiveness compared to traditional HTTP-based communication.
End-to-end HTTP headers are those that must be forwarded unchanged by any intermediaries (such as proxies) between the client and server, and are relevant to the entire end-to-end request/response.
In contrast, hop-by-hop headers only apply to a single connection between two sockets, and can be modified or deleted by intermediaries. Examples include Connection, Keep-Alive, and yes, the Upgrade header.
In simple terms, a reverse proxy is an intermediary server that sits between clients (like web browsers) and the backend web servers that host a website or application. When a client sends a request, it doesn't go directly to the target web server, but instead goes through the reverse proxy first.
The Upgrade and Connection headers are used to facilitate the transition from one protocol to another within an existing HTTP connection.The Upgrade header is used by the client to indicate the protocols it would like to switch to, in order of preference. This allows the server to choose one of the proposed protocols and upgrade the connection accordingly.
The Connection header is mandatory when the Upgrade header is present. It signals that the client wants to upgrade the connection, rather than just adding a new header.
The Upgrade header tells the server that the client wants to switch to the WebSocket protocol, while Connection: upgrade indicates that the client wants to upgrade the connection to a different protocol
some extra info on the Upgrade and Connection header
The Sec-WebSocket-*** headers are a set of HTTP headers used in the WebSocket opening handshake to negotiate and confirm the WebSocket connection.
These headers are critical for establishing a secure WebSocket connection and agreeing on any optional extensions or subprotocols to be used for the application-level protocol layered on top of WebSocket. The headers are only used during the initial handshake, after which the WebSocket data frames are exchanged using a different format.
I want to explain why the headers being with "Sec".
The Sec-WebSocket-Key header is used in the WebSocket opening handshake to provide part of the information used by the server to prove that it received a valid WebSocket opening handshake.
It's main purpose according to the RFC is to prevent accidental WebSocket upgrade requests: The Sec-WebSocket-Key header is randomly generated by the client and is unlikely to be used by non-WebSocket clients. This helps prevent servers from accepting WebSocket upgrade requests from clients that are not expecting WebSocket protocol
You cannot start a WebSocket connection using AJAX. The WebSocket connection must be established separately, typically using the native WebSocket API in the browser or a WebSocket library on the client-side. AJAX and WebSockets serve different purposes and are used in different scenarios within web applications.
In order to become a grandmaster at WebSockets, I'm teaching you the inner workings.
In this bonus lecture I'm going to show you how to calculate your base64 encoded nonce value yourself - without the use of an API.
Final words on Sec-WebSocket-Key header.
Some interesting facts about the Sec-WebSocket-*** headers
Base64 is a way to convert binary data (like images, documents, or other files) into a text format that can be easily transmitted over the internet. It works by taking the binary data and converting it into a string of characters that are easy to send and receive.
Base64 is commonly used when you need to send binary data, like attachments in emails or data in web applications, over text-based protocols like HTTP.
This is a continuation of the previous lecture, with and example showing you how to encode the word "DOG" into base64
By working with the UTF-8 hexadecimal values, where each hex pair corresponds to an 8-bit byte, you can then encode any character / data using Base64 without any issue.
A quick fun example of how one would go about encoding the rocket emoji into base64
The Sec-WebSocket-Accept header is an important part of the WebSocket handshake process. When a client initiates a WebSocket connection, it sends a request with a Sec-WebSocket-Key header containing a randomly generated value. The server then takes this Sec-WebSocket-Key value, concatenates it with a specific GUID string, computes the SHA-1 hash of the result, and includes the Base64-encoded hash in the Sec-WebSocket-Accept header of the response. This allows the client to verify that the server understood the WebSocket protocol and is responding to the correct handshake request, preventing accidental WebSocket upgrades.
Why does the server have to hash the KEY + GUID number?
It's easy to think that WebSockets sit at the application level in the newtork stack, and for the most part I agree. But there are unique characteristics of WebSockets that make it more of a lower-level layer.
If the client supports multiple sub-protocols, it includes a list of sub-protocol names in the Sec-WebSocket-Protocol header of the initial request. The server then selects one or more of these sub-protocols and includes the chosen sub-protocol name(s) in the Sec-WebSocket-Protocol header of the response, indicating which sub-protocol(s) will be used for the WebSocket communication.
Two last headers in the WebSocket handshake process that we need to cover are the Sec-WebSocket-Version and Sec-WebSocket-Extensions headers.
The Sec-WebSocket-Version header specifies the WebSocket protocol version that the client or server supports, ensuring compatibility between the communicating parties. This header is essential for establishing a successful WebSocket connection, as both the client and server must agree on the protocol version to be used.
The Sec-WebSocket-Extensions header, on the other hand, is used to negotiate any additional protocol extensions that the client and server may want to use during the WebSocket session. These extensions can provide additional functionality or optimizations to the WebSocket communication, such as data compression.
You'll often see Sec-WebSocket-Extensions: permessage-deflate; client_max_window_bits and so I explain what Deflate means, as well as the client_max_window_bits.
Enjoy :)
This section has been about the WebSocket headers and upgrade process. But if you ask 99% of developers about this, they will not know it.
This is because most developers will use the WebSocket API and frameworks, which handle this process for you.
You've come a long way in this section.
You are WELL equipped at knowing how the inner workings of a WebSocket connection are established.
Well done.
Well done for getting to this section.
In this section we will take a closer look at the WebSocket API and also touch on some server side code for WebSockets.
I can't wait.
The WebSocket API is built directly into the browser.
Up until this point you know that a WebSocket is a protocol that allows two devices / hosts to send data to each other.
In this section I want to focus on how a connection is established.
In this section I want to introduce you to the WebSocket API.
To learn better, I think its best we build a simple project together.
In the next few lectures, I'll be creating the HTML and CSS files necessary for the rest of this section. Of course, this means that the next few lectures are not WebSocket related. You may therefore want to skip the next 2 lectures and just download the HTML and CSS files that I provide.
Building the HTML of our WebSocket Demo project.
Building the CSS together to style up our HTML
The actual HTML and CSS is not crucial to understanding WebSockets, so you can skip the building of the HTML and CSS if you want to, in which case you can just download the HTML and CSS attached to this lecture.
In this lecture I will be turning our attention to building a WebSocket server. In fact this will take 3 lectures.
In this lecture I'll show you how to create an HTTP server in Node.js.
I'll be showing you how to use Node's inbuilt NPM to install a module, add it to the package.json file, and also add a node_modules folder. I can't wait.
It is now turn to mount our WebSocket server instance onto our HTTP server (remember that WebSockets are HTTP compatible). After this lecture, you will have a fully functional WebSocket echo server.
Both the client and server need to "speak" the WebSocket protocol for the real-time communication to work. The client initiates the connection, but the server has to understand and respond using the WebSocket protocol as well.
I often say that code does not exist in isolation. It's the same with the WebSocket API.
Why reinvent the wheel?
Indeed, that's why the WebSocket API relies on other interfaces when firing events.
Opening a WebSocket connection is incredibly easy.
It's often said that WebSockets are HTTP compatible - but what exactly does this mean? In this lecture I'll use Wireshark to show you.
While WebSockets use their own protocol after the initial handshake, the handshake itself is an HTTP request. WebSockets also listen on the same port as HTTP.
This HTTP compatibility allows WebSockets to reuse existing infrastructure and be used alongside traditional HTTP communication. The two protocols are complementary in most modern web applications.
In this lecture I want to show you a practical example of using Wireshark to show that the same server can open up and run numerous socket connections.
In summary, WebSockets are designed to be HTTP compatible by using the same ports, initiating connections through HTTP requests, and sharing some HTTP-like features. This compatibility enables WebSockets to seamlessly integrate with existing web infrastructure without interfering with the server's ability to handle other types of connections and requests.
I want to show you the WebSocket interface gives us access to various properties and methods.
In this lecture I'll show you:
that the event listeners I was talking about in the previous lecture - onopen, onmessage, onerror and onclose - are on the object
what the binaryType property is, and how the browser uses the bufferedAmount property
In this lecture I'll finish off showing you the extensions and protocols properties that are automatically attached to the WebSocket object.
The WebSocket API is event driven, and part of this process is firing off readyState events throughout the connection and closure process.
Before we can start looking at the events on the WebSocket API, we have a little more HTML and CSS to write. It won't be hard, I assure you.
The onopen event in WebSockets is fired when the WebSocket connection is successfully established and ready for communication. It indicates that the initial WebSocket handshake has completed, and the client and server can now exchange data bidirectionally. Upon receiving this event, the client can start sending messages to the server or wait for incoming messages, depending on the application's requirements. The onopen event is a crucial part of the WebSocket lifecycle, as it marks the beginning of the active communication phase between the client and server.
The onopen event object is of type Event, and it doesn't tell us much.
In this lecture I'll show you how to use the currentTarget.url property to dynamically update the user on the status of the websocket connection.
The message event in WebSockets is used to handle incoming data from the server. To listen for this event, you can either use the onmessage event handler property or the addEventListener() method:
The onmessage event in WebSockets is triggered when data is received from the server. This event handler property allows the client to process incoming messages, which can be either text or binary data, depending on the message type.
A quick lecture to style our table element
Last but not least, I want to discuss the remaining two event listeners we have not yet looked at - the close event and the error event.
They are closely related because usually a close event is fired when an error event is fired.
Some interesting facts about the close event that is fired by the WebSocket API.
It's now time to finish off listening for all 4 events of the WebSocket object - the "error" event.
The onerror event indicates something went wrong with the WebSocket connection, but you should examine the circumstances and listen for related events to determine the exact cause. It is (almost) always followed by the close event
In this lecture I will show you that often when there's an error, a close event soon fires afterwards. Often it is more useful to look inside of the close object than it is on the actual error object itself.
Although the onclose event gives us more detail, its important to remember that error events are designed to be vague to prevent hackers from exploiting the WebSocket protocol.
The readyState property in WebSockets provides information about the current state of the WebSocket connection. It is a read-only property that returns one of four possible values:
CONNECTING (0) - The connection is being established.
OPEN (1) - The connection is open and ready for communication.
CLOSING (2) - The connection is in the process of closing.
CLOSED (3) - The connection is closed or could not be opened.
In this lecture I want to add code to our server to show you all state's in action :)
The WebSocket API only gives us access to two methods.
That's right, only two - the send() and close() methods.
But if you will recall, when we inspected the socket object, we did not see those methods ... hmm ... so where are they coming from?
The WebSocket object in JavaScript provides a simple and straightforward API, with only two main methods available to developers: send() and close().
The CloseEvent and MessageEvent interfaces are both relevant for WebSockets because they are used to handle different types of events that can occur during the WebSocket communication.
A useful summary of these two objects
Stop, and let's look at what we are going to do next.
Let's go back to our project code and use the send() method to send data to our server after the user types in the textarea field.
The send() method takes a string or a binary data as an argument and sends it over the WebSocket connection. However, before calling the send() method, you need to ensure that the WebSocket connection is open by checking the readyState property of the WebSocket object. If the readyState is WebSocket.OPEN (which has a value of 1), it means the connection is open and ready for communication. If the connection is not open, you should wait for the open event to be triggered before sending messages.
The process of closing a WebSocket connection is called the "closing handshake".
I will explain in this lecture what this means.
he WebSocket closing handshake is the process of gracefully closing a WebSocket connection. It involves one party initiating the closing by sending a close frame with an opcode of 8. This close frame can optionally include a UTF-8 encoded reason string, up to 123 bytes, explaining why the connection is being closed. The other party then responds by sending its own close frame back, with the same reason string if provided. Once both parties have exchanged close frames, the WebSocket connection is considered closed, and no further data can be sent or received.
In this lecture, we will continue our project code and now turn our attention to allowing the user to terminate the WebSocket connection.
The socket.close() method is used to close a WebSocket connection. After this method is called, no more data can be sent or received over the WebSocket connection.
The close(code, reason) method take two optional arguments - a closure code and closure reason.
But remember that the reason is sent from one peer to the other.
I want to open up Wireshark and show you that the closing handshake occurs at the WebSocket protocol level as well as on the TCP level.
The WebSocket protocol and the WebSocket API are not the same thing.
Right now, if a WS connection closes, it is closed across the board. BUT I want you to amend the project code to handle these 3 scenarios:
the server initiates the closure of the WebSocket connection
the client initiates the closure of the WebSocket connection
the server is down and there's a network error
In this lecture I'll show you how to amend the code to handle different WebSocket closure codes
The JavaScript switch statement is used to perform different actions based on different conditions. It provides an alternative to long if-else chains, improving readability and maintainability, especially when handling multiple conditional branches.
Did you know that Live Server uses WebSockets to communicate between your client / browser and the VSC application for any changes that are made?
Well done for getting through a tough section in the course.
This section is going to be pretty epic, because it's going to dive into the specifics aspects of a WebSocket data frame.
Knowing the format of a WS data frame is crucial.
A solid understanding of the WS data frame structure aids in debugging issues related to data transmission. Developers can analyze the frames being sent and received to identify problems such as incorrect framing, data corruption, or unexpected behavior in real-time applications. This knowledge is vital for optimizing performance and ensuring a smooth user experience.
To appreciate and understand the WebSocket data frame, you need to start at the beginning.
In this lecture you will learn how HTTP/1.1 deals with handling and sending data over the wire.
In summary, the use of \r\n as the line ending in HTTP headers is a well-established convention that ensures compatibility, unambiguity, and consistency in the formatting of this important metadata. Removing or altering these line endings could lead to parsing errors and other issues when working with HTTP communications
HTTP/1.1 uses ASCII-based text for sending its header information.
HTTP/2 introduced, for the first time, the concept of "frames".
A quick binary joke
In order to use Wireshark to examine an HTTP/2 frame, the data needs to be decrypted. In this advanced bonus lecture I'll show you how to do this.
It's time to talk about the nitty-gritty in terms of how HTTP/2 defines its data frames.
Learning about HTTP/2 is important in the sense that WebSockets can work with HTTP/2.
In the previous lecture you've seen how a client and server negotiate an HTTP/2 connection. In this lecture I want to introduce you to how HTTP/2 compresses data before sending it over the wire.
I want to finish off talking about HTTP/2 by showing you how a frame looks and is defined by the RFC spec.
As you know, WebSockets package data into "frames" when sending data over the wire. this is not a new concept, as this is also done with HTTP/2.
WebSockets, like HTTP/2, are a framing protocol. This means that all data sent over a WebSocket connection is formatted into a specific "format" of binary numbers. This format is known as a frame.
There are certain code values that are given, in order to tell the receiver what frame it is dealing with.
One type of WebSocket frame is known as a connection close frame. This has an operational code of 0x8. I want to show you how this works in practice.
It is common for a heartbeat mechanism to be implemented into the WebSocket protocol. You don't want the server keeping its connection alive whne the client is no longer active (for example the user has closed their browser). therefore, there is a simple "ping/pong" mechanism that can be used to determine if both peers are still alive.
In this lecture I'll show you how to initiate a "ping" from the server, listen for the "pong" event, and implement some basic logic.
Have fun :)
The WebSocket ping/pong process is a mechanism used to keep the connection alive and detect disconnections.Ping frames are used to verify the remote endpoint is responsive and to keep the connection alive
With HTTP, you can have HUNDRES of bytes of header information. This is not uncommon.
But the good news is that WebSockets are extremely efficient. In fact, in many cases you're header size will be 2 bytes.
The maximum size of a WebSocket header frame is 14 bytes.
Unbelievable ... right?
Imagine that a WebSocket endpoint had to send all data inside of one frame?
This would be extremely inefficient, because it would mean that a peer would have to wait for the entire payload to be uploaded into their buffer memory before being able to send the frame.
For this reason, WebSockets allow frames to be broken up into smaller pieces - called "fragments" - to be sent to the receiver.
Reviews help others discover the course and provide valuable insights to the instructor. Even a brief comment can go a long way in supporting the creation of high-quality educational resources.
Just because a peer can send a fragmented message, it doesn't mean that the receiver can't start working with that data immediately.
This is a powerful feature of WebSockets.
In previous sections I mentioned that the HTTP/2 protocol introduced streaming, with stream ID's. These stream ID's help to differentiate different messages within a single stream.
But WebSockets don't have the concept of stream id's, so how do you guarantee that the data packets you receive are in order?
Great question. Let me tell you.
As you'v seen, there are 3 bits reserved inside of a WebSocket frame.
heh?
What are these reserve bits used for? Most lectures don't tell you. But I'm not like most lecturers. I'll explain how it works and give you a hypothetical example of how you could implement this in practice.
Although we have 6 different types of frames, the WebSocket protocol further breaks down frames into 2 broad categories, what's known as "control frames", and "non-control" frames.
The distinction between control frames and non-control frames in the WebSocket protocol is vital for ensuring efficient communication, maintaining connection integrity, and facilitating error management. This clear separation allows for a robust and reliable framework for real-time data exchange over the WebSocket connection.
We are busy discussing the WebSocket data frame structure. In this lecture, you will learn that there is 1 bit reserved to indicate whether the client has sent data to the server, in which case the mask bit needs to be set to 1.
In the WebSocket protocol, the client is required to mask the payload data of frames it sends to the server. This masking is a security feature designed to prevent certain types of attacks, such as cross-site WebSocket hijacking, by ensuring that the data is not sent in a straightforward, predictable format. The client applies a masking key to the payload data using a bitwise XOR operation, which obscures the original data. The server, upon receiving the masked data, can easily unmask it using the same key, allowing it to process the message correctly. This requirement is specific to client-to-server communication; servers do not mask their outgoing messages to clients.
Usually cache poisoning occurs with HTTP.
So then Clyde, why are you showing us an example of cache poisoning when this course is about WebSockets?
Great question.
Watch this lecture to find out.
Masking the payload data in WebSocket frames sent from the client to the server helps prevent cache poisoning attacks. By obscuring the data using a masking key, the client ensures that the payload is not sent in a predictable format. This makes it more difficult for an attacker to craft malicious data that could be cached by intermediaries, such as proxies or load balancers, and later served to other clients. The unpredictable nature of the masked data reduces the likelihood of successful cache poisoning attempts, as the attacker would need to guess the correct masking key to inject malicious content into the cache.
A summary of why client payloads are required to be masked.
It is mandatory that every message sent using WebSockets includes a payload header length inside of its frame.
You may be scratching your head around why the specification treats the numbers of 126 and 127 as special.
A payload length of 128 bytes is not a special or reserved number, so the normal logic of how the WebSocket protocol will wrap it inside of a data length header field will apply.
Some final comments on the payload length header
In summary, while the theoretical maximum size for a WebSocket frame is extremely large, practical limitations, including implementation constraints, network conditions, and application requirements, generally result in much smaller frame sizes being used in practice. Developers often opt for more manageable frame sizes to ensure efficient data transmission and resource utilization.
In an earlier section in this course I explained to you that TCP impose their own limit sizes on what a maximum segment size can be.
So the question becomes ... what happens if a WebSocket frame is larger than what the TCP protocol can handle?
Here is more advanced information about the payload length header
WebSockets are much more efficient at sending data over the wire compared with HTTP.
Proof is in the pudding - so let me show you.
Unlike HTTP, WebSockets have a persistent connection between client/server.
WebSocket broadcasting refers to the capability of a server to send the same message to multiple connected clients simultaneously. This means that the server can transmit a message to all known and connected clients at once, allowing for efficient and synchronized communication between the server and multiple clients
Well done for completing this section - seriously. You've come a long way and you are now a true WEBSOCKET GRANDMASTER.
A link to my webserver course.
A common misconception is that a server can only handle a limited number of concurrent WebSocket connections due to the number of available TCP ports (65,535). This is clearly not true. For instance, applications like WhatsApp and frameworks such as Phoenix have demonstrated the ability to manage millions of concurrent connections effectively.
Let me summarize what the practical limits are on how many concurrent websocket connections a client can make to a server.
In theory, if each client has a unique IP address and port, and the server can differentiate between them, there is no strict limit on the number of connections a WebSocket server can establish.
Short polling is a technique used in web applications where the client repeatedly sends HTTP requests to the server at regular intervals to check for new data or updates. Unlike long polling, where the server holds the request open until new information is available, short polling immediately returns a response, regardless of whether there is new data.
In summary, short polling with setInterval every 4 ms is an extremely inefficient and potentially problematic approach that should be avoided in modern web development. It can lead to server overload, wasted resources, inaccurate timing, and potential bugs. Use more appropriate real-time update mechanisms instead.
In long polling, the client sends an HTTP request to the server and the server holds that request open until new data is available or a timeout occurs. Once the server has new information, it responds to the client, which then processes the data and immediately sends another request to the server, effectively creating a continuous loop of requests and responses.
While polling can still be useful in scenarios where WebSocket support is not feasible, WebSockets are generally preferred for applications that require high-frequency updates, such as chat applications, gaming, and live data feeds. This transition from polling to WebSockets not only enhances performance but also reflects a broader trend in web development toward more efficient and responsive communication methods.
While WebSockets are powerful for applications requiring full-duplex communication (like chat applications or collaborative tools), SSE is a simpler and more efficient choice for scenarios focused on server-to-client updates. But hey, both can get the job done in a simple server-to-client model. The decision between SSE and WebSockets ultimately depends on personal preference.
In summary, while both SSE and long polling keep the HTTP connection open on the server, SSE is more efficient for continuous server-to-client data streaming, whereas long polling involves a cycle of repeated requests and responses.
While SSE is a great option for simpler applications requiring server-to-client updates, WebSockets are often preferred for more complex scenarios that demand bidirectional communication and efficient handling of various data formats.
The CONNECT method has been around since HTTP/1.1 (1999) and has evolved through HTTP/2 (2015) to HTTP/3 (2022), maintaining its core functionality while adapting to the changes in protocol architecture.
WebSockets can be bootstrapped over HTTP/2 using an extended CONNECT request, which allows a client to establish a WebSocket connection inside of a single HTTP/2 stream.
he server must first indicate support for the extended CONNECT method by sending a SETTINGS_ENABLE_CONNECT_PROTOCOL frame. Once the tunnel is established, the client can then initiate the WebSocket handshake, allowing for full-duplex communication over the HTTP/2 stream. This integration leverages HTTP/2's multiplexing capabilities while maintaining the WebSocket protocol's features.
You've come a long way and learnt a lot about how HTTP/2 works with WebSockets. I want to summarize it in a few words.
Many developers get confused about how to implement and use HTTP/2 or HTTP/3.
Let me put your mind to rest.
While HTTP/2 improves web performance by allowing multiple requests and responses to be sent over a single connection, it still follows a request-response model, which means that the client must wait for the server to respond to each request. In contrast, WebSockets provide a persistent, bidirectional connection that allows both the client and server to send and receive data at any time without waiting for requests. This makes WebSockets ideal for real-time applications, such as chat or gaming, where low latency and continuous data flow are essential. Thus, while HTTP/2 enhances traditional web communication, it cannot fulfill the real-time, interactive requirements that WebSockets are specifically designed to handle.
HTTP/2 operates on a request/response model, which means that communication between the client (like a web browser) and the server is structured around a series of requests made by the client and responses provided by the server.
With the introduction of RFC 9220, WebSockets can now be bootstrapped over HTTP/3.
However, as I'll explain, support for this on the server-side is extremely limited.
It's a little messy at the moment. The agreement between servers and browsers as to whether they can use HTTP/3 involves a combination of DNS records, HTTP response headers, and connection attempts. As support for HTTP/3 continues to mature, the process of negotiation will likely become more seamless, enhancing the performance and reliability of web connections.
How does HTTP/2 effect the use of WebSockets?
While HTTP/3 improves web performance, it does not fulfill the real-time communication capabilities that WebSockets offer.
While CORS applies to standard HTTP requests, WebSockets do not enforce CORS restrictions; however, they do send an Origin header that servers can validate to ensure that only requests from trusted origins are accepted
Scaling WebSockets is a complex challenge due to their stateful, long-lived nature. Unlike HTTP which uses short-lived connections, WebSockets require servers to maintain persistent connections and allocate resources like memory and CPU for an indefinite period of time per client.
Horizontal scaling by adding more server instances is also non-trivial, as each server only knows about the clients connected to it and must synchronize connection state and broadcast messages to all clients across the cluster. Solutions often involve introducing a pub/sub mechanism or shared data store to coordinate between servers, adding complexity.
Ultimately, while WebSockets enable powerful real-time functionality, delivering a scalable WebSocket infrastructure requires careful architectural design and often the use of a managed service to handle the challenges of scaling to millions of concurrent connections
You've covered a lot in this course, things like TCP/IP layers, handshakes (HTTP/1.1, HTTP/2, and HTTP/3), the WebSocket API as well as Node.js modules like "websocket" and "ws".
You know about the WebSocket data frame and how to get started in bit-parsing if you want to create your own WebSocket server.
You know about CORS, scaling and other techniques such as AJAX, polling and SSEs that can be used instead of WebSockets.
Well done my friend, well done.
A quick recommendation for what course you should do next.
*** THE BEST WEBSOCKETS COURSE IN 2026 ***
Pure WebSockets: Forget libraries! Learn to implement WebSockets from the ground up, harnessing their raw power for real-time applications.
Network Stack: Gain a solid understanding how WebSockets work with other network communication protocols like TCP and UDP.
HTTP Upgrade Process: Discover how WebSockets use the HTTP protocol to establish persistent connections, transitioning from HTTP to full-duplex communication.
Client-Side API Mastery: Get hands-on experience with the native WebSocket API, enabling you to send and receive messages in real time. CRAZY!
Server-Side Development: Learn how to use Node.js to implement WebSockets. Write server-side code that handles WS connections seamlessly.
This course is very informative, created with YOU in mind.
This WebSockets course gets YOU to the next level, and I am with you all the way. I have set out to provide you with the best WebSockets course available and I believe I achieved my goal.
Why WebSockets Are a Game Changer for Web App Developers
Imagine a world where your web applications can communicate instantly, just like a conversation between friends.
With WebSockets, this dream becomes a reality.
Unlike the aging HTTP protocol, which relies on a request/response model, WebSockets establish a persistent connection between the client and server, enabling real-time data exchange without the need for constant polling. In the real world, where apps are expected to deliver location-based services, real-time stock updates, and seamless live chat experiences, the limitations of HTTP become real. The HTTP request-response model, while effective for static content delivery, struggles to keep up with the demands of newest web applications.
WebSockets provides a solution that is both efficient and scalable. By maintaining a persistent connection, WebSockets reduce the overhead associated with multiple HTTP requests, leading to faster response times and improved user experiences.
THIS COURSE FOCUSES ON THE PURE WEBSOCKET PROTOCOL. VERY INFORMATIVE. WITHOUT LIBRARIES.
WHAT SKILLS ARE NEEDED?
You don't need any prior WebSocket knowledge.
I will take you through the WebSocket protocol from the basics through to the very advanced.
A basic knowledge of HTTP, HTML and JavaScript is required. Remember, JavaScript is important because in order to use WebSockets on the client, you have to use JavaScript to interact with the WebSockets API.
WEBSOCKETS ARE ESSENTIAL
Here’s why learning about WebSockets is not just great, but essential for any aspiring developer:
Instant Communication
With WebSockets, your applications can send and receive messages in real time. This means no more having to use HTTP to send a request to a server, just to find out if there is new data. This also means no more refreshing the page to see updates! Whether you’re building a chat app, a live sports scoreboard, or a collaborative tool for teams, WebSockets allow users to interact quickly, creating a more engaging experience.
Efficient Data Transfer
WebSockets provide a more efficient way to transfer data compared to traditional HTTP requests. As you'll learn in this course, WebSockets use a binary framing layer (called a binary data frame) to wrap all messages into. This reduces latency and improves performance, making your applications faster and more responsive. It reminds me of my nifty-fifty days on the scooter
Real-Time Features Made Easy
Want to add real-time features to your website? WebSockets make it simple! From live notifications to instant updates, you can enhance user experience dramatically. Imagine users receiving alerts as soon as new content is available or seeing live updates in a collaborative document. With WebSockets, these features are possible.
Future-Proof Your Skills
As web technologies evolve, understanding WebSockets positions you to stay ahead of the curve. Many modern apps rely on real-time communication, and being proficient in WebSockets will make you a more versatile and sought-after developer. Plus, you’ll be ready to work with the latest web standards like HTTP/2 and HTTP/3, which further enhance WebSocket performance. By understanding how WebSockets work, you'll be able to quickly learn other technologies like WebTransport and WebRTC, enhancing your skillset even more.
Build Projects That Stand Out
In a competitive job market, having real-time capabilities in your projects can set you apart. Employers are looking for developers who can create dynamic, interactive applications. Mastering WebSockets will empower you to build standout projects that showcase your skills and creativity.
Join a Thriving Community
WebSockets are widely used in various industries, from gaming to finance. By learning this technology, you’ll become part of a vibrant community of developers who are pushing the boundaries of what’s possible on the web. Collaborate, share ideas, and stay inspired as you explore new ways to leverage real-time communication.
Conclusion
WebSockets are more than just a technical skill; they are a gateway to creating engaging, interactive web experiences. By mastering WebSockets, you’ll unlock the potential to build applications that not only meet user expectations but exceed them. Get ready to transform your development journey and make your mark in the world of real-time web development.
This course takes YOU on an complete journey through the intricacies of HOW WebSockets work, and WHAT they are.
You'll learn to harness the power of this cutting-edge technology without relying on libraries. I like to use native code. I believe this is the best way to learn.
This course is designed for developers or project leaders who are eager to build dynamic, interactive applications that require real-time data exchange, such as chat applications and team management tools.
What You'll Learn In This WebSockets Course
In this comprehensive course, you will explore the following key topics:
Pure WebSockets: Forget libraries! We’ll focus on the raw power of WebSockets, teaching you how to implement them from the ground up. You'll gain a deep understanding of how to create real-time applications without any dependencies on the client-side.
Understanding the Network Stack: Delve into the TCP/IP model and learn about the four layers of the network stack. This foundational knowledge will empower you to understand how WebSockets operate within the broader context of network communication.
The HTTP Upgrade Process: Discover how WebSockets leverage the HTTP protocol to establish a persistent connection. We’ll break down the upgrade process step by step, ensuring you grasp how WebSockets transition from HTTP to a full-duplex communication channel. WebSockets can be bootstrapped to work inside of a single stream inside of HTTP/2 and also HTTP/3, and this is discussed in detail in this course.
WebSocket API on the Client Side: Get hands-on experience with the native WebSocket API, learning how to create and manage connections directly from the client side. You'll be able to send and receive messages in real time, enhancing user engagement and interactivity.
Server-Side Development with Node.js: Transition to the server side as you implement WebSocket functionality using Node.js. This course will guide you through writing server-side code that can handle WebSocket connections and deliver real-time updates seamlessly. A few server-side modules are used, such as the pure "websockets" module, as well as the "ws" module.
WebSocket Data Frames: We'll unpack the structure of WebSocket data frames and learn how data is organized and transmitted. Understanding binary data framing is crucial for optimizing performance. It's also useful if you ever want to create your own custom server-side WebSocket API where you'll have to bit-parse the WebSocket binary frame.
Exploring HTTP/2 and HTTP/3: Learn how WebSockets can work alongside the latest HTTP protocols, including HTTP/2 and HTTP/3. We’ll discuss the advantages of these protocols and how they enhance the efficiency of WebSocket communication.
ADVANCEC CONCEPTS. You'll learn about XOR'ing, masking, how to calculate client WebSocket keys, and the server accept values, you'll learn how to base64 encode data, you'll learn how to examine data packets, how to scale WebSockets with proxy servers, how CORS relates to WebSockets, how cache poisoning works, and a WHOLE LOT MORE!!!
Meet Your Instructor: ME
Clyde is a coding enthusiast who has been immersed in the world of computers since the age of 7, in the early 1990's.
With years of experience in web development and a passion for teaching, Clyde brings a wealth of knowledge and practical insights to the course. His engaging teaching style and real-world examples will make complex concepts accessible and enjoyable.
Enrol now
Don’t miss this opportunity to elevate your web development skills and unlock the potential of real-time communication with WebSockets.
Right this second, your competitors are learning how to become better web developers.
Web development is a blazing hot topic at the moment. But you have a distinct advantage. This course offers memorable learning topics, actionable tactics and real-world examples.
Get ready to transform your projects into interactive experiences that captivate users and make you money!
Let's get crackin'