
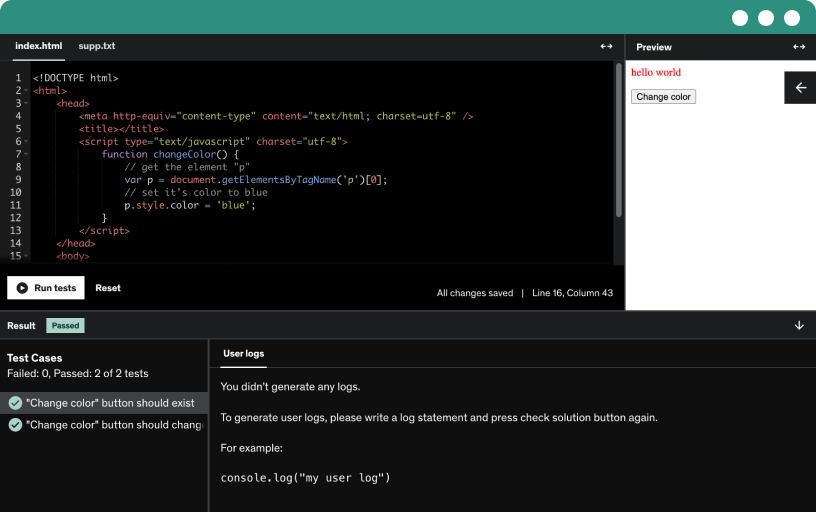
This course includes our updated coding exercises so you can practice your skills as you learn.
See a demo
Welcome to your Python programming journey! In this opening lesson, you'll write your very first lines of code by creating a professional Python docstring - the foundation of well-documented programs.
What You'll Learn:
How to create module docstrings using triple quotes (""")
Why documentation is crucial for professional Python development
The structure and components of effective docstrings
How docstrings appear at the top of Python files to describe their purpose
What You'll Do: You'll open VS Code and type the complete docstring that introduces our 4th Dimensional Entity Interaction Simulator. This isn't just any documentation - it's a scientific exploration that sets the stage for everything we'll build together. You'll learn how the triple quote syntax works and why Python treats docstrings specially.
Key Concepts Covered:
Triple quote syntax (""") for multi-line strings
Module-level documentation standards
Professional code organization from day one
How docstrings help other programmers (and future you!) understand your code
Prerequisites Reminder: Before starting this lesson, ensure you have VS Code, Python, Git, and GitHub properly installed and configured on your system. We'll be working directly in VS Code throughout the course and committing our progress with Git after each lesson - but we won't be covering the installation process.
By the End of This Lesson: You'll have written your first Python code, understand the importance of documentation, and be ready to commit your initial docstring to your GitHub repository. This foundational skill will make all your future Python projects more professional and maintainable.
Next Steps: After completing this lesson, you'll commit your docstring to Git and move on to importing Python modules - the building blocks that give our programs powerful capabilities.
Get introduced to PEP 257, the official Python Enhancement Proposal that establishes docstring conventions used by professional developers worldwide. This brief overview explains what PEP 257 is, why it matters for writing professional Python code, and where to find the complete guidelines. After completing this lecture, you'll understand the importance of following standardized documentation practices and know where to reference PEP 257 when you're ready to dive deeper into professional Python development standards.
Time to expand your Python toolkit! In this lesson, you'll learn one of the most fundamental programming concepts - importing modules - while adding the power of randomness to your 4D simulator project.
What You'll Learn:
How to import Python modules using the import statement
What modules are and why they're essential for programming
The import random syntax and how it works
How importing gives your programs access to pre-built functionality
What You'll Do: You'll add your first import statement to your growing project by typing import random at the top of your file. This single line unlocks an entire library of random number generation capabilities that we'll use throughout our 4D entity simulator to create unpredictable, lifelike behavior in our higher-dimensional beings.
Key Concepts Covered:
Module importing fundamentals with the import keyword
Understanding Python's extensive standard library
How import random makes random functions available
The concept of extending Python's capabilities through modules
Professional code organization with imports at the top of files
Real-World Application: The random module is crucial for our 4D simulator because real entities would behave unpredictably. We'll use randomness to simulate realistic 4D entity positions, movements, and interactions - just like how quantum mechanics shows us that the universe itself has inherent randomness at the fundamental level.
Development Workflow: As always, you'll be working in VS Code and will commit this addition to your Git repository. Each import we add builds toward our complete 4D entity interaction system.
By the End of This Lesson: You'll understand how Python modules work, know how to import them, and have the random module ready to generate the unpredictable behavior that makes simulations realistic. You'll also understand why imports go at the top of Python files and how they extend your programming capabilities.
Looking Ahead: With random imported, you're ready to learn about the math module next, which will provide the mathematical functions needed for our 4D geometric calculations and transformations.
Power up your mathematical capabilities! In this lesson, you'll import Python's math module and discover the mathematical functions that will drive the complex 4D calculations in your entity simulator.
What You'll Learn:
How to import the math module using import math
Essential mathematical functions and constants available in the math module
Why mathematical precision matters in scientific programming
How the math module differs from basic Python arithmetic operations
What You'll Do: You'll add import math as your second import statement, building on your growing understanding of Python modules. This import unlocks powerful mathematical functions like trigonometric calculations, logarithms, and important constants like π (pi) that are essential for 4D geometric transformations and entity positioning.
Key Mathematical Functions You'll Access Throughout the Course:
math.pi - The precise value of π for geometric calculations
math.sin(), math.cos() - Trigonometric functions for rotations
math.sqrt() - Square root calculations
Mathematical constants with scientific precision
Advanced functions for complex geometric operations
Real-World Application: The math module is crucial for our 4D simulator because higher-dimensional geometry requires precise mathematical calculations. We'll use these functions to calculate 4D rotations, measure distances in hyperspace, and perform the geometric transformations that allow 4D entities to appear in our 3D world.
Scientific Context: Just as real physicists and mathematicians use precise mathematical tools to study higher dimensions, your simulator will use the math module to perform accurate calculations that represent genuine 4D mathematical principles.
Development Workflow: Continue working in VS Code, adding this import below your random import. You'll commit this progress to Git, building your module imports systematically as professional developers do.
By the End of This Lesson: You'll have the math module imported and understand how it provides the mathematical foundation for scientific computing. You'll be ready to perform precise calculations needed for realistic 4D geometric simulations.
Next Steps: With both random and math modules imported, you're ready to add time-based functionality that will control the dynamic, evolving nature of your 4D entity interactions.
Master the dimension of time in your programming! In this lesson, you'll import Python's time module and learn how to control timing, create delays, and manage time-based operations in your programs.
What You'll Learn:
How to import the time module using import time
Essential time functions for program control and measurement
The difference between time measurement and time delays
How timing functions enable realistic simulations and user experiences
What You'll Do: You'll add import time as your third import statement, continuing to build your module foundation. This import provides crucial timing capabilities that will make your 4D simulator feel realistic and responsive, allowing entities to move and interact over time rather than instantaneously.
Key Time Functions You'll Access Throughout the Course:
time.time() - Get current timestamps for duration calculations
time.sleep() - Create pauses and delays in program execution
Time measurement for performance monitoring
Temporal control for simulation pacing
Real-World Application: The time module is essential for our 4D simulator because realistic entities don't just appear - they evolve and move through time. We'll use timing functions to create smooth animations, pace entity interactions, and simulate the passage of time in higher-dimensional space. Just like how physicists study how objects move through spacetime, your simulator will track entities moving through 4D space over time.
Simulation Context: Think of time as the fourth dimension in traditional physics (before we add our spatial 4th dimension). Your entities will exist in a 5-dimensional space: 4 spatial dimensions plus time. The time module helps you control this temporal aspect professionally.
Development Workflow: Continue in VS Code, adding this import after your math import. You'll commit this systematic progress to Git, building a complete set of essential modules that professional Python developers rely on.
By the End of This Lesson: You'll have the time module imported and understand how to control program timing. You'll be ready to create delays, measure durations, and manage the temporal aspects of your 4D entity interactions.
Next Steps: With random, math, and time modules imported, you're ready to add datetime functionality for precise timestamp creation and formatting in your scientific simulations.
Learn advanced importing with specific functionality! In this lesson, you'll discover a new way to import Python modules and gain access to precise timestamp creation for your scientific simulator.
What You'll Learn:
The from module import specific_function syntax
How from datetime import datetime differs from import datetime
Why we sometimes import specific functions instead of entire modules
Creating and formatting timestamps for scientific data logging
What You'll Do: You'll add from datetime import datetime as your fourth import statement, learning a more targeted import approach. This specific import gives you direct access to the datetime function without needing to type the full module path each time - crucial for creating precise timestamps that will mark when 4D entities are detected and observed.
Key Concepts Covered:
Selective importing with from...import syntax
The difference between import datetime and from datetime import datetime
Direct function access without module prefixes
Professional code organization with specific imports
Timestamp creation for scientific data logging
Real-World Application: In our 4D simulator, precise timestamps are essential for scientific accuracy. Just like real physics experiments that record exact measurement times, your simulator will timestamp every entity detection, interaction attempt, and dimensional observation. This creates a scientific log of all 4D phenomena.
Import Strategy: This lesson introduces you to strategic importing - sometimes you want the whole module (import math), and sometimes you want direct access to specific functions (from datetime import datetime). Professional developers choose the approach that makes their code cleaner and more readable.
Development Workflow: Continue building in VS Code, adding this import after your time import. Notice how this import style differs from your previous three imports. You'll commit this progression to Git, building a complete import foundation.
By the End of This Lesson: You'll understand selective importing and have direct access to datetime functionality. You'll be ready to create precise timestamps that give your 4D entity interactions scientific credibility and professional data logging.
Next Steps: With all essential modules imported, you're ready to begin building the core structure of your simulator by creating your first Python class!
Enter the world of Object-Oriented Programming! In this pivotal lesson, you'll create your first Python class and learn how to organize code like professional developers do.
What You'll Learn:
What Python classes are and why they're essential for organizing code
The class keyword and proper class naming conventions
How classes serve as blueprints for creating objects
The fundamentals of Object-Oriented Programming (OOP)
What You'll Do: You'll type class FourthDimensionalSimulator: and create the foundation of your entire 4D entity system. This single line transforms your program from a simple script into a sophisticated, object-oriented application. You're creating a "blueprint" that will contain all the methods and data needed to simulate 4D entities.
Key Concepts Covered:
Class definition syntax with the class keyword
PascalCase naming convention for classes (FourthDimensionalSimulator)
The colon (:) that begins the class definition block
How classes group related functions and data together
The concept of creating reusable, organized code structures
Real-World Application: Think of your class like a scientific instrument blueprint. Just as physicists design complex detection equipment to study particles, you're designing a FourthDimensionalSimulator class that will detect, track, and interact with 4D entities. The class will contain all the methods needed to generate entities, calculate their 3D cross-sections, and attempt communication.
Professional Development: Classes are fundamental to professional Python programming. Major applications, scientific tools, and enterprise software are built using object-oriented principles. By learning classes now, you're developing the same organizational skills used by professional developers.
Development Workflow: Continue in VS Code, adding this class definition after your imports. Notice how this begins a new level of code organization. You'll commit this architectural foundation to Git, marking the transition from simple scripts to object-oriented programming.
By the End of This Lesson: You'll have created your first Python class and understand the basic structure of object-oriented programming. You'll be ready to add an __init__ method that will set up your simulator when it's created.
Next Steps: With your class defined, you're ready to learn about the special __init__ method that initializes your simulator and sets up all the data structures needed for 4D entity management.
Learn the most important method in Python classes! In this essential lesson, you'll create the __init__ method that automatically runs every time your FourthDimensionalSimulator is created.
What You'll Learn:
What the __init__ method is and why every class needs it
The special "dunder" (double underscore) method syntax
How __init__ acts as your class constructor
The self parameter and what it represents in object methods
What You'll Do: You'll type def __init__(self): inside your class, creating the initialization method that will set up your simulator's initial state. This method runs automatically whenever someone creates a new FourthDimensionalSimulator object, preparing all the data structures and settings needed for 4D entity simulation.
Key Concepts Covered:
The def keyword for defining methods within classes
Double underscore methods (__init__) and their special meaning
The self parameter as the first argument in all instance methods
How __init__ serves as the constructor for your objects
Method indentation within class definitions
Real-World Application: Think of __init__ like the startup sequence for a scientific instrument. When physicists turn on a particle detector, it runs calibration routines, initializes sensors, and prepares data storage systems. Your __init__ method will do the same - setting up entity databases, detection equipment specifications, and 4D mathematical frameworks.
The Self Parameter: The self parameter is crucial - it refers to the specific instance of your class being created. When you create a FourthDimensionalSimulator, self becomes that particular simulator object, allowing the method to set up its unique data and state.
Development Workflow: Continue in VS Code, adding this method definition inside your class with proper indentation. Notice how methods inside classes are indented further than the class definition itself. You'll commit this foundational method to Git.
By the End of This Lesson: You'll understand how __init__ methods work and have the constructor ready for your simulator. You'll be prepared to add the initialization code that sets up all the data structures your 4D entity system needs.
Next Steps: With your __init__ method defined, you're ready to learn about Python comments and begin adding the detailed setup code that will prepare your simulator for 4D entity management.
Make your code speak for itself! In this essential lesson, you'll learn how to add comments to your Python code using the hash symbol (#) and discover why documentation is crucial for complex scientific programming.
What You'll Learn:
How to create Python comments using the hash symbol (#)
Why Python ignores everything after the # symbol on a line
Best practices for writing helpful, meaningful comments
How comments explain complex concepts that code alone cannot convey
What You'll Do: You'll add your first inline comment: # Real 4D geometric forms based on mathematical research to document the sophisticated mathematical foundation of your simulator. This comment explains that your upcoming data isn't arbitrary - it's based on genuine 4D geometric research and mathematical principles.
Key Concepts Covered:
The hash symbol (#) syntax for creating comments
How Python's interpreter ignores commented text
Inline comments that appear on the same line as code
Professional commenting practices for scientific code
The difference between code (what) and comments (why)
Real-World Application: In scientific programming, comments are especially important because complex mathematical concepts need explanation. When other researchers (or future you) read this code, the comment immediately clarifies that your 4D forms aren't fictional - they're based on real mathematical research into higher-dimensional geometry.
Professional Development: Professional developers use comments to explain complex logic, document assumptions, and provide context that makes code maintainable. In scientific computing, comments often reference research papers, mathematical principles, or experimental procedures.
Development Workflow: Continue in VS Code, adding this comment above the line where you'll define your dimensional forms data. Notice how comments make your code more readable and self-documenting. Commit this documentation practice to Git.
By the End of This Lesson: You'll understand how to add comments to your code and appreciate their importance for documenting complex scientific concepts. You'll be ready to build the sophisticated data structures that your comments will help explain.
Next Steps: With commenting skills established, you're ready to learn about Python variables as references and the self.attribute_name syntax for creating object attributes that belong to specific instances of your class.
Discover the truth about variables in Python! In this fundamental lesson, you'll learn that Python variables aren't containers that store data - they're labels that point to and reference data in memory.
What You'll Learn:
The correct understanding of variables as labels and references, not storage containers
How the assignment operator (=) creates references between names and data
Why thinking of variables as "pointers" leads to better Python programming
The self.dimensional_forms syntax for creating object attributes
Different types of variables: local, global, instance, and class variables
What You'll Do: You'll create your first object attribute by typing self.dimensional_forms = and learn how this creates a label that will point to your 4D geometric data. This isn't just storing information - you're creating a reference system that allows your simulator object to access and manage complex 4D mathematical structures.
Key Concepts Covered:
Variables as labels that reference data, not containers that hold data
The assignment operator (=) creating reference relationships
Object attributes using self.attribute_name syntax
Instance variables vs. class variables vs. local variables vs. global variables
Why self. creates variables that belong to specific object instances
The difference between the variable name and the data it references
Real-World Application: Think of variables like scientific reference cards in a research lab. When physicists create an index card that says "Particle Data - located in Lab Storage Unit 5," they're not putting the data inside the card - they're creating a reference system that points to where the actual data is stored. Similarly, self.dimensional_forms will be a reference label that points to your collection of 4D geometric data.
Memory Concept: Understanding that variables are references helps you write better code and avoid common mistakes. When you assign self.dimensional_forms = some_data, you're creating a label that points to the data in memory, not copying the data into a variable box.
Development Workflow: Continue in VS Code within your init method, adding this object attribute definition. You'll notice how self. creates instance variables that belong to your specific simulator object, separate from any other simulators you might create. Commit this conceptual foundation to Git.
By the End of This Lesson: You'll understand the true nature of Python variables as references, know the different types of variables in Python, and have created your first instance variable using self. dot notation. You'll be ready to assign complex data structures to this reference label.
Next Steps: With your variable reference created, you're ready to learn about Python dictionaries - the powerful key-value data structure that will store your complex 4D geometric data and organize it in a way that's both mathematically meaningful and easily accessible.
Master Python's LEGB Rule - the systematic order Python uses to resolve variable names. Learn how Local, Enclosing, Global, and Built-in scopes determine which variable Python accesses, preventing naming conflicts and improving code predictability in complex programs.
Understand the fundamental truth about Python variables and scope resolution! In this essential lesson, you'll master the LEGB Rule - Python's hierarchical system for resolving variable names across different scopes. This knowledge is crucial for writing predictable, maintainable code and avoiding common variable scoping mistakes that plague many Python developers.
What You'll Learn:
The LEGB hierarchy: Local → Enclosing → Global → Built-in scope resolution order
How Python searches through scopes systematically to find variable definitions
Why understanding scope prevents unexpected variable behavior and debugging nightmares
The difference between variable assignment and variable lookup in different scopes
How nested functions create enclosing scopes that follow LEGB rules
When and why Python creates new variables vs. modifying existing ones
Best practices for variable naming to avoid scope-related conflicts
What You'll Do: You'll trace through complex code examples where multiple variables share the same name across different scopes, learning to predict exactly which variable Python will access. You'll examine x = 5 in local scope, x = 10 in enclosing scope, x = 15 in global scope, and understand how Python's LEGB rule determines which x gets used in each context, creating a mental model for scope resolution.
Key Concepts Covered:
Local scope: Variables defined inside functions and their precedence
Enclosing scope: How nested functions access variables from outer functions
Global scope: Module-level variables and their accessibility across functions
Built-in scope: Python's predefined names like print, len, and str
The global and nonlocal keywords for modifying scope resolution behavior
Variable shadowing and how inner scopes can hide outer scope variables
Common scoping pitfalls and how LEGB prevents unexpected behavior
Real-World Application: Your LEGB mastery mirrors how professional software manages variable scope in complex applications. Just like how enterprise systems use hierarchical naming conventions to prevent conflicts between different modules and teams, Python's LEGB rule ensures your variables are resolved predictably. Understanding LEGB is essential for debugging production code, working with nested functions, and writing maintainable applications that scale.
Memory Concept: Think of LEGB like a systematic search through filing cabinets. When Python needs a variable, it searches Local cabinet first, then Enclosing cabinet, then Global cabinet, and finally Built-in cabinet - stopping at the first match it finds. This systematic approach prevents ambiguity and ensures consistent behavior.
Development Workflow: Practice identifying scope boundaries in your VS Code environment by examining function definitions, nested structures, and variable assignments. You'll learn to mentally trace Python's LEGB search pattern, making your code more predictable and easier to debug. Master this fundamental concept that underlies all Python variable behavior.
By the End of This Lesson: You'll confidently predict variable resolution in any Python code, understand why certain variables are accessible while others aren't, and write code that leverages scope hierarchy effectively. You'll avoid common scoping mistakes and be prepared to work with complex nested functions and modular applications that rely on proper scope management.
Discover Python's most powerful data structure! In this fundamental lesson, you'll learn about dictionaries - the key-value storage system that will organize all your 4D geometric data in a logical, accessible way.
What You'll Learn:
What dictionaries are and how they store data in key-value pairs
Dictionary syntax using curly braces {}
How keys act as labels to access their associated values
The fundamental concept of associative data storage
What You'll Do: You'll create your first dictionary by typing the opening self.dimensional_forms = { and begin building a sophisticated database of 4D geometric forms. This dictionary will store real mathematical data about tesseracts, hyperoctahedrons, hyperspheres, and Klein bottles - each with their own properties and characteristics.
Key Concepts Covered:
Dictionary creation syntax with {}
Key-value pair relationships (key: value)
String keys like "tesseract" and "hypersphere"
How dictionaries organize related information
The concept of structured data storage
Real-World Application: Think of dictionaries like a scientific catalog system. Just as a physics lab might have a catalog where "Equipment_A" points to detailed specifications, your dictionary uses names like "tesseract" to point to complete mathematical descriptions. Each 4D form becomes a catalog entry with all its properties organized and accessible.
Scientific Context: Your dictionary will contain authentic mathematical data about 4D shapes studied by real mathematicians like Charles Howard Hinton (who coined "tesseract") and Ludwig Schläfli (who classified 4D polytopes). This isn't fictional data - it's based on genuine higher-dimensional geometry research.
Development Workflow: Continue in VS Code, creating this dictionary structure within your __init__ method. Notice how the opening brace begins a complex data structure. You'll commit this foundational data organization to Git.
By the End of This Lesson: You'll understand how dictionaries work and have begun creating the mathematical foundation for your 4D simulator. You'll be ready to add the detailed properties that make each 4D form unique and scientifically accurate.
Next Steps: With dictionaries introduced, you're ready to learn about Python strings - the text data type that will store the names, descriptions, and mathematical properties of your 4D geometric forms.
Master the art of text in programming! In this essential lesson, you'll learn about Python strings - the data type that handles all text information in your programs, from 4D shape names to mathematical descriptions.
What You'll Learn:
What strings are and how they represent text data in Python
String syntax using quotation marks (both single and double quotes)
How strings work as dictionary keys and values
The fundamental role of text data in programming
What You'll Do: You'll work with strings throughout your 4D geometric data, including names like "tesseract" and "hypersphere", descriptions like "4D hypercube - most basic 4D shape", and mathematician names like "Charles Howard Hinton (1904)". You'll see how strings make your data human-readable and meaningful.
Key Concepts Covered:
String literal syntax with quotation marks
Using strings as dictionary keys ("tesseract", "hyperoctahedron")
Using strings as dictionary values (descriptions and properties)
Text data as a fundamental programming data type
How strings make data readable and meaningful
Real-World Application: In scientific programming, strings are crucial for labeling, describing, and documenting data. Your 4D simulator uses strings to name geometric forms, store mathematical descriptions, credit historical mathematicians, and provide human-readable information about complex mathematical concepts.
Scientific Context: The strings in your dictionary aren't arbitrary - they contain real mathematical terminology and historical information. "Tesseract" is the actual term for a 4D hypercube, "Ludwig Schläfli (1850s)" credits the mathematician who first classified these shapes, and descriptions like "4D cross-polytope, dual of tesseract" use precise mathematical language.
Text Data Organization: You'll see how strings work seamlessly with dictionaries to create organized, searchable data. Dictionary keys are strings that act as labels, while string values provide detailed information about each 4D geometric form.
Development Workflow: Continue in VS Code, examining how strings appear throughout your dictionary structure. Notice how quotation marks define text data and make it distinct from numbers or other data types. Commit your understanding of text data to Git.
By the End of This Lesson: You'll understand how strings work in Python and appreciate their role in making data meaningful and accessible. You'll be ready to work with lists - the data structure that will organize multiple related items.
Next Steps: With strings mastered, you're ready to learn about Python lists - the ordered collections that will store multiple cross-section types and other sequential data in your 4D simulator.
Organize multiple items with Python's ordered collections! In this essential lesson, you'll learn about lists - Python's way of storing multiple related items in a specific sequence.
What You'll Learn:
What lists are and how they store multiple items in order
List syntax using square brackets []
How lists maintain sequence and allow duplicate items
The difference between lists (ordered) and dictionaries (key-value pairs)
What You'll Do: You'll work with lists in your 4D geometric data, specifically the "cross_section_types" lists like ["cube", "rectangular_prism", "rhombus", "point"] for tesseracts. These lists show the different 3D shapes that appear when a 4D entity intersects our 3D world, ordered from most complete to least complete manifestation.
Key Concepts Covered:
List creation syntax with square brackets []
Storing multiple string items in sequence
How lists preserve order (first item, second item, etc.)
Using lists as dictionary values
The concept of ordered collections vs. key-value storage
Real-World Application: In your 4D simulator, lists represent progression sequences. When a tesseract moves through 3D space, it appears as different shapes depending on how it intersects our dimension - first as a complete cube, then a rectangular prism, then a rhombus, and finally just a point. The list order represents this natural progression from complex to simple manifestations.
Scientific Context: These cross-section sequences are based on real 4D geometry. When higher-dimensional objects pass through lower dimensions, they create predictable sequences of shapes. Your lists capture this mathematical reality, organizing the possible manifestations in scientifically accurate order.
Data Organization: Lists work perfectly with dictionaries - while dictionary keys give you categories ("tesseract", "hypersphere"), lists within those categories give you ordered sequences of related items. This creates rich, hierarchical data structures.
Development Workflow: Continue in VS Code, examining how lists appear within your dictionary structure. Notice how square brackets create ordered collections that complement your key-value dictionary organization. Commit this data structure understanding to Git.
By the End of This Lesson: You'll understand how lists work and their role in organizing sequential data. You'll be ready to learn how lists and dictionaries work together to create complex, nested data structures.
Next Steps: With lists mastered, you're ready to learn about nested data structures - how lists can exist inside dictionaries to create sophisticated, multi-layered information systems.
Build sophisticated data architectures! In this lesson students are encouraged to finish building out the dictionaries and lists in the 4D program in their VS Code environment up until the point where they have reached the print lines which will be covered in the next Python lesson. The python code file supporting this is available in this lesson's resources section.
Connect your program to the world! In this essential lesson, you'll learn about Python's print() function - the fundamental tool that allows your programs to communicate with users by displaying text in the VS Code terminal.
What You'll Learn:
What the print() function does and how it displays text output
Print function syntax with parentheses and string arguments
How print() creates visible communication between your program and users
The concept of program output and user interaction
What You'll Do: You'll add two print statements to your simulator: print("4th Dimensional Entity Interaction Simulator Initialized") and print("Based on real mathematical and consciousness research"). These statements will display welcoming messages when your simulator starts up, confirming successful initialization and highlighting the scientific foundation of your program.
Key Concepts Covered:
Print function syntax: print("message")
String arguments within print statements
How print() outputs text to the VS Code terminal
Program communication and user feedback
Sequential print statements for multiple lines of output
Real-World Application: Just like real scientific instruments display status messages when they initialize, your 4D simulator uses print statements to communicate its operational status. These messages confirm that the complex data structures have been set up correctly and the system is ready for 4D entity detection and analysis.
Development Context: The print() function is essential for debugging, user communication, and program monitoring. Throughout your simulator, print statements will provide feedback about entity detections, simulation progress, and research findings - making your program interactive and informative.
VS Code Terminal Integration: When you run your program in VS Code, these print statements will appear in the integrated terminal, creating a professional scientific interface that keeps users informed about the simulator's operations and discoveries.
Development Workflow: Continue in VS Code within your __init__ method, adding these print statements after your data structure initialization. You'll see immediate feedback when you run your program. Commit this user communication capability to Git.
By the End of This Lesson: You'll understand how print() works and be able to create programs that communicate with users. You'll be ready to learn about string repetition - a technique for creating visual separators and formatted displays.
Next Steps: With print() mastered, you're ready to learn about Python string repetition using the asterisk (*) operator to create visual formatting elements like separator lines.
Create professional visual formatting with ease! In this creative lesson, you'll learn how Python's multiplication operator (*) works with strings to create repeated patterns for visual formatting and professional program displays.
What You'll Learn:
How the asterisk (*) operator repeats strings when used with text
The concept of string multiplication for pattern creation
How "=" * 60 creates a line of 60 equal signs
Professional formatting techniques for program output
What You'll Do: You'll add print("=" * 60) to create a visual separator line in your simulator's output. This single line of code generates a professional-looking border of 60 equal signs, creating clear visual separation in your program's display - just like the formatting you see in professional scientific software and research tools.
Key Concepts Covered:
String repetition syntax using the * operator
How "=" * 60 multiplies the equals sign 60 times
Visual formatting and program presentation
Creating consistent, professional-looking output displays
The concept of operators working differently with different data types
Real-World Application: Professional scientific software uses visual separators to organize complex output data. Your simulator's separator line creates clear sections in the terminal output, making it easier to read simulation results, entity data, and research findings. This mirrors the formatting standards used in real scientific computing applications.
Visual Design Principles: The 60-character separator line creates an appropriate width for terminal displays, providing clear visual breaks without overwhelming the content. This length works well across different screen sizes and terminal configurations, following professional software design standards.
Mathematical Elegance: This demonstrates how programming concepts mirror mathematical operations - just as you can multiply numbers, Python allows you to "multiply" text to create repeated patterns. It's a elegant example of how programming extends mathematical thinking into text manipulation.
Development Workflow: Continue in VS Code, adding this separator line after your initialization messages. Run your program to see the immediate visual impact of professional formatting. Commit this formatting enhancement to Git.
By the End of This Lesson: You'll understand string repetition and be able to create professional visual formatting for your programs. You'll be ready to learn about function parameters and how to pass data to your program's methods.
Next Steps: With string formatting mastered, you're ready to learn about Python function parameters - how to pass specific data to functions to control their behavior and customize their operations.
Transform Your Programming Skills While Building Something Extraordinary
Have you ever bought a model airplane kit for an F-22 Raptor? You start with a specific, exciting project in mind, follow step-by-step instructions, and end up with that exact impressive model. This Python course works the same way - we're building one specific, mind-blowing project: a 4th Dimensional Entity Interaction Simulator. By the end, you'll have that exact program completed, running beautifully in VS Code, and ready for your GitHub portfolio.
What Makes This Course Different
Instead of jumping between random programming exercises, we focus on one fascinating 4D physics and hyperspace project that naturally teaches you everything you need to know about Python, data science, and analytics. You'll learn fascinating concepts about tesseracts, hyperspheres, and higher-dimensional geometry while mastering essential programming concepts, statistical analysis, and data processing techniques. Every line of code serves a purpose in our scientific simulation.
Comprehensive Learning in Bite-Sized Videos: While our 98 sections total only 3.5 hours of video content (each video averages 2 minutes), this is a fully hands-on course designed for deep learning. Short, focused videos mean you spend more time coding and less time watching. In the videos and assignments, you'll build the 4D physics simulation alongside me in VS Code. Additionally, you'll spend extensive time coding in Udemy's browser-based coding exercise lab, working through data science challenges, AI-preparation exercises, and advanced programming problems. With coding exercises, quizzes, and assignments in every section, expect to invest weeks mastering these concepts through practical application - the video time is just the beginning of your learning journey.
You'll naturally absorb essential Python idioms and Pythonic patterns throughout the project. Learn the elegant for key, value in dictionary.items() iteration style, create concise list comprehensions with conditional filtering, and use modern f-string formatting for clean output. You'll discover common patterns like max(0, min(1, value)) for data clamping, random.choice(list(dict.keys())) for dictionary sampling, and proper exception handling with specific error types. These aren't just syntax rules - they're the conventional, readable ways that experienced Python developers write code, making your programs both functional and professionally styled.
Beginner to Advanced Python Learning
Starting from absolute zero programming knowledge, we'll build your skills systematically through hands-on practice:
Python Fundamentals You'll Master
Core Programming Concepts:
Variable creation and assignment - storing data efficiently
Assignment vs comparison - understanding the difference between = and ==
Strings and string manipulation - working with text data
Built-in functions - len(), abs(), max(), min() for data analysis
Python commenting - writing clean, professional code
Python docstrings - documenting your functions like a pro (PEP 257 standards)
Module importing - leveraging Python's powerful libraries
Function Programming:
Function definition - creating reusable code blocks
Parameters and arguments - passing data between functions
Return statements - getting results back from functions
Default parameters - creating flexible, reusable functions
Function invocation patterns - professional code organization
Mathematical Operations & Data Processing:
Mathematical operations - multiplication, division, and complex calculations
Mathematical constants (π, e) - working with scientific data
Type conversion - seamlessly handling different data types
Precision formatting - controlling decimal places for scientific accuracy
Statistical calculations - averages, sums, and data aggregation
Data Science & Analytics Foundations
Statistical Analysis & Data Processing:
Sum() and mathematical aggregation - analyzing collections of data
Generator expressions - efficient data processing for large datasets
Counter patterns - tracking and analyzing data frequencies
Statistical data validation - ensuring data integrity
Average calculations with advanced aggregation techniques
Probability logic and random sampling for data science applications
Data Collection & Management:
Data collection patterns - gathering information systematically
Data cleaning and validation techniques
Scientific data documentation and logging
Real-time data processing and analysis
Data visualization preparation and formatting
Advanced Data Structures and Manipulation
Dictionary Mastery:
Dictionary creation - storing complex entity data
Dictionary key access - retrieving specific information
Nested dictionaries - organizing multi-layered data structures
Advanced dictionary methods - .values(), .items(), .keys(), .get()
Dictionary comprehensions with conditional logic
Dynamic key creation and variable-based access
Safe data access patterns preventing KeyError exceptions
List & Collection Operations:
List operations - managing collections of data
List comprehensions - creating filtered lists with conditional logic
The append() method - adding new data dynamically
List indexing and slicing - accessing specific data points
Tuple creation and unpacking - immutable data structures
Collection iteration patterns - processing large datasets efficiently
Control Flow and Advanced Logic
Conditional Programming:
If/elif/else statements - making decisions in code
The 'if not' pattern - checking for missing data
The 'not in' operator - validating data existence
Nested conditional statements - handling complex logic
Boolean logic with 'and'/'or' - combining multiple conditions
Ternary operators - concise conditional assignments
Loop Mastery:
For loops - repeating operations efficiently
While loops - running simulations until conditions are met
Range() function - creating number sequences for loops
Break statements - exiting loops when conditions are met
Dictionary iteration - looping through key-value pairs
Enumerate() - accessing both index and value in loops
Loop unpacking - extracting multiple variables simultaneously
Professional Error Handling & Debugging
Robust Exception Management:
Try/except blocks - handling errors gracefully
Specific exception types - ValueError, KeyboardInterrupt handling
Exception variables - capturing error details with "as e"
Finally blocks - ensuring cleanup code always runs
Input validation and error prevention
Graceful program termination and user interaction
Essential Python Modules for Data Science
Scientific Computing Libraries:
Random module - generating realistic simulation data and statistical sampling
Math module - performing complex mathematical calculations
Time module - managing simulation timing and performance measurement
Datetime module - tracking when events occur and data logging
Object-Oriented Programming Foundations
Class Design & Implementation:
Class creation - organizing complex data and behaviors
Object instantiation - creating entity instances
The 'self' concept - understanding object methods
Method chaining - connecting operations elegantly
Dot notation - accessing object properties and methods
Professional code organization patterns
Advanced Programming Patterns
Professional Development Practices:
Code organization - structuring large, maintainable programs
Modular programming - creating reusable components
Data validation - ensuring information accuracy and type safety
String processing - advanced text manipulation and cleaning
F-string expressions - complex formatting with embedded calculations
Augmented assignment operators - efficient data modification
Real Scientific Content & AI/ML Preparation
This isn't toy programming - you're building legitimate simulation software that demonstrates concepts essential for data science and AI development. Learn fascinating concepts about:
Mathematical & Scientific Modeling:
4th-dimensional objects - tesseracts, hyperspheres, Klein bottles and their properties
Physics theories - string theory, extra dimensions, and brane world models
Consciousness research - how brains process spatial information
Mathematical projections - how 4D objects would appear in 3D space
Statistical modeling and probability distributions
Data analysis patterns used in machine learning
Preparation for Advanced Topics:
Data structures essential for machine learning algorithms
Statistical analysis patterns fundamental to data science
Random sampling and probability concepts used in AI
Mathematical operations crucial for neural networks
Data cleaning and validation techniques for real-world datasets
Your Learning Journey: VS Code + Browser-Based Coding Lab
In VS Code: Working alongside me in the videos and assignments, you'll build the complete 4D Entity Interaction Simulator using professional development workflow. With your environment already set up as a prerequisite, we dive straight into coding the physics simulation from day one.
In Udemy's Coding Exercise Lab: You'll spend significant time in the browser-based coding environment, working through data science challenges, AI-preparation exercises, and advanced programming problems that complement the main physics project. Every concept is reinforced through practical application - when we need random number generation for entity movement in VS Code, you'll explore advanced statistical sampling in the coding lab. When we calculate 4D rotations in the main project, you'll practice mathematical operations and data analysis techniques in additional exercises.
What You'll Build
Your finished 4D Entity Interaction Simulator will demonstrate advanced programming concepts including:
Core Simulation Features:
Generate mathematical 4D entities (tesseracts, hyperspheres, etc.)
Calculate how they appear as 3D cross-sections in our reality
Simulate their movement through 4-dimensional space
Attempt communication using mathematical sequences
Data Analysis & Analytics:
Track entity consciousness levels and interaction patterns
Generate comprehensive statistical reports on dimensional phenomena
Analyze entity behavior patterns using data science techniques
Process and visualize complex multi-dimensional data
Implement real-time data logging and analysis systems
Professional Programming Features:
Provide an interactive menu system for exploration
Robust error handling and user input validation
Professional documentation and code organization
Modular, extensible codebase ready for further development
Portfolio-Ready Project
By completion, you'll have a sophisticated Python program that demonstrates advanced programming concepts, data science techniques, and statistical analysis capabilities while exploring cutting-edge scientific theories. This isn't just a learning exercise - it's an impressive portfolio piece that showcases your ability to handle complex programming challenges, process data scientifically, and build maintainable, professional-quality software.
Who This Course Is For
Complete programming beginners who want to learn Python properly from the ground up
Science enthusiasts interested in higher-dimensional mathematics and data analysis
Students looking for an engaging way to master programming fundamentals and data science
Career changers building a programming portfolio with real-world applications
Aspiring data scientists who want solid Python foundations
Anyone who wants to create something truly unique while learning professional development practices
What You Need
VS Code installed and configured
Git and GitHub account set up and ready to use
Curiosity about mathematics, programming, and data analysis
Commitment to hands-on learning through extensive coding practice
No prior programming experience required
Note: Environment setup (VS Code, Git, GitHub) is a prerequisite - we jump straight into coding!
Course Structure: Comprehensive Learning Through Practice
Every section builds naturally on the previous one through our unique structure:
109 focused video lessons averaging 2 minutes each (3.5 total hours)
106 comprehensive quizzes testing your understanding of each concept
93 browser-based coding exercises - Data science, AI-prep, and advanced programming challenges in Udemy's coding lab
VS Code development - Build the complete 4D physics simulation alongside me
Real-world assignments applying concepts to the 4D simulation project in VS Code
Complete solution code available throughout for reference and comparison
We start with basic concepts like variables and gradually progress to complex object-oriented programming, data analysis, and statistical processing. The 4D physics and hyperspace theme keeps everything connected and engaging - you're not just learning isolated programming concepts, you're building toward an extraordinary scientific simulation while mastering the foundations of data science through complementary coding exercises.
Short videos mean more time coding and less time watching. You'll spend weeks mastering these concepts through practical application in both VS Code (main project) and the browser coding lab (additional challenges), with each brief lesson introducing concepts you'll immediately apply through extensive hands-on practice.
Your Programming Future
By the end of this course, you'll understand not just Python syntax, but how to think like a programmer and analyze data like a scientist. You'll have created something that most intermediate programmers would struggle to build, and you'll have the confidence to tackle any Python project, data analysis challenge, or even begin your journey into machine learning and AI.
You'll emerge with skills directly applicable to:
Data science and analytics roles
Scientific programming and research
Software development positions
Machine learning and AI preparation
Statistical analysis and modeling
Ready to step into the 4th dimension and master Python programming, data science, and professional development practices? Enroll now and let's build something amazing together.