
Your cart is empty.
Keep shoppingWeb Forms - Build & Master HTML Web forms In 2026
Highest Rated
2,863 students
Web Forms - Build & Master HTML Web forms In 2026
An advanced Web Forms course for everyone! Master URL encoding, form elements, GET vs POST, form validation and more
Created byClyde Matthew
Last updated 1/2026
English
GermanEnglish
What you'll learn
- Why web forms are the MONEY PAGES of websites
- Build web forms from scratch with pure native HTML, CSS and JavaScript
- Learn how to use AJAX to submit form data to a server
- Learn about HTTP and how it relates to HTML
- Tons of practical examples and fun challenges to make learning easy
- Learn how to send form data to a web server
- Master client-side validation by using both HTML and JavaScript
- Understand how to create custom error messages with the ConstraintValidation
- Practical examples - build many dynamic front-end forms with me
- I am here to support you and bring you to the next level, step-by-step
- Learn how to extract form key:value pairs using the URLSearchParams() API
- Have fun mastering advanced front-end website development
- Design and create forms to get the response you desire, be successful
- Understand the CSS Box Model, the CSS Grid and pseudo classes and pseudo elements
- Learn about the different form controls available
- Master the <input> types like text, password, email, tel, color, date, number and more!
- Master non <input> form controls like textarea, output, progress & meter bars, and more!
- Learn why the browser implement URL Encoding when a user submits a form
- Understand URL encoding
- Understand how a server receives data from a form
- Learn how to start a PHP server and receive form data (real example)
- Learn how to start a Node server and receive form data (real example)
- Understand why a user can type international characters into your form even though URL encoding specifies it has to be ASCII characters
- Learn how to build envied forms with elements like <datalist> and <select>
- Learn how to view HTTP request header and body information
- Learn about the <form> attributes (such as action, method, autocomplete, novalidate, enctype, REL, and more)
- Understand why a GET request appends the form data to the URL
- Learn why the browser appends the form data to the body of the HTTP request on a POST request
- Doing help learning and we work through lots of examples together
- Understand multipart/form-data and why do you need it when uploading files
- Understand the difference between radio buttons and checkboxes
- Understand how to listen for events on form controls (such as the input or change event)
- Build dropdown controls, progress bars, meter bars, and a whole bunch more
- Learn how to listen for different types of events, such as submit, input, change, etc.
- Understand the ACTION and METHOD attributes
- Understand the accept-charset (ISO vs ASCII) attribute
- Learn about Numerical Character References
- Easily master the original <input> types (such as password, text, hidden and more)
- Learn how to build functional forms using <fieldset>, <legend> and <inputs>
- Learn the 2 ways to create submit buttons on forms
- Be an expert on the newer <input> types like email, search, tel, number, date and more!
- FUN CHALLENGES throughout the course (where we build custom toggles, checkboxes, color pickers and more)
- From beginner to expert (advanced +)
- Gain the knowledge to achieve and lead
- Gives you depth of knowledge to boost your ability and confidence
Explore related topics
Coding Exercises
This course includes our updated coding exercises so you can practice your skills as you learn.
See a demo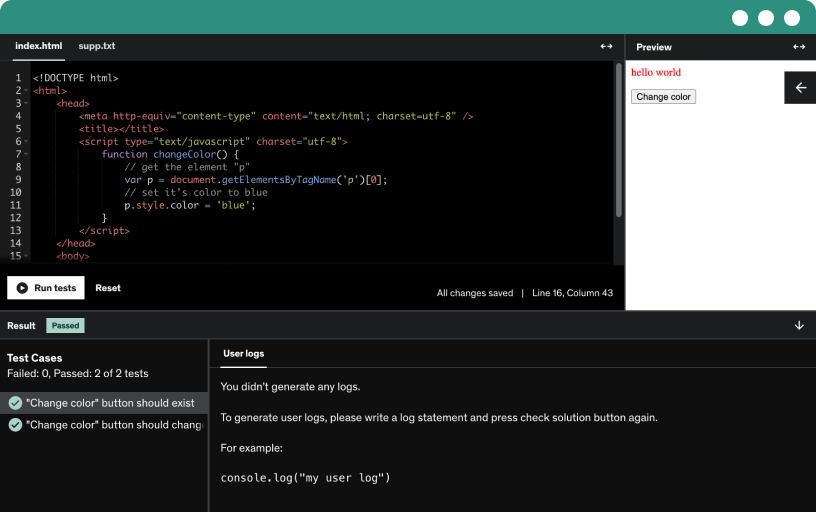
Course content
14 sections • 260 lectures • 22h 4m total length
Requirements
- A desire to become an informed full stack web developer
- Basic HTML, CSS and JavaScript will be helpful, but not absolutely necessary
- A Mac or PC is required as you need to code alongside me to learn effectively
Description
*** THE ULTIMATE COURSE ON WEB FORMS AND HTML FORM ELEMENTS ***
HTML Forms: Master the HTML <form> element and attributes to create user-friendly interfaces.
Advanced Concepts: Understand URL encoding, date formatting, and the intricacies of the infamous input element.
Master Client-Side Validation: Understand progress bars, toggles, checkboxes, ranges, and tons more.
Handle Data Like a Pro: Learn how to grab and process form data on the server side using Node.js and PHP.
Strap in my dear student, it's going to be a fun ride.
Let Me Share My Form-Building Expertise with You!
Understanding how forms work is essential for becoming a skilled front-end developer. This course will empower you to implement your creative, dynamic ideas into your web projects. Mastering forms is a critical step toward full-stack development, giving you the control and knowledge to create effective user interactions. In this course, we’ll take a deep dive into web forms and their functionalities. Here are some key questions we’ll explore:
Why do we need to wrap our form elements within form tags?
How can you include a progress bar in your forms?
What are the best practices for customizing toggles and checkboxes?
Where does the data go once a user clicks the submit button?
How can you perform validation on your forms, both natively and using JavaScript?
How can users upload files through your forms?
What happens to the data once it arrives at the server?
By addressing these questions and more, you'll gain the skills needed to build advanced forms that enhance user engagement and experience. You'll also understand the full-stack process involved in handling form data effectively.
What You Will Learn
The fundamentals of HTML forms and their importance in web development.
You will understand at an advanced level how to create forms natively, and how powerful they can be in increasing conversions.
Techniques for creating dynamic forms that enhance interactivity.
Strategies for validating user input on both client and server sides.
Best practices for customizing form elements to fit your design needs.
From understanding the structure of forms to implementing validation techniques, you’ll gain the skills necessary to create dynamic and user-friendly web applications.
THE NITTY GRITTY OF WEB FORMS?
A web form is also known as an HTML form.
It’s a place where users can enter data that’s then sent to a server for processing. Web forms allow users to place orders on your site, to provide their name and email address to sign up for a newsletter, or to sign up as a member to your site and so forth.
What’s really great about web forms is that there is no “one size fits all”. You can use your artistic flare, and personal business acumen to create web forms with a particular length, format, content type and appearance.
By doing this course, you’ll be able to improve your web form usability, which will ultimately enhance user experience and get website visitors excited about completing your form and converting.
Why is this course so important?
Forms which are on point present an opportunity for a company to grow and capture loyalty.
A form can often be both a marketing tool and a necessity. A form that puts the user at ease, that evokes feelings of trust, will get filled out far more often than a form which looks (or is) complicated and confusing.
After completing my “Advanced Forms” course, you will be knowledgeable, confident and the “go-to” person for forms.
Let me share my form building skills with you
Understanding how forms work will equip you to become an awesome front-end programmer. Learn how to implement your creative, different and dynamic ideas into your website. Master forms and you’re half way to becoming a full stack web developer. Take control through understanding. Delivering a perfect, interactive and functional form is challenging.
In this course, I take a deep-dive into explaining web forms and how they work. Why do we need to wrap our form within <form> tags? How can you include a progress bar in a form? How can you customize a toggle or checkbox? Where does the data go once a user clicks on the submit button? How can you perform validation on your form? How can a user upload a file? What happens once the data arrives at the server? What are the different types of events we can listen to on forms? By understanding these questions, and many more in the course, you will be able to build advanced forms and better yet, understand the full stack process! In other words, you will be able to create dynamic forms that improve user engagement and experience.
WHAT THIS COURSE COVERS
This course is huge and comprehensive, from basics to advanced
This course will give you solid fundamentals and practicals regarding forms. It can be taken alone (you don’t need to do any other course) to achieve your goals. You will emerge from this course with an advanced understanding and practical experience with building forms. It will take you to the point where you will understand what method (GET or POST) to use when sending form data, how to define where the data goes, how to perform advanced client-side validation (checking errors on the form before it is sent to the server), how to write custom pattern validation rules (using regular expressions), how to run servers and how to view all HTTP request information. This is awesome knowledge. This course will captivate you and catapult you to the next level and set you well on your way to becoming a true Grandmaster in front-end form web development.
By the end of this course, you'll be able to “speak” and “walk” FORMS by gaining an understanding of how you can build it, manipulate it and style it in meaningful and practical ways. We dig deeper in every lecture, and this course has many bonus lectures which extend your knowledge base and test your skills.
Why should you learn so much about forms?
A web form is one of the best ways to get input from prospective clients and indirectly establish a relationship with them. The time you spend in bringing the user to your website should be matched with the time spent in perfecting the user experience with your web forms. It is surprising to see so many sites these days contain complex and frustrating web forms that cause a negative experience.
Ultimately, a web form allows your visitors to get in contact with you and to send information, such as an order, a catalogue request, or even a query, which is passed on to your database.
Can you begin to see how important forms are and how their use can be escalated?
*** THE MOST comprehensive FORMS course ***
Successful programmers know more than rote learning a few lines of code.
They also know the fundamentals of how HTML code works behind the scenes.
This is particularly true when it comes to building forms.
If you’re wanting to become a full stack developer, you need to know, really know, how forms work. You need to understand how the browser URL encodes form data, how the browser sends data to a URL that you specify, and how to perform validation to ensure the user does not submit invalid data.
A unique approach
You will learn "why" things work and not just "how". Understanding advanced topics about forms (lURL encoding, accept-charset, multipart/form-data, regex, etc) is important as it will give you infinite possibilities and upskill you. Armed with this knowledge, you’ll be able to create forms that are tailored to your needs, and allow the form data to get submitted to a server via AJAX. You will be able to create forms that are customizable by the user (for example, if the user wants to change the color of the form theme). You can create a control on a form that displays the progress completion of the form and displays messages to the user along the way.
Can you begin to see how pivotal forms are and how important having knowledge about forms is?
How is this course different?
There are lots of courses that focus on web development. Many never get into the detail about how the HTML FORM element works behind the scenes – a skill that every full-stack developer needs to master in order to utilize potential.
In this course, I focus on the more advanced topics of true web development when it comes to forms. This includes understanding what all of the attributes on the <form> element mean, understanding the different <input> types in detail, what URL encoding is, and how data is sent over the wire to a server.
Practice makes perfect
Theory is theory … but there’s nothing like getting behind your computer and typing in code. That’s why we will be coding, laughing and pulling out our hair together as we code real life websites and exercises during this course.
I love practical examples, which is why we build multiple forms in this course, starting in section 1.
Is this course for you?
This course is designed for anyone eager to enhance their web development skills, regardless of your current level.
If you find yourself in any of the following categories, this course is perfect for you:
Aspiring Developers: You want to explore the world of programming and learn how to create dynamic and interactive web forms.
Front-End Enthusiasts: You’re looking to gain a deeper understanding of HTML forms and how they can improve user engagement.
Future Full-Stack Developers: You wish to understand how front-end JavaScript interacts with back-end technologies like Node.js and PHP.
Curious Learners: You have a basic grasp of web forms but want to dive deeper into advanced concepts like validation, URL encoding, and data handling.
Developers Seeking Mastery: You’ve taken other courses but feel you haven't fully grasped the intricacies of form elements and client-server interactions.
WHY START NOW?
Right this second, your competitors are learning how to become better web developers.
Web development is a blazing hot topic at the moment, and in the foreseeable future. But you have a distinct advantage. This course offers memorable learning topics, actionable tactics and real-world examples.
Lets get started!
What do you get?
Lifetime access to all tutorial videos. No fees or monthly subscriptions.
Q&A support.
Quizzes, coding challenges, a test and assignments to help you learn.
I’ve allowed you to download all of my lectures for offline viewing.
Let's get excited about becoming a professional web developer, and to be able to confidently apply it to your own websites.
Let's get crackin'
Who this course is for:
- Anyone looking to enhance their coding skills
- Everybody who wants to master HTML web forms
- Everybody who knows about web forms but wishes they knew more
- YES: This course is for beginners too. Aimed at people new to the world of web development. No previous JavaScript experience is necessary
- NO: This course is NOT only for beginners. It is a complete beginner to advanced master course that is suitable for intermediates who know the basics and have an idea about how to build forms, but want to dig deeper to know its inner workings. Knowledge is power, as they say. Experienced students sometimes prefer to skip a section that they are very familiar with
- YES: This course is for someone wanting to be an informed professional, to be expert and confident in the entire front-end development process when it comes to building forms
- Those who want to learn modern coding without third party libraries and frameworks
- Those interested in building their own frameworks, or being better able to learn from the source code of other well-known frameworks and libraries
- Those wanting to start using frameworks (like Angular or Node) that are heavily reliant on JavaScript and knowing the process flow of front-end web development
- Those who have some knowledge of forms, but little in-depth know-how about how it all works behind the scenes, and how to practically implement best practices in their websites to stay in front