Your cart is empty.
Keep shopping
Teach on Udemy
Turn what you know into an opportunity and reach millions around the world.
Learn MoreLearn to Code with Ruby
Learn to Code with Ruby
Learn to program in the Ruby programming language. Newly updated with support for Ruby 3.2. Complete beginners welcome!
Bestseller
Created byBoris Paskhaver
Last updated 1/2026
English
English [Auto],Spanish [Auto],
What you'll learn
- Learn to program in the Ruby programming language
- Master common Ruby objects like Strings, Arrays, Hashes, and more
- Solve popular coding challenges and algorithms with Ruby
- Dive into object-oriented programming including classes and more
Explore related topics
Coding Exercises
This course includes our updated coding exercises so you can practice your skills as you learn.
See a demo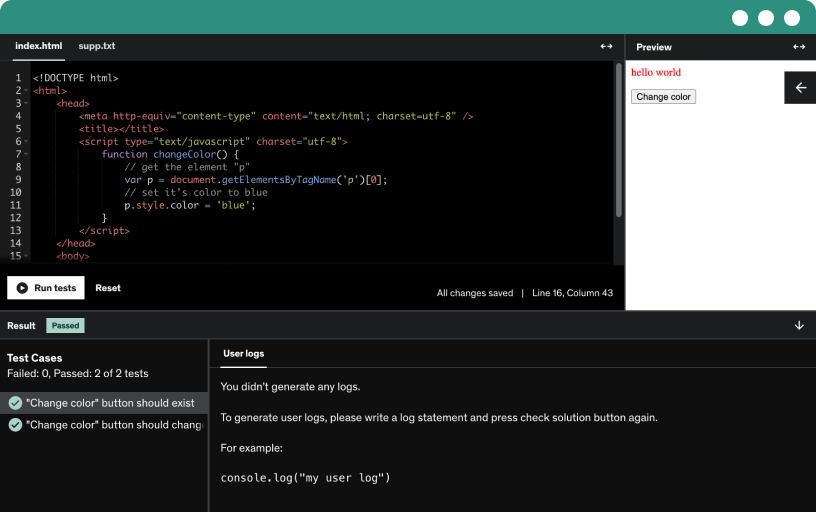
Course content
33 sections • 363 lectures • 42h 50m total length
- Welcome to Ruby [SLIDES]8:09
Welcome to Learn to Code with Ruby! In this lesson, we introduce the language, its history, and some of its advantages/disadvantages relative to other languages.
- Object-Oriented Programming [SLIDES]5:41
Learn about object-oriented programming (OOP), a paradigm that views a software program as a collection of objects that interact with one another. Practice applying OOP principles to real-world objects.
- Ruby Installation Instructions0:55
In this lesson, we discuss how to install the latest version of Ruby.
- macOS - Access and Work with the Terminal9:46
In this lesson, we access the Terminal application on a Mac, which is used to issue text commands to the operating system. We explore popular commands like pwd, ls, and cd to traverse directories and explore their contents.
- macOS - Install XCode Command Line Tools3:22
In this lesson, we'll install the XCode Command Line Tools, a technical prerequisite for installing Ruby on a macOS computer.
- macOS - Install Homebrew3:05
In this listen, we install Homebrew, a software package manager for macOS. We run Homebrew from our Terminal and use it to download/install applications.
- macOS - Install rbenv7:39
In this lesson, we install the rbenv Ruby version manager, which enables us to download and install multiple versions of Ruby on the same machine.
- macOS - Install Ruby6:38
In this lesson, we use rbenv to install Ruby on our macOS operating systems. We target the latest version of Ruby at the time of installation.
- macOS - Install VSCode Text Editor4:42
In this lesson, we download Visual Studio Code, the free text editor in which we'll be writing our Ruby code throughout the course. We also discuss the benefits of using such a tool.
- Windows - Access and Work with PowerShell9:26
In this lesson, we introduce the PowerShell command-line application and some common commands including ls for listing files/folders and cd for directory navigation.
- Windows - Figure Out if System is 32-bit or 64-bit1:19
In this lesson, we use our system settings to determine if our Windows version is 32-bit or 64-bit.
- Windows - Install Ruby6:36
In this lesson, we walk through the process of installing Ruby on a Windows machine. We also use Powershell to confirm the language was installed properly.
- Windows - Install VSCode Text Editor3:39
In this lesson, we download Atom, the text editor in which we'll be writing our code throughout the course. We also discuss the benefits of using such a tool.
- Install VSCode Extensions4:51
Download and install the Ruby and Code Runner VSCode extensions for the Visual Studio Code text editor.
- Add VSCode to Your System PATH1:05
In this lesson, we'll add VSCode and its corresponding Terminal command, code, to our system PATH, which enables the Terminal to locate the software from any directory on our computer.
- Download Course Materials1:56
Download the course materials for the course in a single zip file.
- Write First Ruby File and Run with Code Runner8:55
In this lesson, we write our first Ruby program, which outputs the text Hello World to the screen.
- Write First Ruby File and Run with Terminal or PowerShell4:31
In this lesson, we learn how to run our Ruby file using the ruby program from our Terminal.
- Interactive Ruby (IRB)5:04
In this lesson, we dive into Interactive Ruby (IRB), a REPL (Read Evaluate Print Loop) program for playing around with the Ruby programming language.
- Section Review [SLIDES]3:52
In this optional lesson, we'll review the concepts introduced in this course section including:
Installing Ruby
Running a Ruby file from then Command Line
Running a Ruby file with Code Runner
- The puts Method10:09
In this lesson, we'll learn more about the puts method, which outputs text to the Terminal/output when the program runs. The puts method adds a line break to the end of the output. Like other methods in Ruby, it can be invoked with and without parentheses. We can also use commas to output multiple elements with the put method; Ruby will separate each one with a line break.
- Escape Characters8:13
In this lesson, we'll introduce escape characters, which are special symbols we can use in a Ruby string. Escape characters add special effects like line breaks, tabs, and symbols/characters to a string. We escape the expected pattern of output, which is Ruby outputting the literal characters that we've typed.
- The print Method3:08
In this lesson, we introduce the print method, another way to output text to the screen. The print method is similar to puts but it does not add a line break to the end of the output.
- The p Method6:22
In this lesson, we learn about the p method, which outputs a "technical" version of the object/output. For example, the p method will print a string with double quotes around the content. It exists primarily for the benefit of developers.
- Comments6:30
In this lesson, we'll learn how to use comments to ask Ruby to ignore specific lines of code. We create a comment with a hashtag/octothorpe (#) symbol. We can place the hashtag at the beginning of a line or after a line of valid Ruby code. Comments enable developers to leave explanations, metadata, annotations, diagrams, jokes, and more in their program.
- Outputting Text
- Multiline Comments2:12
In this lesson, you'll how to create multiline comments using =begin and =end. Ruby will treat any content between the two keywords as part of the comment.
- Integers and Floating Point Numbers4:14
In this lesson, we'll discuss the differences between integers and floating-point numbers and their syntax in Ruby.
- Basic Arithmetic in Ruby8:47
In this lesson, we'll learn the symbols for mathematical operations including addition, subtraction, multiplication, division, and modulo.
- String Concatenation3:30
In this lesson, we'll learn how to concatenate (join) two strings together using the + operator.
- Intro to Exceptions: TypeError8:01
In this lesson, we'll learn about errors/exceptions in Ruby including TypeError, which Ruby raises when we provide an invalid type of object for an operation.
- Output and Arithmetic
- Section Review [SLIDES]7:09
Review everything we learned in this section of the course including output methods, comments, exceptions, concatenation, and more.
- Variables [SLIDES]9:43
In this lesson, we'll learn about variables. A variable is a name we assign to a value in our program that is subject to change over time.
- Declaring Variables11:07
In this lesson, we practice declaring various variables in a .rb file and using them in expressions throughout the program. The variable syntax declaration begins a name, then an equal sign, and the value/object to assign that name to.
- Variable Declaration
- Coding Exercise Solution: Variable Declaration0:13
See the solution to the previous coding challenge.
- Exceptions: NameError3:14
In this lesson, we'll learn about the NameError exception, which Ruby raises when it cannot recognize a name in your program.
- Parallel Variable Assignment3:41
In this lesson, we'll learn how to declare multiple variables and provide initial values to them on a single line.
- Swapping Variable Values3:54
In this lesson, we'll learn how to swap two variables (invert the values they store).
- Assignment Shortcuts7:47
In this lesson, we'll learn several shortcuts to perform an operation on a variable's value and assign the result back to the original variable.
- Constants5:36
In this lesson, we'll learn to declare constants in Ruby. A constant is a name for a value that will not change over the program's execution.
- Section Review [SLIDES]6:14
Review everything we've learned in this course section including variables, constants, parallel variable assignment, and more!
- Intro to Object Methods11:21
Welcome to the next section of the course! In this lesson, we begin our exploration of methods on various Ruby objects. A method is a message we can send to an object. A method produces a return value, which represents the final output of the method.
- Integer Methods2:59
Learn about some methods on Ruby's Integer object including next, succ, and pred.
- Intro to Object Methods
- Coding Exercise Solution: Intro to Object Methods0:12
See the solution to the previous coding challenge.
- Exceptions: NoMethodError2:25
Learn about the NoMethodError exception, which Ruby raises when we invoke a method that does not exist on an object.
- Method Chaining5:39
Method chaining is a sequence of successive method invocations. Each invocation returns an object upon which we invoke the next method in line.
- The inspect Method3:43
The inspect method converts an object to a string representation for debugging. The inspect method is available on all Ruby objects. Ruby’s p method invokes the inspect method on an object behind the scenes.
- The nil Object6:07
Learn about nil, a special Ruby object that represents nothingness, blankness, or the absence of a value.
- String Interpolation9:21
String interpolation is the process of injecting content into a string. That content can be anything from a variable to a Ruby expression. Within a string's double quotes, write a hashtag followed by curly braces. Write the variable or operation within the braces.
- The gets Method11:25
In this lesson, we’ll learn about the gets method, which collects input from the user. Like puts or p, gets is a top-level method. We also discuss how to use the chomp method to chop off the newline character from the end of a string.
- The class Method7:26
Practice using the class method, which is available on any Ruby object and returns the class from which the object is made. The class is a blueprint for an object. Another way to think about the class is like the template or schematic. It is the abstract foundation from which a concrete object is created. We call the object an instance of a class.
- Methods to Convert Objects10:31
In this lesson, we’ll learn how to use methods like to_i, to_f, and to_s to convert an object from one type to another (to strings, to floats, to integers, etc).
- Section Review [SLIDES]9:25
Review the concepts introduced in this course section including object methods, the nil object, the gets method, the class method, conversion methods, and more.
- Intro to Booleans7:36
In this lesson, we'll learn about a new object type called a Boolean, which represents either true or false
- The Equality Operator10:32
In this lesson, we'll explore the equality operator ( == ), which tests whether two objects are equal.
- The Inequality Operator3:48
In this lesson, we use the inequality operator ( != ) to test whether two objects are NOT equal.
- Mathematical Comparisons3:14
In this lesson, we'll learn various mathematical symbols available in Ruby including <, <=, >, and >= for greater-than/less-than logic.
- Predicate Methods5:01
In this lesson, we'll introduce predicate methods, which are methods that return a Boolean. These methods always end with a question mark.
- Methods with Arguments (include?)8:30
In this lesson, we'll learn how to pass an argument to a method. An argument is an input we pass to a method that customizes how the method will run.
- Methods with Multiple Arguments5:49
In this lesson, we'll practice passing multiple arguments to a method with the between? method. The between? method validates whether a number falls between a range.
- Arithmetic Methods6:16
In this lesson, we'll dive behind the scenes to see how Ruby translates numeric symbols like + into equivalent method calls on objects.
- Float Methods6:31
In this lesson, we'll learn about exclusive methods on Float objects including floor and ceil.
- Section Review [SLIDES]4:16
Review the concepts we've learned in this section including Booleans, predicate methods, equality and inequality operators, new object methods, and more.
- Intro to Methods10:13
In this lesson, we'll introduce the syntax for declaring a method in Ruby. A method is a reusable procedure that encapsulates a piece of logic; the intent is to capture the logic once and then reuse the method throughout the program.
- Parameters and Arguments8:21
In this lesson, we'll cover how to define a method with a parameter and utilize the parameter in the method body. We then invoke the method and pass in sample arguments.
- Multiple Method Parameters3:00
In this lesson, we'll define a method with multiple parameters and pass in multiple arguments for its invocation.
- Manipulating Arguments3:16
Our method's arguments are regular Ruby objects so we are able to perform operations on them (such as invoking methods). In this lesson, we practice working with string and integer arguments to a custom method.
- Local Variables9:22
A local variable is a variable declared in a method body. Local variables only exist as long as the method executes. In this lesson, we practice declaring local variables and discuss the idea of scope, the boundary/confines within which a name exists in your program.
- Return Values I5:24
In this lesson, we'll learn how to declare a return value within our method. A return value is the final output of a method, the final product it creates for the outside world. Every Ruby method has a return value.
- Return Values II: Implicit Return Values7:53
All Ruby methods must return a value. If we do not provide a specific value, a method will return nil by default. Ruby will return the last evaluated expression as the method’s return value. Thus, we can skip the return keyword and write our return value on the last line of the method. This is considered best practice in the Ruby community.
- Methods
- Coding Exercise Solution: Methods4:47
See the solution to the previous lesson's coding challenge.
- Optional Parameters and Default Arguments5:07
Provide a default argument to a parameter, a fallback value to use when the invocation does not provide one.
- Optional Parameters and Default Arguments
- Coding Exercise Solution: Optional Parameters and Default Arguments6:56
See the solution to the previous lesson's coding challenge.
- Section Review [SLIDES]7:57
In this lesson, we'll review the concepts introduced in this section of the course including:
Methods
Parameters and arguments
Return values
Local variables and scope
Optional parameters and default arguments
- Introduction to Blocks with the times Method9:04
Welcome to the next section of the course! In this section, we'll focus on blocks in Ruby. A block is a chunk of code that is associated with a method invocation. In this lesson, we introduce the concept in combination with the times method, which repeats a chunk of code a specified number of times.
- Intro to Blocks
- Coding Exercise Solution: Intro to Blocks3:59
See the solution to the previous lesson's coding challenge.
- Block Variables8:01
In this lesson, we'll learn how to use vertical pipes to accept block variables in our blocks. A block variable is a dynamic value that exists only as long as the block does. It is a way for a method to pass data to the block.
- Block Variables
- Coding Exercise Solution: Block Variables3:44
See the solution to the previous lesson's coding challenge.
- The upto and downto Methods7:54
In this lesson, we'll learn two more methods, upto and downto, which move from a starter integer to an end integer in steps of 1.
- The step Method4:08
In this lesson, we'll learn about the step, which iterates from one numeric value to another in steps/intervals. The method will enable us to practice more with blocks in Ruby.
- Section Review [SLIDES]4:49
In this lesson, we'll review the concepts introduced in this section of the course including:
Adding a block to a method
Single-line and multi-line block declaration
Differences between blocks and arguments
The times, upto, downto, and step methods
- The if Statement7:56
Welcome to the Conditions section of the course. In this lesson, we'll learn about the if statement, which enables us to run a section of Ruby code if a condition is met. Conditionals enable our programs to have branching logic.
- Predicate Methods in if Statements2:42
In this lesson, we'll learn how to combine predicate methods with if statements. The two are a perfect duo because an if statement expects a Boolean and a predicate method returns a Boolean.
- Truthiness and Falsiness6:52
In this lesson, we'll introduces the concepts of truthiness and falsiness. A truthy value is one that is good enough to be true in a Boolean context; a falsy value is one that is good enough to be false in a Boolean context. false and nil are the two falsy values in Ruby; all other objects/values are truthy.
- if Statements
- Coding Exercise Solution: if Statements6:54
See the solution to the previous lesson's coding challenge.
- if and elsif10:46
In this lesson, we'll learn how add an elsif statement to check for another condition after an if. Ruby will execute the section of code belonging to the first condition that evaluates to true.
- if and else7:49
In this lesson, we'll introduce the else keyword, which allows us to guarantee the execution of code if no if condition or elsif condition is previously met.
- if, else and elsif
- Coding Exercise Solution: if, else and elsif6:51
See the solution to the previous lesson's coding challenge.
- Multiple Conditions with And Operator (&&)8:12
In this lesson, we employ the AND operator (&&) to check for multiple conditions in an if statement.
- Multiple Conditions with Or Operator (||)7:40
In this lesson, we continue our exploration of multiple conditions with the OR operator (||), which checks if either one of multiple conditions is true.
- Multiple Conditions
- Coding Exercise Solution: Multiple Conditions7:19
See the solution to the previous lesson's coding challenges.
- Parentheses Precedence9:12
In this lesson, we'll practice adding parentheses when using && and || operators to establish the precedence for evaluating a condition. Precedence refers to the order of importance.
- Nested if Statements8:44
In this lesson, we'll see how to nest an if statement inside another if statement to create a more complex logical path. All of these constructs are independent Ruby building blocks that we are free to couple together in our code.
- Ternary Operator7:09
In this lesson, we'll learn how to consolidate a simple if/else construct with the ternary operator. The ternary operator has a condition ? true value : false value code structure.
- Call A Method from Another Method8:06
In this lesson, we'll invoke one method from the body of another. This structure allows us to split up the complexity of business logic across several smaller methods.
- The case Statement10:43
The case statement is a shortcut that enables us to replace longwinded if/elsif/else statements with a single construct. In this lesson, we use a case statement in a method to offer a review of various food items.
- The unless Keyword9:31
The unless keyword creates "execute if false" condition for a piece of code. Ruby will execute a section of code unless a condition is met. In this lesson, we showcase the keyword alongside a classic if statement.
- Statement Modifiers4:34
We can replace 1-line if and unless statements with shorter statement modifiers. We put the evaluation logic in front of the respective keywords; the end keyword is not required.
- Conditional Assignment Operator6:39
The conditional assignment operator assigns a value to a variable if it's current value is nil. We use this design when there is an expensive computation that we only want to run once and preserve for later use in a variable.
- Section Review [SLIDES]14:25
In this lesson, we'll review the concepts introduced in this section of the course including:
The if, elsif, and else keywords to create conditional branches of logic
Multiple conditions with the && and || operators
Using parentheses to establish precedence (order of importance)
Declaring the ternary operator as a shortcut to an if/else statement
Cleaning up multiple if/elsif statements with the case/when syntax.
The unless keyword for running a section of code when a condition evaluates to false.
Using the conditional assignment operator to assign a value to a nil variable
- Single Quotes vs Double Quotes6:29
Ruby allows us to use single quotes for string declarations. Single-quote strings do not allow string interpolation. They also do not escape characters like \n.
- Multiline Strings4:16
A multi-line string is officially called a here document or here doc in Ruby. Multi-line strings begin with a << symbol. Afterwards, we place an identifier that marks the start of the multi-line string. Ruby includes all content after the identifier in the string, including tabs and new lines.
- String Comparisons7:43
In this lesson, we review the equality (==) and inequality (!=) operators. We also introduce the < and > symbols to test whether a string comes before or after another in alphabetical order.
- String Concatenation Options11:38
The concat method concatenates two strings to together. Call the concat method on a string and pass it an argument of the second string We can pass only one argument (i.e. one string) to the concat method. The method mutates the original string.
The prepend method is another concatenation method. It prepends (the opposite of appends) the argument to the beginning of the string
- The length and size Methods2:09
The length method returns the number of characters in the string. Spaces count! The size method is identical to the length method.
The object returned back is a Integer object. As a result, Integer instance methods are available on the object.
- Length and Comparison
- Coding Exercise Solution: Length and Comparison4:59
See the solution to the previous lesson's coding challenge.
- Intro to Index Positions10:04
Ruby assigns an index position to every character in a string. The index starts counting from 0.
Pass the index position within square brackets to extract a single character.
Ruby returns nil if the index position does not exist.
- Index Positions
- Coding Exercise Solution: Index Positions5:01
See the solution to the previous lesson's coding challenge.
- Extract Multiple Characters from a String5:53
Use square brackets to extract multiple characters from a string.
The first argument is the starting index position. The second argument is the number of characters to pull out.
Negative index positions are accepted for the first argument. For example, [-7, 5] means start 5 characters from the end and pull out 5 characters.
- String Slicing
- Coding Exercise Solution: String Slicing3:35
See the solution to the previous lesson's coding challenge.
- Overwrite Characters in String6:33
Ruby strings are mutable. We can add, remove, or update characters.
Reference the character by index position, then use = to assign a new value.
- The insert Method4:05
The insert method mutates a string by adding a character at a specified index position.
The first argument is the index position, the second is the character(s) to add.
- The empty? and nil? Methods3:14
The empty? method returns true if the string is empty. Remember, a space counts as a valid character.
The nil? method is available on every Ruby object. The nil? method returns true if called on a nil object. Any valid string (including an empty string) will return false for the nil? method.
- Case Methods4:44
The capitalize method returns a new string with an uppercase first letter.
The upcase method returns a string with all letters in uppercase.
The downcase method returns a string with all letters downcased.
The swapcase method swaps lowercase and uppercase characters.
Ruby ignores numbers and characters in any case methods.
- The reverse Method1:05
The reverse method reverses a string's character
- Bang Methods on Strings7:36
A bang method is a method with a side effect, usually a mutational one.
A bang method modifies the original object that the variable is pointing to.
Bang method names conclude with an exclamation point (!).
Bang methods are an alternative to reassigning the return value of a method call to the same variable
- Section Review [SLIDES]10:31
Review the concepts introduced in this course section including:
String comparisons and equality
Index positions
Character extraction
Character casing methods
The insert method
The reverse method
Bang methods
and more!
- The while Loop10:21
A while loop repeats a piece of condition while a condition is met. The loop rechecks the condition before each round. In this lesson, we learn the syntax for declaring a while loop in Ruby.
- The until Loop5:51
A while loop executes while a condition is true.
An until loop executes until a condition is true. It essentially executes as long as the evalution condition is false.
- FizzBuzz Problem3:23
Tackle FizzBuzz, a popular coding challenge for beginners. FizzBuzz prints different conditional statements if a number is divisible by 3, 5, or both values.
- FizzBuzz Solution12:03
Walk through a sample solution of the FizzBuzz problem from the previous lesson.
- The next Keyword9:39
In this lesson, we’ll introduce the next keyword, which moves execution automatically to the next iteration of a loop. In other words, it finalizes the current iteration and restarts from the beginning of the loop.
- The break keyword4:50
The break keyword forces the termination of a loop before its natural conclusion.
- Recursion I16:28
Recursion is when a method calls itself.
Recursions requires us to think in multiple levels/layers of execution.
The base case is a terminating condition that forces the recursion to complete and "bubble up" back to the original caller.
- Recursion II16:50
In this lesson, we practice recursion by implementing both an iterative and recursive solution for reversing a string.
- Section Review [SLIDES]5:34
Review the concepts introduced int he last section of the course including:
The while loop
The until loop
FizzBuzz
The next keyword
The break keyword
Recurison
and more!
Requirements
- Basic text editing skills
- Basic computer skills (web browsing, app installation, file navigation)
Description
Welcome to the most comprehensive Ruby course available on Udemy! An in-depth overview of coding with Ruby, a popular programming language renowned for its simplicity and elegance. Whether you've never written a line of code before or are looking to learn a brand new language, this course covers all bases!
Learn to Code with Ruby offers more than 40+ hours of video tutorials, 250+ lectures, and dozens of quizzes and coding exercises to test your knowledge as you proceed through the course.
Lessons include:
Installation and configuration for both Mac OS and Windows systems
Common programming concepts (variables, arithmetic, output)
Objects and methods
Strings
Numbers
Booleans
Methods and Conditionals
Ranges
Arrays
Hashes
Blocks, Procs, and Lambdas
Dates and times
File Input and Output
Regular Expression
Classes, Modules, and Inheritance
and more!
Ruby is a language released by Yukihiro Matsumoto in 1995 that bills itself as "a programmer's best friend". Every aspect of Ruby is designed to make programming easier for the developer. There is no better first language if you're interested in learning how to program.
Ruby also serves as the foundation for Ruby on Rails, a popular web framework that powers over 1.2 million websites worldwide. The course offers an extensive introduction to the base language you'll need to know if you intend to tackle web development in the future.
Check out the sample videos below to get a taste of what the course has to offer!
So if you're ready to commit yourself, if you're eager to expand your knowledge of programming, if you're ready to discover what makes this elegant language so loved by developers, you are ready to Learn to Code with Ruby!
Thanks for checking out the course!
Who this course is for:
- Beginning programmers who want to start with an easy, human-friendly language
- Intermediate coders who are interested in exploring the Ruby language in greater depth
- Web development folk curious about the foundation of Ruby on Rails