Your cart is empty.
Keep shopping
Teach on Udemy
Turn what you know into an opportunity and reach millions around the world.
Learn MoreWeb Interfaces for Embedded & IoT Systems
Rating: 4.3 out of 54.3(40 ratings)
1,770 students
Web Interfaces for Embedded & IoT Systems
Learn to code in HTML.CSS.JavaScript.React Basic
Created byKhaja Mohamed
Last updated 2/2026
English
What you'll learn
- HTML Basics for Beginners
- Learn how a simple website can be built with HTML
- What tags are used in HTML for a website
- Basic front end web development
- CSS basics
- Javascript basics
Explore related topics
Coding Exercises
This course includes our updated coding exercises so you can practice your skills as you learn.
See a demo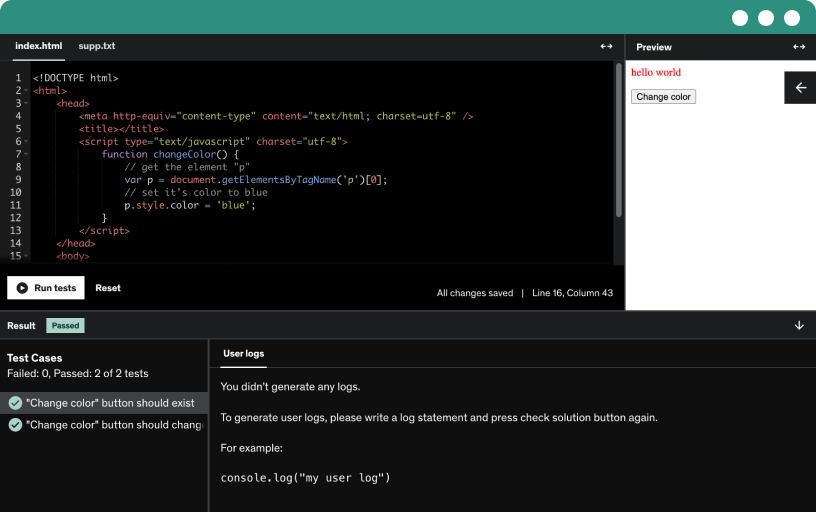
Course content
8 sections • 41 lectures • 3h 39m total length
- Front End Web Development Basics12:36
Learn about the what is front end and tools used and what front developers do
- What does compiled and interpreted code mean2:34
Compiled code refers to source code that has been translated from a high-level programming language (like C, C++, or Java) into machine code (binary) that can be directly executed by a computer's CPU. This translation is done by a compiler, which is a specialized program that processes the entire code and generates an executable file (e.g., .exe on Windows or .out on Linux).
Key Characteristics of Compiled Code:
Translation Before Execution: The source code is first compiled into machine code (binary) before it can be run. This process happens all at once, as opposed to line-by-line interpretation.
Executable File: After compilation, the result is a standalone file (often with extensions like .exe, .out, or .bin) that can be run directly on the target machine without needing the source code or a compiler.
One-time Compilation: Once the source code is compiled into machine code, the executable can be run multiple times without needing to be recompiled unless changes are made to the source code.
Steps of Compilation:
Source Code: You write the program in a high-level language (e.g., C, C++).
Compilation: The compiler translates the source code into machine code.
Executable: The machine code is stored as an executable file that the computer can run.
Example of a Compiled Language:
C: You write a C program (program.c), then use a compiler (e.g., gcc) to compile the code into an executable (program.exe or a.out).
bash
Copy codegcc program.c -o program.exe
After this, you can run program.exe directly.
Advantages of Compiled Languages:
Faster execution: Since the code is already in machine-readable form, it runs faster compared to interpreted languages.
Optimized performance: Compilers often optimize the code for the specific architecture, making the final executable more efficient.
Disadvantages:
Platform-dependent: Compiled code is often tied to the specific hardware and operating system it was compiled for. For example, an executable compiled on Windows may not run on Linux without recompilation.
Longer development cycle: Compilation takes time, and you must compile the entire program before running it, unlike interpreted languages where you can execute code directly.
Compiled Languages Examples:
C
C++
Go
Rust
Fortran
In Summary:
Compiled code is machine-ready code generated by a compiler from source code. It runs faster and more efficiently but typically requires separate compilation for each platform or architecture.
-----------------------------------------------------------------------------------------------------------------
An interpreted language refers to a type of programming language where the code is executed directly by an interpreter, rather than being first compiled into machine code. The interpreter reads the source code line by line and translates it into machine code on the fly, executing each instruction immediately.
Key Points:
Interpreted Language: Code is executed line by line by an interpreter, without prior conversion to machine language. This is in contrast to compiled languages, where the entire code is translated into machine language beforehand.
Execution Process:
Interpreted languages: The source code is translated into intermediate code or machine code at runtime.
Compiled languages: The code is translated into machine code before execution, producing an executable file (e.g., .exe).
Examples of Interpreted Languages:
Python
JavaScript
Ruby
PHP
Perl
Advantages of Interpreted Languages:
Portability: Interpreted code is platform-independent because the interpreter can run on any machine.
Easier debugging: Since the code is executed line by line, errors can be identified and fixed quickly.
Disadvantages:
Slower execution: Because code is translated at runtime, interpreted languages generally execute slower than compiled languages.
Dependency on the interpreter: The code cannot run without the interpreter being installed.
Example:
When you write Python code (.py file), the Python interpreter reads and executes your code at runtime. You don't need to compile it into an executable beforehand. Each line is read, interpreted, and executed on the fly.
- Cascading Style Sheet Basics2:43
Cascading Style Sheet Basics
- Javascript Basics Theory12:40
Javascript Basics Theory
- What is Node.js1:27
Node.js is an open-source, server-side JavaScript runtime environment built on Chrome's V8 JavaScript engine. It allows developers to run JavaScript code outside of a web browser, enabling them to build scalable and high-performance network applications. Node.js uses an event-driven, non-blocking I/O model, which makes it lightweight and efficient, suitable for real-time applications that handle a large number of concurrent connections.
Key features and components of Node.js include:
Asynchronous and Event-Driven: Node.js uses asynchronous, event-driven programming, allowing it to handle multiple connections simultaneously without blocking the execution of other tasks. This makes it ideal for building responsive and scalable applications, such as web servers and real-time chat applications.
NPM (Node Package Manager): Node.js comes with npm, the largest ecosystem of open-source libraries and packages for JavaScript. npm allows developers to easily install, manage, and share reusable code modules, making development faster and more efficient.
Single-threaded, Non-blocking I/O: Node.js runs on a single-threaded event loop, but it employs non-blocking I/O operations to handle multiple requests concurrently. This architecture allows Node.js to handle high levels of concurrency efficiently, making it suitable for applications that require real-time data processing.
Cross-platform Compatibility: Node.js is cross-platform, meaning it can run on various operating systems, including Windows, macOS, and Linux, making it versatile and widely adopted for building applications across different environments.
Built-in HTTP Module: Node.js includes a built-in HTTP module that allows developers to create HTTP servers and handle HTTP requests and responses without the need for external libraries.
Streaming and Buffering: Node.js supports streaming data processing, which enables developers to efficiently process large files or data streams in chunks, reducing memory usage and improving performance.
Community and Support: Node.js has a vibrant and active community of developers, contributors, and users who continuously contribute to its growth and improvement. This community provides support, resources, and a wealth of knowledge through forums, documentation, and online tutorials.
Overall, Node.js is a powerful platform for building server-side applications and network services using JavaScript, leveraging its simplicity, performance, and scalability to meet the demands of modern web development.
- What is Node.js5:30
What is Node.js
Node.js is an open-source, server-side JavaScript runtime environment built on Chrome's V8 JavaScript engine. It allows developers to run JavaScript code outside of a web browser, enabling them to build scalable and high-performance network applications. Node.js uses an event-driven, non-blocking I/O model, which makes it lightweight and efficient, suitable for real-time applications that handle a large number of concurrent connections.
Key features and components of Node.js include:
Asynchronous and Event-Driven: Node.js uses asynchronous, event-driven programming, allowing it to handle multiple connections simultaneously without blocking the execution of other tasks. This makes it ideal for building responsive and scalable applications, such as web servers and real-time chat applications.
NPM (Node Package Manager): Node.js comes with npm, the largest ecosystem of open-source libraries and packages for JavaScript. npm allows developers to easily install, manage, and share reusable code modules, making development faster and more efficient.
Single-threaded, Non-blocking I/O: Node.js runs on a single-threaded event loop, but it employs non-blocking I/O operations to handle multiple requests concurrently. This architecture allows Node.js to handle high levels of concurrency efficiently, making it suitable for applications that require real-time data processing.
Cross-platform Compatibility: Node.js is cross-platform, meaning it can run on various operating systems, including Windows, macOS, and Linux, making it versatile and widely adopted for building applications across different environments.
Built-in HTTP Module: Node.js includes a built-in HTTP module that allows developers to create HTTP servers and handle HTTP requests and responses without the need for external libraries.
Streaming and Buffering: Node.js supports streaming data processing, which enables developers to efficiently process large files or data streams in chunks, reducing memory usage and improving performance.
Community and Support: Node.js has a vibrant and active community of developers, contributors, and users who continuously contribute to its growth and improvement. This community provides support, resources, and a wealth of knowledge through forums, documentation, and online tutorials.
Overall, Node.js is a powerful platform for building server-side applications and network services using JavaScript, leveraging its simplicity, performance, and scalability to meet the demands of modern web development.
- React Basics Theory8:39
React Basics Theory
- Setup React1:30
Download NodeJS and install it
If you encounter following error
The ENOENT error in npm indicates that it is unable to find a file or directory. The specific error message you provided suggests that npm cannot find or access the C:\Users\kpmkh\AppData\Roaming\npm directory.
Here's a step-by-step guide to troubleshoot and resolve this issue:
Check if the directory exists:
Open File Explorer and navigate to C:\Users\kpmkh\AppData\Roaming\npm.
If the directory does not exist, create it manually.
Set the npm prefix:
Open a terminal (Command Prompt or PowerShell).
Set the npm prefix to ensure it points to the correct directory. Run the following command:
sh npm config set prefix "C:\Users\kpmkh\AppData\Roaming\npm"
Reinstall npm:
Sometimes, reinstalling npm can help fix directory issues.
Run the following command to reinstall npm:
sh npm install -g npm
Check permissions:
Ensure you have the necessary permissions to access the directory.
Right-click on the npm directory, select Properties, go to the Security tab, and ensure your user account has full control.
Clear npm cache:
Clearing the npm cache can resolve some issues. Run the following command:
sh npm cache clean --force
Update npm:
Make sure you are using the latest version of npm. Update npm with the following command:
sh npm install -g npm@latest
Check for conflicting software:
Ensure no antivirus or security software is blocking access to the npm directory.
Verify Node.js and npm installation:
Make sure Node.js and npm are properly installed. Run the following commands to check their versions:
sh
node -v
npm -v
If none of these steps resolve the issue, you may consider reinstalling Node.js and npm entirely:
Uninstall Node.js:
Go to Control Panel -> Programs -> Programs and Features.
Find Node.js in the list and uninstall it.
Delete remaining directories:
Manually delete the C:\Program Files\nodejs directory (or the installation directory you chose).
Delete the C:\Users\kpmkh\AppData\Roaming\npm and C:\Users\kpmkh\AppData\Roaming\npm-cache directories.
Reinstall Node.js:
Download the latest Node.js installer from the official website.
Install Node.js and npm using the installer.
After following these steps, try running your npm commands again. If the problem persists, please provide more details about the command you are trying to run and any additional error messages you may see.
- UI UX Basics8:56
UI UX Basics
- Front end development tools5:45
Front end development tools you should know
- What is Online Webstore is it Front End or Back End1:25
Frontend
The frontend is the part of the webstore that users interact with directly. It includes:
User Interface (UI): This includes the layout, design, and overall appearance of the website. It involves HTML, CSS, and JavaScript.
User Experience (UX): Ensures the webstore is easy to navigate and use.
Client-Side Interactions: These include product searches, adding items to a cart, filtering products, etc., often handled with JavaScript frameworks like React, Angular, or Vue.js.
Backend
The backend is the server-side part of the webstore that handles the business logic and database interactions. It includes:
Server-Side Logic: Handles the logic of the webstore, such as processing orders, managing user accounts, etc. This can be implemented using languages and frameworks like Node.js, Django, Ruby on Rails, or Java.
Database Management: Stores all the data related to the webstore, such as product details, user information, orders, and inventory. Common databases include MySQL, PostgreSQL, MongoDB, etc.
APIs: Facilitate communication between the frontend and backend, often using RESTful or GraphQL APIs.
Authentication and Authorization: Manages user authentication (login, signup) and authorization (access control).
Integration
Payment Gateways: Integrating payment services like Stripe, PayPal, or other payment processors.
Third-Party Services: Such as shipping services, email notifications, and analytics tools.
Example Flow
User Browses Products: User interacts with the frontend to browse products.
Product Data Fetch: Frontend makes an API call to the backend to retrieve product data from the database.
Add to Cart: User adds a product to the cart, which is managed by the frontend but might involve backend operations to update the user’s session or cart in the database.
Checkout: User proceeds to checkout, and the frontend sends the order details to the backend for processing.
Order Processing: Backend handles payment processing, order validation, and inventory management, and updates the database accordingly.
Confirmation: Backend sends a response to the frontend, which then displays an order confirmation to the user.
In summary, an online webstore requires both backend and frontend components to function effectively, with each part playing a crucial role in the overall operation of the webstore.
- What is Bootstrap2:11
Bootstrap is a popular open-source framework for developing responsive and mobile-first websites. It provides a collection of CSS and JavaScript tools and components that help developers create modern, visually appealing web pages with less effort. Bootstrap includes a grid system, pre-designed components, and JavaScript plugins, all of which are designed to work together seamlessly.
Key Features of Bootstrap
Responsive Grid System:
Bootstrap's grid system allows you to create complex layouts quickly and easily. It uses a 12-column layout and includes responsive classes to handle different screen sizes.
Pre-designed Components:
Buttons, forms, modals, navigation bars, and other UI elements are available out of the box, which can be customized to fit the design of your website.
Utility Classes:
A wide range of utility classes that help with spacing, text alignment, colors, and more, allowing for quick styling adjustments without writing custom CSS.
JavaScript Plugins:
Includes several JavaScript plugins for common UI behaviors such as modals, tooltips, carousels, and dropdowns.
Customizable:
Bootstrap is highly customizable. You can modify the source Sass files to change the design system to fit your needs.
Using Bootstrap to Add Social Media Share Buttons
Let's integrate Bootstrap into your existing index.html to improve the styling of your visitor counter and add social media share buttons.
Step 1: Include Bootstrap in Your Project
Add the Bootstrap CSS and JS links to the <head> and before the closing </body> tag in your index.html file:
htmlCopy code<!DOCTYPE html>
<html lang="en">
<head>
<meta charset="UTF-8">
<meta name="viewport" content="width=device-width, initial-scale=1.0">
<title>Website Visitor Counter</title>
<link href="https://stackpath.bootstrapcdn.com/bootstrap/4.5.2/css/bootstrap.min.css" rel="stylesheet">
</head>
<body>
<div class="container text-center mt-5">
<h1>Visitor Count: <span id="counter" class="badge badge-primary">0</span></h1>
<div class="share-buttons mt-4">
<a href="#" id="facebook-share" class="btn btn-primary" title="Share on Facebook">
<i class="fab fa-facebook-f"></i> Facebook
</a>
<a href="#" id="twitter-share" class="btn btn-info" title="Share on Twitter">
<i class="fab fa-twitter"></i> Twitter
</a>
<a href="#" id="linkedin-share" class="btn btn-primary" title="Share on LinkedIn">
<i class="fab fa-linkedin-in"></i> LinkedIn
</a>
</div>
</div>
<script src="https://code.jquery.com/jquery-3.5.1.slim.min.js"></script>
<script src="https://cdn.jsdelivr.net/npm/@popperjs/core@2.5.3/dist/umd/popper.min.js"></script>
<script src="https://stackpath.bootstrapcdn.com/bootstrap/4.5.2/js/bootstrap.min.js"></script>
<script src="https://kit.fontawesome.com/a076d05399.js" crossorigin="anonymous"></script>
<script>
document.addEventListener('DOMContentLoaded', () => {
fetch('/count')
.then(response => response.json())
.then(data => {
document.getElementById('counter').textContent = data.count;
});
const pageUrl = encodeURIComponent(window.location.href);
const message = encodeURIComponent("Check out this website!");
document.getElementById('facebook-share').href = `https://www.facebook.com/sharer/sharer.php?u=${pageUrl}`;
document.getElementById('twitter-share').href = `https://twitter.com/intent/tweet?url=${pageUrl}&text=${message}`;
document.getElementById('linkedin-share').href = `https://www.linkedin.com/sharing/share-offsite/?url=${pageUrl}`;
});
</script>
</body>
</html>
Explanation:
Bootstrap CSS and JS:
Added Bootstrap CSS via CDN in the <head> section.
Added Bootstrap JS, Popper.js, and jQuery via CDN before the closing </body> tag.
Font Awesome:
Included Font Awesome for social media icons via CDN.
HTML Structure:
Used Bootstrap classes for styling: container, text-center, mt-5, badge, and btn.
Added Font Awesome icons inside the share buttons for visual enhancement.
JavaScript:
Same as before, dynamically sets the share URLs for Facebook, Twitter, and LinkedIn.
Styling:
Used Bootstrap classes to style the visitor counter and share buttons.
Now, when you run your server and open the webpage, you will see a more polished design with responsive share buttons styled using Bootstrap.
- What is nextjs1:29
Next.js is a popular open-source React framework developed by Vercel (formerly ZEIT) that enables developers to build server-rendered React applications with minimal configuration. It is widely used for its performance, scalability, and developer-friendly features.
Key Features of Next.js:
Server-Side Rendering (SSR):
Next.js allows pages to be rendered on the server rather than the client, improving performance and SEO. This means that when a user requests a page, the server renders the HTML and sends it to the client.
Static Site Generation (SSG):
Pages can be pre-rendered at build time, which is ideal for static content that doesn't change often. SSG enhances performance since the page is served as a static file from a content delivery network (CDN).
API Routes:
Next.js allows developers to create API endpoints directly within the application, which can be used to handle server-side logic without needing a separate backend server.
File-based Routing:
The routing system in Next.js is based on the file system. Any file added to the pages directory automatically becomes a route.
Automatic Code Splitting:
Next.js automatically splits your code into smaller bundles, which improves load times as only the necessary code is loaded for each page.
Client-Side Rendering (CSR):
Next.js supports traditional client-side rendering as well, allowing for a hybrid approach where some parts of the application can be server-rendered while others are client-rendered.
API Integrations:
It has built-in support for TypeScript, Sass, CSS Modules, and various data-fetching strategies, making it easy to integrate with other technologies and tools.
Image Optimization:
Next.js includes features for automatic image optimization, reducing load times by serving images in modern formats and the appropriate size.
Internationalization (i18n):
Next.js provides built-in support for internationalized routing and localization, helping developers create applications that can easily support multiple languages.
Use Cases:
E-commerce: High-performance, SEO-friendly storefronts.
Blogs/Marketing Websites: Static site generation for speed and SEO.
SaaS Applications: Full-stack apps with API routes and server-rendered pages.
Dashboards: Dynamic content with a mix of SSR and CSR for fast interactions.
Next.js has become one of the go-to frameworks for modern web development due to its flexibility, performance optimizations, and ease of use.
- What is backend and theory surrounding it2:28
The backend of an application refers to the server-side part of the software that handles the business logic, database interactions, and server configuration, which are not directly visible to users. The backend is responsible for managing the data, ensuring that it is securely stored, processed, and transmitted to the frontend (the part of the application that users interact with).
Key Components of a Backend:
Server:
A server is a computer or system that provides data, services, or functionality to other computers, known as clients, over a network. The backend server processes requests from clients (e.g., web browsers) and responds with the appropriate data or action.
Database:
A database is where the application’s data is stored, retrieved, and managed. Common types of databases include:
Relational Databases: Such as MySQL, PostgreSQL, and SQL Server, which use structured tables and SQL for querying.
NoSQL Databases: Such as MongoDB, Couchbase, and Firebase Realtime Database, which store data in flexible formats like JSON or key-value pairs.
APIs (Application Programming Interfaces):
APIs define how different parts of the software interact. In a backend context, APIs allow the frontend and other services to communicate with the backend to perform actions like retrieving or updating data. REST (Representational State Transfer) and GraphQL are common API standards.
Business Logic:
This is the core functionality of the application, representing the rules and operations that dictate how data is processed and decisions are made. For example, in an e-commerce application, business logic might handle tasks like calculating prices, processing orders, and applying discounts.
Authentication and Authorization:
Authentication is the process of verifying a user’s identity, while authorization determines what actions or resources the authenticated user is allowed to access. These processes ensure that only legitimate users can perform specific actions within the application.
Server-Side Frameworks:
Backend frameworks provide the tools and libraries necessary to build and manage server-side applications. Examples include:
Node.js with Express (JavaScript)
Django (Python)
Ruby on Rails (Ruby)
Spring Boot (Java)
Laravel (PHP)
Security:
The backend is responsible for ensuring the security of the application, including protecting data from unauthorized access, securing communications between the client and server (e.g., using HTTPS), and defending against threats like SQL injection, cross-site scripting (XSS), and distributed denial-of-service (DDoS) attacks.
Deployment and Hosting:
The backend needs to be hosted on servers that are accessible over the internet or an internal network. Common hosting environments include cloud platforms like AWS, Google Cloud, and Azure, as well as traditional on-premises servers.
Middleware:
Middleware is software that sits between the server and the client, handling tasks like logging, authentication, and request parsing. It helps streamline the processing of requests and responses within the backend.
Backend Responsibilities:
Handling Client Requests: Receiving, processing, and responding to requests from the frontend.
Data Management: Storing, retrieving, updating, and deleting data in the database.
Business Logic Processing: Implementing the rules and processes that define the application's core functionality.
Security Management: Ensuring that data and communications are secure and that user authentication and authorization are correctly implemented.
API Development: Creating and managing the endpoints that allow the frontend and other services to interact with the backend.
Example:
In a social media application, the backend would handle tasks like:
Storing user data (profiles, posts, comments) in a database.
Authenticating users when they log in.
Processing requests to like, comment on, or share a post.
Serving the data to the frontend for display to users.
Overall, the backend is crucial to the functioning of an application, as it supports the frontend by managing data, ensuring security, and implementing the application's core logic.
- Firebase basics2:09
Firebase is a comprehensive platform developed by Google that provides a suite of cloud-based tools and services for building and managing web and mobile applications. It offers a variety of backend services, making it easier for developers to create apps without needing to manage the underlying infrastructure. Firebase is particularly popular for its real-time capabilities, ease of integration, and scalability.
Key Features of Firebase:
Firebase Realtime Database:
A NoSQL cloud database that stores and syncs data in real-time across all clients. Changes to the database are immediately reflected in the connected clients, making it ideal for applications like chat apps, collaborative tools, and live data dashboards.
Cloud Firestore:
A scalable, flexible database for mobile, web, and server development. Unlike the Realtime Database, Cloud Firestore supports more complex querying and offers better scaling capabilities for large applications.
Authentication:
Firebase Authentication provides an easy way to handle user sign-in and identity management. It supports various authentication methods, including email/password, phone number, and third-party providers like Google, Facebook, and GitHub.
Cloud Functions:
Firebase Cloud Functions allow developers to write server-side code that automatically responds to events triggered by Firebase features and HTTPS requests. This is useful for tasks like processing payments, sending notifications, or handling complex data manipulations.
Cloud Storage:
Firebase Cloud Storage offers a powerful, simple, and cost-effective object storage solution. It allows you to store and serve user-generated content such as photos, videos, and other large files.
Firebase Hosting:
A fast and secure hosting service for static and dynamic content, Firebase Hosting supports the deployment of web apps, static websites, and microservices. It also offers features like custom domains, SSL certificates, and CDN integration.
Firebase Analytics:
Google Analytics for Firebase provides insights into app usage and user engagement. It helps developers understand their audience and make data-driven decisions to improve their apps.
Firebase Cloud Messaging (FCM):
FCM allows you to send notifications and messages to users across different platforms (iOS, Android, and the web). It supports both targeted messaging (to individual devices) and broad messaging (to large groups).
Remote Config:
Firebase Remote Config allows you to dynamically change the behavior and appearance of your app without requiring users to download an update. This is useful for A/B testing, feature rollouts, and customizing user experiences.
Firebase Test Lab:
A cloud-based app testing service that lets you test your app on a wide range of devices and configurations, helping ensure it works correctly across different environments.
Firebase Performance Monitoring:
A service that helps you understand where and when your app's performance might be lacking. It provides insights into how your app performs from the user’s perspective, including slow rendering, long load times, and network issues.
Use Cases:
Real-Time Applications: Such as chat apps, live updates, and collaborative tools.
User Authentication: For managing user accounts and sign-ins with minimal backend code.
Data-Driven Applications: With analytics, performance monitoring, and A/B testing.
Cross-Platform Development: Supporting Android, iOS, and web apps with a single backend.
Firebase is widely used by startups and large enterprises alike because it reduces the complexity of backend development and allows developers to focus on building features and improving user experiences.
- How to create Firebase Project - Web App - Database0:58
- What is flask2:13
Flask is a micro web framework written in Python. It is designed to be lightweight and easy to use, making it ideal for building web applications quickly and with minimal overhead. Here are some key features and concepts related to Flask:
Key Features of Flask
Microframework: Flask is termed as a "micro" framework because it keeps the core simple and extensible. It doesn't come with built-in tools or libraries that you don't need, allowing you to choose the components you want to integrate.
Flexible and Scalable: You can start with a simple application and scale it up to a more complex one by adding extensions and middleware as needed.
Routing: Flask uses URL routing to map URLs to Python functions, which makes handling web requests straightforward.
Templating: Flask integrates with the Jinja2 templating engine, allowing you to separate the business logic from the presentation layer.
Request Handling: Flask provides tools to handle HTTP requests and responses, manage sessions, cookies, and more.
Extensions: There are many Flask extensions available to add functionality such as database integration, form validation, user authentication, and more.
Basic Flask Application
Here's a basic example of a Flask application to illustrate how it works:
Install Flask:
bashCopy codepip install flask
Create a simple Flask application:
pythonCopy codefrom flask import Flask
app = Flask(__name__)
@app.route('/')
def home():
return 'Hello, Flask!'
if __name__ == '__main__':
app.run(debug=True)
Run the application:
Save the above code in a file (e.g., app.py) and run it:
bashCopy codepython app.py
Access the application:
Open your web browser and navigate to http://127.0.0.1:5000/. You should see "Hello, Flask!" displayed on the page.
Components of a Flask Application
App Instance:
pythonCopy codeapp = Flask(__name__)
This creates a Flask application instance. The __name__ argument helps Flask determine the root path of your application.
Routing:
pythonCopy code@app.route('/')
def home():
return 'Hello, Flask!'
The @app.route decorator maps a URL ('/' in this case) to the home function. When a user visits this URL, the function is called, and its return value is displayed in the web browser.
Running the Application:
pythonCopy codeif __name__ == '__main__':
app.run(debug=True)
This block ensures that the server runs only if the script is executed directly (not when imported as a module). The debug=True parameter enables the debug mode, providing useful error messages and auto-reloading the server on code changes.
Benefits of Using Flask
Simplicity: Flask's simplicity allows developers to quickly create applications with minimal boilerplate code.
Flexibility: The lack of built-in components means you can pick and choose the libraries and tools you need, making it highly flexible.
Community and Extensions: A strong community and a wealth of extensions make it easy to add common functionality to your applications.
Documentation: Flask has excellent documentation that is both comprehensive and easy to understand.
Use Cases
Simple web applications and APIs: Ideal for small to medium-sized applications and APIs.
Prototyping: Quickly create prototypes to test ideas and functionalities.
Learning: Great for beginners to learn web development with Python due to its simplicity and clear structure.
In summary, Flask is a versatile and powerful tool for building web applications in Python, offering a balance of simplicity and functionality that makes it a popular choice among developers.
- AI website1:45
Creating a simple website where AI is used can be a great demo to showcase AI capabilities. We'll build a basic example where users can input text, and the AI will respond with a simple analysis of the text, such as sentiment analysis (positive, negative, neutral).
We'll use the following stack:
HTML for the frontend structure.
CSS for styling.
JavaScript for frontend logic and making API calls.
Flask (Python) to serve the backend and handle the AI processing.
Step 1: Set Up the Project Structure
Project Folder Structure:
arduinoCopy codeai_demo/
├── app.py
├── static/
│ └── style.css
└── templates/
└── index.html
Step 2: Create the Frontend
index.html (in the templates folder):
htmlCopy code<!DOCTYPE html>
<html lang="en">
<head>
<meta charset="UTF-8">
<meta name="viewport" content="width=device-width, initial-scale=1.0">
<title>AI Text Analysis Demo</title>
<link rel="stylesheet" href="{{ url_for('static', filename='style.css') }}">
</head>
<body>
<div class="container">
<h1>AI Text Analysis</h1>
<form id="textForm">
<textarea id="inputText" placeholder="Enter your text here..." required></textarea>
<button type="submit">Analyze Text</button>
</form>
<div id="result"></div>
</div>
<script>
document.getElementById('textForm').addEventListener('submit', async function(event) {
event.preventDefault();
const inputText = document.getElementById('inputText').value;
const response = await fetch('/analyze', {
method: 'POST',
headers: {
'Content-Type': 'application/json'
},
body: JSON.stringify({ text: inputText })
});
const result = await response.json();
document.getElementById('result').innerText = `Sentiment: ${result.sentiment}`;
});
</script>
</body>
</html>
style.css (in the static folder):
cssCopy codebody {
font-family: Arial, sans-serif;
background-color: #f4f4f4;
display: flex;
justify-content: center;
align-items: center;
height: 100vh;
margin: 0;
}
.container {
background: #fff;
padding: 20px;
border-radius: 8px;
box-shadow: 0 0 10px rgba(0, 0, 0, 0.1);
text-align: center;
width: 300px;
}
textarea {
width: 100%;
height: 100px;
margin-bottom: 10px;
padding: 10px;
border-radius: 5px;
border: 1px solid #ccc;
}
button {
padding: 10px 20px;
background-color: #007BFF;
color: white;
border: none;
border-radius: 5px;
cursor: pointer;
}
button:hover {
background-color: #0056b3;
}
#result {
margin-top: 20px;
font-size: 1.2em;
}
Step 3: Create the Backend
app.py (in the root folder):
pythonCopy codefrom flask import Flask, request, jsonify, render_template
from textblob import TextBlob
app = Flask(__name__)
@app.route('/')
def index():
return render_template('index.html')
@app.route('/analyze', methods=['POST'])
def analyze():
data = request.json
text = data.get('text')
blob = TextBlob(text)
sentiment = blob.sentiment.polarity
if sentiment > 0:
sentiment_label = 'Positive'
elif sentiment < 0:
sentiment_label = 'Negative'
else:
sentiment_label = 'Neutral'
return jsonify(sentiment=sentiment_label)
if __name__ == '__main__':
app.run(debug=True)
Step 4: Run the Application
Make sure you have Flask and TextBlob installed:
bashCopy codepip install flask textblob
Run the Flask application:
bashCopy codepython app.py
Open your browser and go to http://127.0.0.1:5000/ to see the demo.
This simple application allows users to input text, and it will analyze the sentiment using the TextBlob library, displaying whether the sentiment is positive, negative, or neutral.
- How to host a website1:27
Hosting a website means storing your website's files on a special computer called a server, so people can access your site on the internet. Here's a simple explanation of how it's done:
Create Your Website: First, you need to create your website. This can be done using website builders like WordPress, Wix, or by coding it yourself with HTML, CSS, and JavaScript.
Choose a Hosting Provider: A hosting provider is a company that offers servers and technology to store your website. Some popular hosting providers are Bluehost, HostGator, and SiteGround.
Select a Hosting Plan: Hosting providers offer different plans based on your needs:
Shared Hosting: Your website shares a server with other websites. It's the cheapest option and good for small sites.
VPS Hosting: Your website shares a server but has its own dedicated portion of resources. It’s more expensive and suitable for larger sites.
Dedicated Hosting: Your website gets an entire server to itself. It’s the most expensive and is used for very large or high-traffic sites.
Register a Domain Name: This is your website's address (like www.yourwebsite.com). You can register a domain through your hosting provider or through a separate domain registrar like GoDaddy.
Upload Your Website Files: Once you have hosting and a domain, you need to upload your website files to the server. This can be done using:
File Transfer Protocol (FTP): A method to transfer files from your computer to the server. Programs like FileZilla help with this.
Hosting Control Panel: Most hosting providers offer a control panel (like cPanel) where you can upload files directly.
Configure Your Domain: Link your domain name to your hosting account by updating the Domain Name System (DNS) settings. This tells the internet where to find your website.
Launch Your Website: Once everything is uploaded and configured, your website will be live on the internet. Visitors can now access it using your domain name.
In summary, hosting a website involves creating your site, choosing a hosting provider and plan, registering a domain, uploading your site files, and configuring settings so your site is accessible online.
- Hosting web apps on Tomcat and Alternatives1:28
- What is tomcat web server0:18
What is tomcat web server
- What is apache web server0:18
What is apache web server
- Key Differences between Apache and Tomcat0:11
Key Differences between Apache and Tomcat
- Nextjs Application Structure Explanation1:05
- Front End Web Development and HTML27:15
Theory of HTML and Front-End Web Development
HTML (HyperText Markup Language)
Definition: HTML is the standard language used to create and design documents on the web. It structures web content and forms the backbone of web pages.
Elements: Building blocks of HTML documents. Examples include paragraphs, headings, links, images, and lists.
Attributes: Provide additional information about elements, such as the source of an image or the URL of a link.
CSS (Cascading Style Sheets)
Definition: CSS is a stylesheet language used to describe the presentation of an HTML document. It controls the layout, colors, fonts, and overall visual appearance of web pages.
Selectors: Patterns used to select elements to apply styles. Examples include class selectors, ID selectors, and element selectors.
Box Model: A fundamental concept in CSS that describes the rectangular boxes generated for elements. It includes content, padding, border, and margin.
JavaScript
Definition: JavaScript is a programming language that enables dynamic and interactive behavior on web pages. It can manipulate HTML and CSS, handle events, and communicate with servers.
DOM (Document Object Model): A programming interface for web documents. It represents the page so that programs can change the document structure, style, and content.
Event Handling: JavaScript can respond to user actions like clicks, key presses, and mouse movements, making web pages interactive.
Front-End Frameworks and Libraries
React: A JavaScript library for building user interfaces, developed by Facebook. It allows for the creation of reusable UI components.
Angular: A TypeScript-based framework developed by Google. It provides a comprehensive solution for building dynamic web applications.
Vue.js: A progressive JavaScript framework that is incrementally adoptable. It focuses on the view layer and can be integrated into projects easily.
Responsive Web Design
Definition: An approach to web design that ensures web pages render well on various devices and window or screen sizes.
Media Queries: A CSS technique used to apply styles based on the characteristics of the device, such as its width, height, and orientation.
Flexible Layouts: Use of relative units like percentages instead of fixed units like pixels to create fluid and adaptable layouts.
Web Development Tools
Text Editors: Software used to write and edit code. Popular examples include Visual Studio Code, Sublime Text, and Atom.
Version Control Systems: Tools like Git that track changes in code and facilitate collaboration among developers.
Build Tools: Software that automates repetitive tasks in the development process, such as code compilation and minification. Examples include Webpack, Gulp, and Grunt.
Performance Optimization
Minification: The process of removing unnecessary characters from code to reduce file size and improve load times.
Caching: Storing copies of files or data to reduce load times and server requests.
Lazy Loading: A design pattern that delays the loading of resources until they are needed, improving initial load times.
Accessibility
Definition: The practice of making websites usable by as many people as possible, including those with disabilities.
ARIA (Accessible Rich Internet Applications): A set of attributes that define ways to make web content and applications more accessible to people with disabilities.
Semantic HTML: Using HTML elements that convey meaning about the content, which improves accessibility and SEO.
Summary
Front-end web development involves creating the user-facing part of websites and web applications. It combines HTML for structure, CSS for styling, and JavaScript for interactivity. Developers often use frameworks and libraries to streamline the process, ensure responsive design for various devices, and employ tools and techniques to optimize performance and accessibility.
- HTML Tutorials 1 - Beginning with Visual Studio and Coding basic html5:01
Beginning with Visual Studio and Coding basic html
Learn about visual studio , using header tags and more
- HTML Tutorials 2 - Href and Img tags5:01
How to make links and add images with href , img tags
- HTML Tutorials 3 - p tag , adding coloured text5:01
- HTML Tutorials 4 - pre, header, bold tags5:01
Learn about pre, header and bold tags , mainly about formatting text in html like ms word
- HTML Tutorials 5 - styles tag for header and p tags , foreground and background4:57
Learn about styles tag for header and p tags , foreground and background
- HTML Tutorials 6 - Tags Summarising till now6:42
A summary and more lectures will follow please do comment
- HTML Tutorials 7 - Learn to use colors20:40
Learn to use colors in HTML
- HTML Tutorials 8 - HTML Forms11:04
HTML Tutorials 8 - HTML Forms
- HTML Tutorials 9 - Tool4:18
SimpleLang Interpreter
Goto "learncoding-nine.vercel.app" for the app
- HTML Quiz
- Front end web development Quiz
- Cascading Style Sheet in Web Development Quiz
- Javascript Quiz
- Create a simle HTML app with basic tags and CSS styles
- Draw a square and circle - Code in HTML
- Moving circle code in HTML Javascript CSS in ONE FILE
- Moving circle code in 3 files , Understand how html,js and css work together
- Write a html,js,css code to take input from user and print in color
- Write HTML code for a simple form
- Create your first simple react application7:49
Create your first simple react application
- Create react application with Visual Studio Code5:47
What is Node.js
- Web Testing1:31
- Introduction13:42
- What are embedded devices11:05
- Introduction1:35
- Iot Career Guidance and How to start1:35
Requirements
- No programming experience required
- Basic computer knowledge sufficient
- Passion to learn
Description
Welcome to the "Web Development" course! In this comprehensive journey, you'll delve into the fundamental language that powers the backbone of the World Wide Web—HTML (Hypertext Markup Language). Whether you're an aspiring web developer, a designer venturing into the digital realm, or an enthusiast eager to understand the language behind your favourite websites, this course is your gateway to mastering HTML.
Course Overview:
HTML is the cornerstone of web development, and understanding its principles is crucial for anyone venturing into the dynamic field of web design and programming. This course has been meticulously crafted to guide you through the essentials of HTML, providing a solid foundation for creating well-structured and semantically meaningful web pages.
Why Learn HTML:
Foundation of Web Development: HTML is the building block of web development. A strong understanding of HTML is essential for anyone looking to pursue a career in web design or development.
Accessibility and SEO: Using semantic HTML not only enhances accessibility for users with disabilities but also improves search engine optimization (SEO), making your web pages more discoverable.
Versatility: Whether you're developing a personal blog, a portfolio, or a business website, HTML is a versatile language that forms the backbone of all web content.
Who this course is for:
- Beginners who want to learn computers and programming
- People who want to be front end developers
- College and School students wanting learn computers or want to enter IT industry