
Your cart is empty.
Keep shoppingEasyDSLR Digital Photography Course for Beginners
9,601 students
EasyDSLR Digital Photography Course for Beginners
Take dramatically better photos by learning the basic principles you need to master your DSLR camera
Created byKen Schultz
Last updated 5/2013
English
What you'll learn
- Give you an understandng of Basic Photography Principles
- Give you an Overview on how DSLR cameras are used
- By the end of the course you will understand your camera better, you will be off AUTO and taking dramatically better photos.
Explore related topics
Course content
8 sections • 18 lectures • 5h 8m total length


Requirements
- DSLR - Digital Single Lens Reflex Camera or DSLT (Sony) to get the most out of the Course.
Description
Most new DSLR camera owners use very little of the potential of their cameras. (DSLR = Digital Single Lens Reflex). The thought of moving off AUTO can be daunting. To really get creative control over your photos you need to grasp some basic photography principles - it's not 'rocket science' - but it is essential. This course is to fill that gap in knowledge so you can get into the more creative modes of your camera and start taking better photos. Over 4 Hours Training.
If this Course seems a little too Basic for you check out my Advanced Course for more Creative topics - EasyDSLR Digital Photography Course: Advanced
Recent Member Comment "I'm blown away with how much knowledge I'm retaining when I walk away from each video. It's exactly my learning style as I'm very much a visual person." Andy Rose UK
CHAPTER 1: Getting Started gives you an orientation of the course and introduces The Photo Triangle - which is the foundation that most of the concepts in this course rest on.
If you are totally new to DSLR cameras you can watch CHAPTER 2: DSLR Overview where I give you a quick tour of What a DSLR camera is, it's benefits and essential items in your DSLR kit.
The major portion of this course talks about the 3 Main points to a great photo - The Photo Triangle:
- FRAME - compositon and perspective
- LIGHT - Tonal values and color
- FOCUS - what's in Focus
You can Download the Printable PDF version of the Photo Triangle in Chapter 1 to have on hand during the course.
Having a solid foundation is key to understanding how the settings interact to create a great photo. In this course I cover Composition, the 3 important settings affecting Exposure: ISO, Aperture, and Shutter Speed, White Balance, Focus and Depth of Field, Flash basics and Diffusers.
These are some of what you will Discover:
- What Essential Items you need in your DSLR Kit
- The Photo Triangle – my secret weapon to explaining the Basics
- To Compose better Photos using the same Principles DaVinci, Botticelli, Van Gogh and many more used
- How to use Auto Focus Points to create better Composition
- What Crop Factor has to do with Framing your Subject
- The importance of Lens Choice and Focal Length
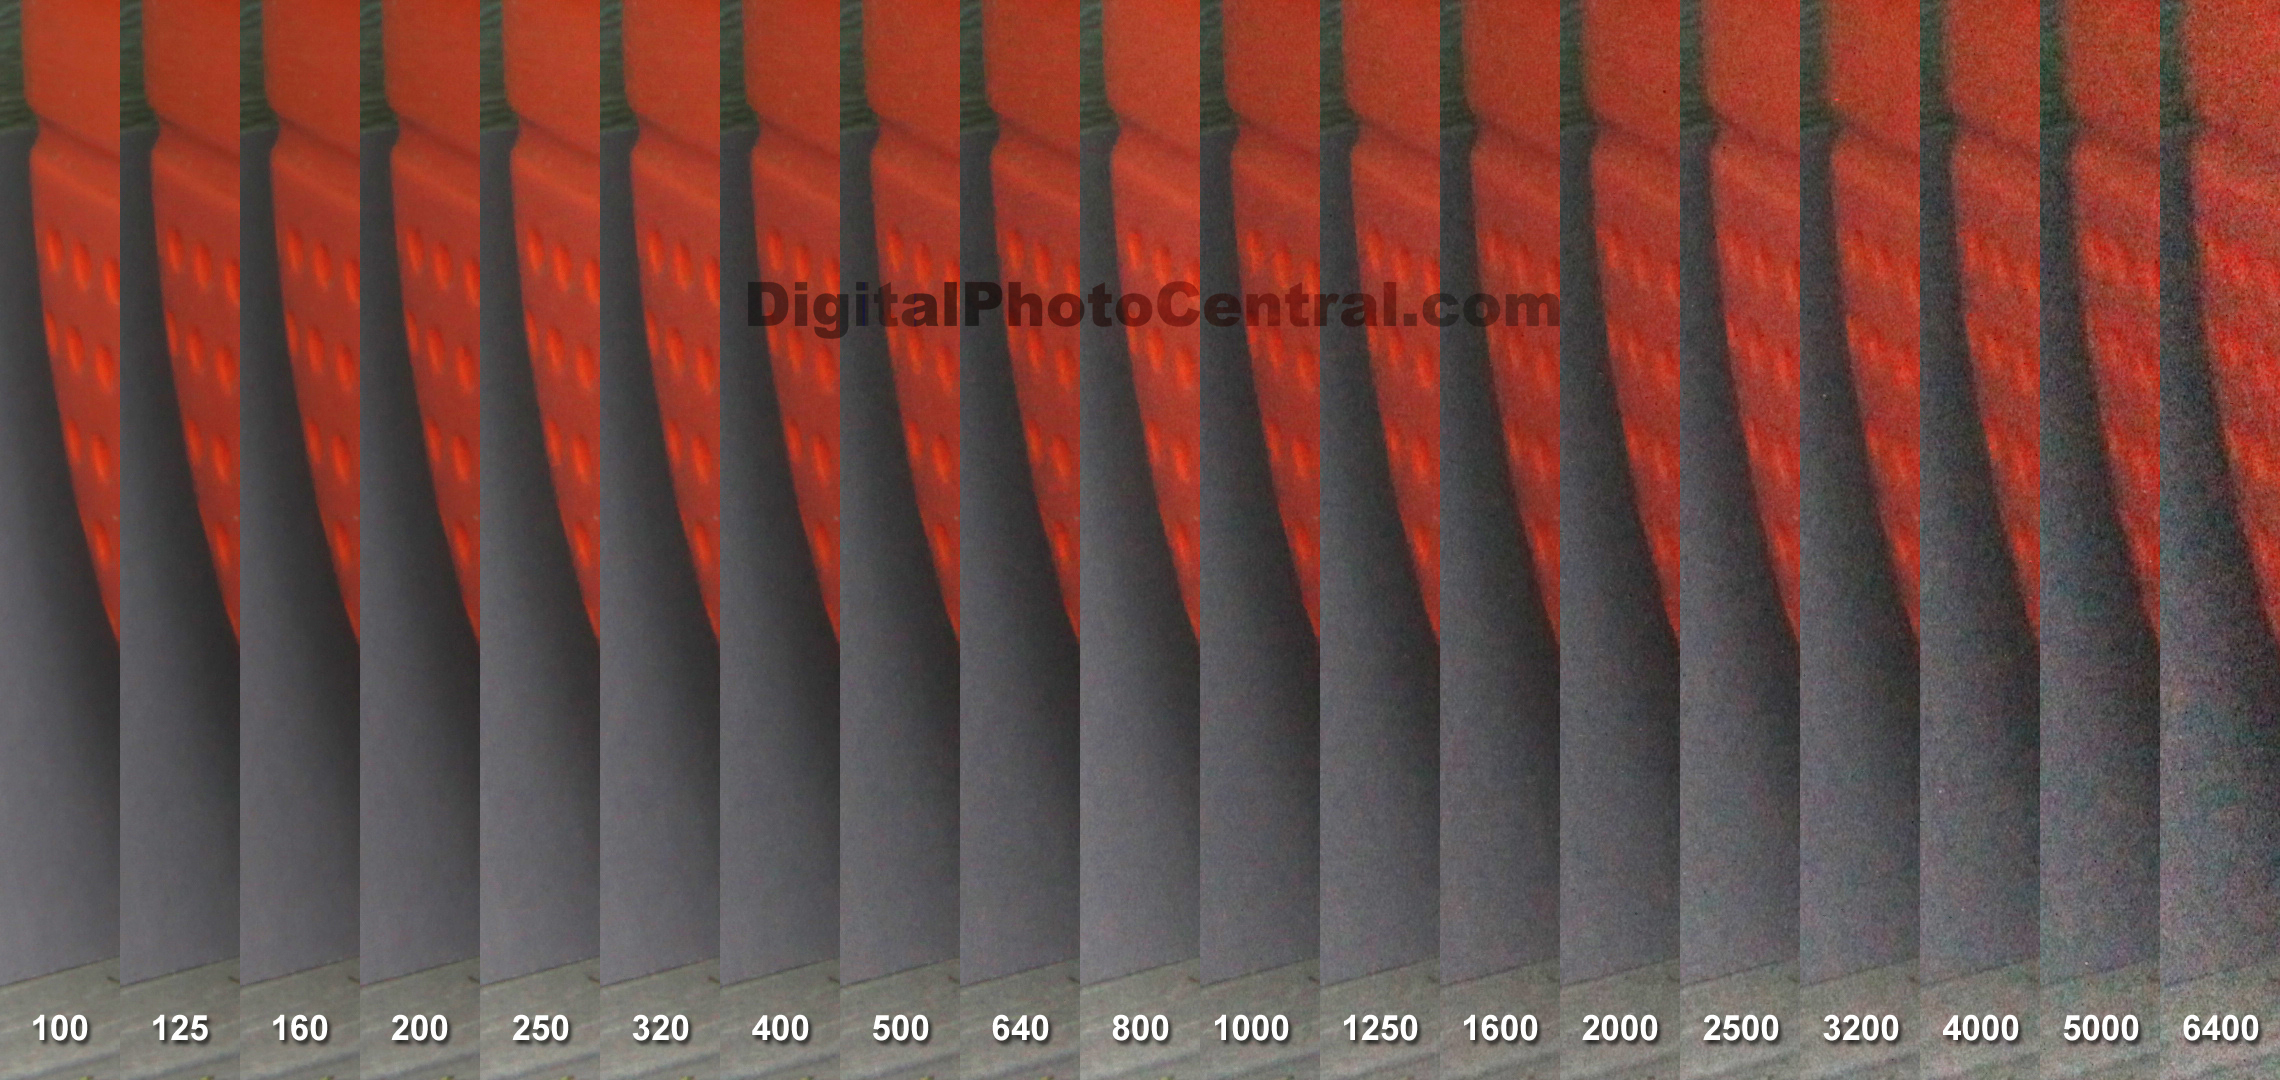
- Exposure and ISO and why it matters
- How to get off AUTO
- A powerful Tool - in your camera – that ensures perfect Exposure
- How Aperture effects your photos
- Creative use of Shutter Speed
- 2 causes of Motion Blur … how to ‘use them’ or ‘lose them’
- Pan Method of enhancing Speed in your Photos
- Introduction to Exposure Compensation and Bracketing
- Why we need White Balance
- What is Light Temperature … why it’s useful
- Using White Balance Shift
- How to set Custom White Balance
- My Best Method for using Autofocus Points
- Hybrid Auto/Manual Focus Method
- What is Depth of Field
- 3 Main Effects on Depth of Field
- How to Isolate your Subject
- 3 Main situations to use Flash … it’s not just for Night Shots
- The best Tool for better Flash Photos
I am confident that you will be much more comfortable using your DSLR camera and will be taking better photos by the end of this course.
Who this course is for:
- Beginner to intermediate Photographers