
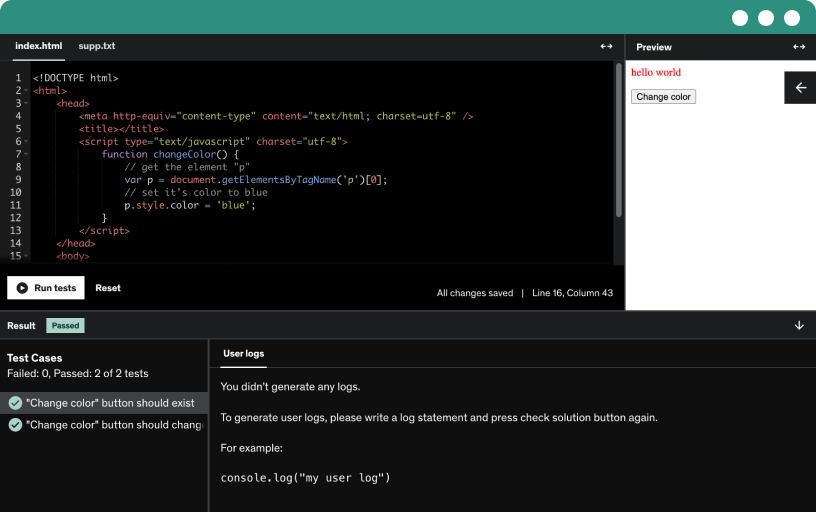
This course includes our updated coding exercises so you can practice your skills as you learn.
See a demo
An introduction to this course
I have split up this course into sections to make it easy for you to pick up or skip sections that you feel very confident in. To make this work, I'll include the final project code at the end of every section.
To start things off, I'll also attach the starting files to this lecture (it only contains the images for our cards, nothing else)
I've split this course up into segments, to make it easy for you to skip sections if you so choose
In this lecture, I want to set up our HTML for the project. As you'll see, its very easy. All the complicated code will take place in our JavaScript file and CSS file, making the HTML very simple.
When it comes to sizing elements in CSS, two commonly used relative units are em and rem. Both units are essential for creating responsive designs, but they function differently.
When an HTML element's display property is set to grid or inline-grid, it becomes a grid container, and its direct children become grid items. In this lecture we will set up our grid with 6 columns and 2 rows that will ultimately contain our memory cards.
Defining CSS root variables is an effective way to manage styles across a web project, allowing for easier maintenance and consistency. CSS variables, also known as custom properties, enable developers to store reusable values such as colors, sizes, and fonts.
The colon : is a CSS pseudo class selector that you have to use when defining root variables. When declaring CSS variables, it is mandatory to use the -- prefix followed by the variable name. This prefix distinguishes custom properties from standard CSS properties and ensures that the variable is recognized by the browser.
Section project files
An intro as to what we'll do in this section.
I want to write a JSON file that contains all the information we need about our cards.
To reference a JSON file from your main JavaScript file, you can grab it using the Fetch API.
The Fetch API is a modern way to retrieve resources, including JSON files, from a server or local directory.
In this lecture I'll show you how to use async/await with Fetch. The async keyword is placed before a function declaration to indicate that the function will return a promise. This means that any value returned from the function will be wrapped in a resolved promise.
The await keyword can only be used inside an async function. It pauses the execution of the function until the promise is resolved, allowing you to write asynchronous code in a synchronous style.
By default, web browsers enforce a same-origin policy, which restricts web pages from making requests to a different origin (protocol, domain, or port) than the one that served the page.
The file protocol (file://) is used by web browsers to access files on the local file system. When you open an HTML file directly in a browser (e.g., by double-clicking it), it is served using this protocol.
When running a local development server:
You can access any files within the directory where the server is running.
Subdirectories are also accessible, allowing you to organize your project files effectively.
The server can serve HTML, CSS, JavaScript, images, and other static assets without triggering CORS errors since it operates under the HTTP protocol.
When running a local development server:
You can access any files within the directory where the server is running.
Subdirectories are also accessible, allowing you to organize your project files effectively.
The server can serve HTML, CSS, JavaScript, images, and other static assets without triggering CORS errors since it operates under the HTTP protocol.
We will code up a simple Fetch request, followed by then() statements to deal with the promises. I'll also show you a limitation of the map() method.
Using the spread syntax in JavaScript allows you to expand an iterable (like an array or string) into individual elements. This feature, introduced in ES6, provides a concise way to work with arrays and objects, making it easier to create new arrays or merge existing ones.
Once a CSS grid is created, elements are automatically added to the grid layout based on the defined grid structure.
Before we go further, I want us to be on the same page regarding what we will call our cards and the structure that our HTML will take.
In this lecture I want to loop through all of our cards in our "cards" array, and add those cards directly to the live Document Object Model (DOM). This is not the best way to do it, as I'll show you in future lectures, but for now I want you to know about this approach because you'll see most developers do this.
Using the appendChild() method is a common way to add elements, such as cards, to the DOM in JavaScript.
The appendChild() method is part of the Node interface in the DOM. It appends a node (usually an element) as the last child of a specified parent node.
Each time you append an item to the DOM, the browser may need to recalculate the layout (reflow) and repaint the affected area of the page. This can be particularly costly in terms of performance if done repeatedly in a loop, leading to slow rendering and a laggy user experience.
Increased CPU Usage: Continuously modifying the DOM can significantly increase CPU usage, especially if you are adding many elements in a tight loop. This can lead to freezing or stuttering in the browser.
A Document Fragment is a lightweight container used in the DOM (Document Object Model) to hold a portion of the document structure. It allows developers to group multiple nodes together without affecting the live DOM until they are explicitly added.
In this lecture we will adapt our code to use fragments and then add the cards to the live DOM. This is a grandmaster technique because now we are avoiding having to manipulate the live DOM on each FOR iteration.
I want to test our code and also prove that the fragment is emptied when we finally append its contents to the live DOM.
We are going to use CSS to style the back of the card
In this lecture you're going to now style the front of the card, and also fix a slight error in our code
Updated project files for this section
This is going to be a very short section - in fact, only a few lectures long.
I did this because its so important for you to master the fisher-yates shuffle and also understand how to create a CSS 3D transformation to a card.
In this lecture we will loop through all of our cards and dynamically add a click event listener to them. In doing so I will teach you about the THIS keyword in JavaScript which will point to the DOM element that triggered the event.
The rotateY() function specifically rotates an element around the vertical Y-axis. When you apply transform: rotateY(180deg);, it effectively flips the element to face the opposite direction. The angle specified (in this case, 180 degrees) determines how far the element will rotate
In this lecture I want to set up our shuffle() function that we will use to implement the Fisher-Yates shuffle algo.
The Fisher-Yates shuffle, also known as the Knuth shuffle, is a highly efficient algorithm used to randomize the order of elements in a finite sequence, such as an array. This algorithm ensures that every possible permutation of the sequence is equally likely, making it a fair and unbiased method for shuffling.
It's time to put theory to practical use.
In this lecture we will create a temporary variable that holds our random card, and then later insert that card into the position represented by the currentIndex.
When you log an array directly in the console using console.log(), it logs a reference to that array in memory rather than a snapshot of its current state. This means that if the contents of the array change after logging, the console will reflect those changes when you expand the logged output.
I'll show you how to see the incremental changes we make to the shuffledCardsArray by creating a shallow copy of it in memory.
Destructuring assignment in JavaScript is a powerful feature introduced in ES6 that allows developers to extract values from arrays into distinct variables. This technique enhances code readability, reduces verbosity, and improves maintainability.
In this lecture we will look at the second way we can define our shuffledCardsArray with less code.
Attached are the latest project files
A quick intro about what we will do in this exciting section!
The this keyword in JavaScript is a fundamental concept that refers to the context in which a function is executed. In our project, THIS refers to the HTML element that triggered the flip effect.
We will use this concept to define our firstCard and secondCard variables.
A flag variable is a boolean variable used to indicate the status of a particular condition. It can signal the presence or absence of a specific condition within your code.
In our example, I want to set a noFlipping flag so that the user will not be allowed to flip more than 2 cards.
The dataset property in JavaScript is a feature introduced by HTML5 that provides access to custom data attributes defined using the data-* prefix. This property is exposed via the HTMLElement interface and offers a convenient way to interact with these custom attributes programmatically.
In this lecture we will use the dataset property to determine if the "name" value is the same between 2 cards.
We will also use the ternary operator in JavaScript to execute the appropriate function depending on whether there is a match or not.
The setTimeout() function is provided by the global Window object, and is used to generate a timer after which a JavaScript function executes. In this lecture we will use the setTimeout() function to unflip the cards if there is no match.
Right now, we are stuck. Once the cards flip back over to their original position, the user is not able to click on more cards. This is because our flags are still set.
In this lecture we will build a resetFlags() function that will solve this problem.
I can't wait.
I want to now deal with matched logic.
Once two cards are matched, we don't want them flipping back over. Also, we don't want the user clicking on those cards again, and finally we want to add a visual effect to those cards making it very clear that they are matched.
A quick lecture to preclude the user from clicking on the same card twice and falsely getting a match. We will also solve the problem of being stuck when we have two cards that are matched.
The latest project files.
A quick introduction to the finishing touches we will implement in this section.
In this lecture I want to implement a counter to indicate how many tries the user has left to match cards. When the counter gets to zero, the user loses and has to start again.
Now that we have our counter set up, we can decrease the counter every time the user does not get a match, and perform a simple check to see if the counter at any time has reached 0.
Let's use JavaScript to dynamically add the <img> to the DOM when the user loses the game.
Using position: fixed in CSS allows an element to maintain a constant position relative to the viewport, meaning it will not move when the page is scrolled. This property is particularly useful for creating persistent UI elements.
The requestAnimationFrame() method is a JavaScript function that allows you to create smooth animations by synchronizing your animation updates with the browser's repaint cycle.
I want to define a function that creates a star using pure JavaScript. We will then later style each star created using CSS.
CSS animations allow for the smooth transition of elements between different styles over time, enhancing the visual appeal and interactivity of web pages. They consist of two main components: keyframes and animation properties.
Once our star animation completes, I want to ensure our HTML is clean. To do this, I will use the remove() method to remove the star from the DOM.
Now that we have defined our star function, and styled those stars in CSS, it's time to add logic to add it to our game.
It really has come to this point ... to test our final code.
Before we finish off, let's add a quick transition property to any changes in the background color of our back card.
Final project code.
It's always a bitter sweet for me at this point. I've had to much fun putting this course together, and its sad to end.
However, I also know that many more exciting courses are on the horizon, so I will (hopefully) see you again soon.
Take care my dear student. Take care :)
*** USE PURE JAVASCRIPT IN 2026 TO CREATE A GAME***
Unleash your inner game developer
Build a fully functional memory card game, from scratch
Understand JSON, Fetch, Fisher-Yates Algo, Animations, 3D Transformations & More
Use pure JavaScript, HTML and CSS without libraries or modules
Hands-on, interactive course designed for YOU, to take YOU through the entire process of creating a fully functional memory card game from scratch
Dive into complex code, made easy
Are you ready for an exhilarating journey into the world of coding as we build a Random Memory Card Game using only pure HTML, CSS, and JavaScript?
WHAT YOU'LL LEARN
Build a Game from the Ground Up: Forget libraries and modules! In this hands-on course, you’ll learn to craft every aspect of the game using only HTML, CSS, and JavaScript. By focusing on pure code, you'll gain a deeper understanding of how each component works together to create an engaging user experience.
Master Complex Tasks: Coding can be complex, but it doesn’t have to be daunting! I’ll guide you through various methods and techniques for tackling intricate tasks. You’ll become adept at problem-solving and thinking like a developer, giving you the confidence to tackle any coding challenge that comes your way.
CSS 3D Transformations: Get ready to dazzle players with stunning visuals! We’ll explore CSS 3D transformations to create an eye-catching flip effect for your cards. You’ll discover the magic of the preserve-3d property, which allows your cards to flip in style, adding depth to your game.
Randomization with Fisher-Yates Algorithm: Want to keep players on their toes? Learn how to implement the Fisher-Yates random shuffle algorithm to randomize your card array. This powerful technique not only enhances gameplay but also equips you with skills applicable in various coding scenarios—think gaming, random selections, and more!
Understand JSON: Unlock the potential of data handling by exploring JSON (JavaScript Object Notation). You’ll learn how to reference JSON files in your JavaScript code, making it easy to manage game data.
Fetch API & Async/Await: Level up your JavaScript skills with the Fetch API! We’ll cover both traditional .then() statements and the modern async/await syntax for seamless data fetching.
Track Progress with Counters & Flags: Every great game needs feedback! We’ll implement counters to track player progress and display failure images when matches aren’t made. This will help create a more engaging experience as players strive for success.
Celebrate Wins with Confetti: What’s more exciting than winning? We’ll add a delightful winning effect that showers players with confetti when they complete all matches. This fun touch will make your game memorable and encourage players to come back for more!
Random Matching Game Mechanics
Each new game will feature a fresh set of cards, ensuring that no two games are ever the same! You’ll learn how to implement this randomness effectively, keeping gameplay exciting and unpredictable.
* WHAT MAKES THIS COURSE UNIQUE?
This course is not just about coding; it’s about creating an experience. By the end of our journey, you will have built a fully functional memory card game that showcases your newfound skills. Plus, you'll walk away with valuable knowledge that can be applied across various projects in your development career.
Game Logic Implementation: Discover how to implement game mechanics such as card flipping, matching logic, and win/lose conditions. You'll gain practical experience in managing game states and user interactions.
Data Handling: Learn how to fetch and utilize external data. You'll work with JSON data to populate your game with unique cards, enhancing your understanding of data structures.
User Experience Design: Explore best practices for designing an engaging user interface. You'll implement animations, transitions, and visual feedback to create an immersive gaming experience.
READY TO PLAY?
Don’t miss out on this opportunity to enhance your coding skills while having fun! Join us in creating something amazing—your very own Random Memory Card Game awaits!
Let’s code something spectacular together!
COURSE HIGHLIGHTS?
Hands-On Project: Each section includes practical exercises where you'll build components of the game step by step, culminating in a fully playable memory card game.
Quizzes, Coding Exercises and Tests: I have incorporated tests, quizzes and even coding exercises to get you up to speed, fast.
Expert Guidance: Benefit from personalized feedback and mentorship from me, who is passionate about teaching.
I look forward to seeing you in class!
Let's make learning fun—one card at a time!
Clyde