
Your cart is empty.
Keep shoppingMaster Bootstrap 4 (4.6.0) and code 7 projects with 25 pages
4,776 students
Master Bootstrap 4 (4.6.0) and code 7 projects with 25 pages
Master the latest version of Bootstrap 4 and create real projects and themes while learning HTML, web design and coding
Created byJeppe Schaumburg Jensen
Last updated 2/2021
English
What you'll learn
- Learn how to create and use all components and utilities of the Bootstrap 4 framework
- Learn how to create seven different responsive websites using the Bootstrap 4 framework
- Practice with 5 quizzes, 70 coding exercises and a special built Bootstrap 4 Learning Kit (100+ source files)
- Master the latest version: Bootstrap 4.6.0 (from January 2021)
- How to create fluid and responsive layouts
- How to use breakpoints and the grid system
- How to structure all kinds of content
- How to build all of the 24 components
- How to use all of the 19 utilities
- How to build 14 different web page templates
- Project 1: Create a landing page
- Project 2: Create an online forum
- Project 3: Create a blog
- Project 4: Create a knowledge base
- Project 5: Create a resume and CV page
- Project 6: Create a small business website
- Project 7: Create a survey
- How to customize the default styling
- Advanced Bootstrap 4: How to use JavaScript triggers, options, methods and events
- How to use Google Fonts
- How to add icons with Font Awesome 4
- How to add icons with Font Awesome 5
- Accessibility best practices
Explore related topics
Coding Exercises
This course includes our updated coding exercises so you can practice your skills as you learn.
See a demo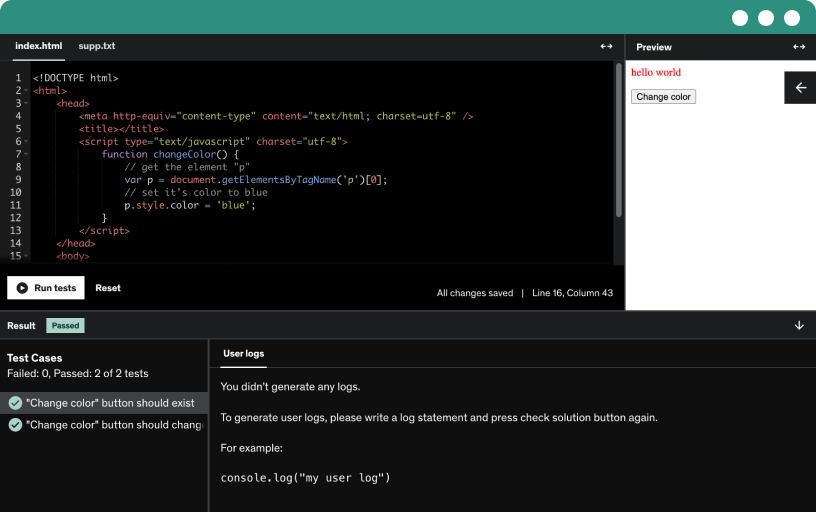
Course content
15 sections • 208 lectures • 22h 34m total length
Requirements
- Basic understanding of HTML
- A code editor and a browser
Description
ABOUT
Bootstrap - the world's most popular front-end frameworks!
This course covers all the different parts of the latest version of the world's most popular front-end framework, Bootstrap 4.6.0. Bootstrap has been used by thousands of people around the world and have been carefully developed to cover a wide range of typical user interfaces.
Web pages built with Bootstrap 4 works across all kinds of devices, browsers and screen sizes while also taking care of accessibility and a clean and modern design.
This course is for the beginner who want to learn Bootstrap 4 from the bottom up. It goes through all the different parts, but each lecture can be watched independently.
In addition to just learning about the different parts of Bootstrap 4 you will find a detailed walk-through of how to build different responsive, modern and common web page templates, including a photo gallery, video gallery, mixed gallery, audio gallery, login, contact, footer, sitemap, shortcuts, FAQ, thank you, employees, pricing table and create account.
Finally, I will walk you through how to create 7 complete projects using Bootstrap 4.
PROJECTS
Learn to build the following projects using Bootstrap 4:
Project 1: Landing Page
Project 2: Online Forum
Project 3: Blog
Project 4: Knowledge Base
Project 5: Resume and CV Page
Project 6: Small Business Website
Project 7: Survey
LEARNING STYLE
More than just video lectures
In addition to the video lectures this course contains the following kinds of learning materials:
70 coding exercises:
A total of 291 automatic tests against your code. This is one of the best ways to learn how to code - no downloads or installations required.5 quizzes:
In the end of every section you will find a quiz to test your new knowledge.Bootstrap 4 Learning Kit:
Downloadable ZIP file that works offline
A custom built learning kit with source code for all parts of Bootstrap 4. Features a reference section with many examples and a practice section, which you can use while learning about Bootstrap 4. More than 100 source files included in this learning kit.
WHY THIS COURSE?
Why this course instead of other Bootstrap courses?
Wondering why you should choose this course instead of other Bootstrap courses? This course has the following features that makes it stand out among the rest:
up to date with the latest version of Bootstrap 4 from January 19, 2021: version 4.6.0
more features and extra learning materials including coding exercises, interactive CodePens and a custom Learning Kit
most lectures can be watched independently of each other
has been carefully crafted through more than 300 hours of dedicated work
UPDATES
Upcoming future updates for this course will include the following features and lectures:
New projects will be added: online shop, social network, portfolio, CMS admin, dashboard and more...
"Assignments": practice your knowledge by doing assignments as part of the course
New components, utilities and other features in future versions of Bootstrap will be added
TESTIMONIALS
Don't take my word for it – read what other students are saying:
This is a benchmark for all course makers in how-to-do prospective! Satisfied deeply
– Nurzhan Toishy
Very clear and clear explanation. Quietly speaking. Nice to make the subject matter your own!
– Ben Michilsen
This is a benchmark for all course makers in how-to-do prospective! Satisfied deeply
– Nurzhan Toishy
Amazing detailed lessons
– Joseph Alba
This course is the best of all the bootstrap courses I have taken on Udemy. The presenter's language is clear and to the point, with only a very slight accent which does not affect intelligibility. Structurally the course material stands heads and shoulders above the others, with not only a comprehensive coverage of the bootstrap framework which the author maintains up to date, but also some very pertinent real world projects which can be used as starting points for most commercial projects which one might want to launch into after taking the course. Additionally, the presenter is very responsive when reached out to and his answers always cover questions comprehensively. As far as I am concerned, this course sets the standard by which all educational courses in this format should be measured.
– Philippe Damerval
Very detailed and useful! It is right for me! I am very satisfied with all the content on this course. The instructor has been very clear in his explanations. Thank you Mr. Jeppe for your time and patience!
– Julio Bell Soublet
Excellent, I've been loving it since the beginning !!!
– Douglas Matos da Silva
Bootstrap 4 - the complete guide
– André Brandão
Detailed explanations about different Bootstrap features. Many Live example demos. The Learning Kit alone makes the purchase of this course all worth it. Thank you Jeppe.
– Dany Michaud
Great introduction to the building blocks of Bootstrap. Material is taught in a comprehensive manner. Not only has this been a great tool for learning bootstrap, but i will also be able to use this coursework as a reference for projects moving forward. The instructor (Jeppe) is quick with feedback and the coursework is taught is a logical, effective manner.
– Eric Dusel
Great in depth Tutorial I really enjoyed and upgraded knowledge.
– Shyam
The Awesome Bootstrap 4 Bible :)
– Ankruz
The course is very thorough. The lecturer is a master of the subject matter. I like the application he provided which serves both as a lab and a reference application.
– Glyn Davies
Very thorough going through everything so far. I like the Learning Kit which you get to use and follow along with in CodePen.
– Jim O'Brien
Fantastic course with concrete quiz which makes it easier to master the content included.
– AndySun
I took alot of courses on Udemy, this is the first time i feel that i must leave such a rating because simply it deserves more than that .. the instructor answered all my questions faster than i even imagined and was more than clear and helpful, beside it is very explanatory for a beginner like me (other course i took claimed that no prior knowledge is required but i discovered later that i was in a total mess because i don’t have prior knowledge in bootstrap to an extent that i left the whole course).The usage of pencode was an excellent idea because it shows for beginners (Like me) the effect of each class alone before applying the next class. The course is rich with alot of learning hours that concentrates on the pure bootstrap classes before engaging in projects (I hope all courses do this, i dunno why all courses today just dig into projects without deeply explaining the core of the skill), All the previous made me dig into the course faster than i imagined .i hope the instructor can make more courses ( I would highly appreciate a course of modern Html5 that contains deep explanation for Aria and modern accesibility attributes).
– Karim Usama
Very fluent and easy to follow.
– Kevin Rambo
Its really a great course, helped me in understanding many new features related to BS4, Lectures are very clear and to the point.Also Jeppe is prompt in responses, Wish to see more content around this subject. Thanks Jeppe.
– Ravi Challa
This course is the best HTML, CSS, bootstrap course there is in 2018.
– Alice Rose
Excellent course on frontend with bootstrap 4, very interesting and useful.
– Sridevi Ambati
Great and enjoyable course with a very extensive information on different aspects of Bootstrap. The instructor is very enthusiastic and the depth of his knowledge is impressive. So glad I enrolled
– Nadezda Zajancauskaite
The quality of the course is very good. The tutor explains everything in an ordered way.
– Akash Giri
An outstanding course for learning & understanding Bootstrap 4
– Arifur Rahman
Excellent course
– Monirul Hossain Anik
Instructor really put in the effort to teach us the principles of Bootstrap 4. Would recommend to anyone who wants to learn Bootstrap and is a fan of "video tutorials kinda way of learning".
– Brane Opačić
A well deserved 5/5!! Thank You so much for such an excellent course!!
– Aman Ali
Its timely, and the structure is awesome...
– Waibi Andrew Franklin
Lots of resources, very well documented. I have a good feeling that with this course i am going to be really good at bootstrapp at the end of the course.
– Tim de Tombe
Who this course is for:
- Anyone who wants to learn how to make responsive and modern websites with Bootstrap 4
- Anyone who wants to learn how to make quick prototypes